


DXZ848RMC 27
English
Operations Common to Each Mode
Dimmer control
You can setting the dimmer control “ON” or
“OFF”.
∗ The factory default setting is “ON”.
1. Press and hold the [T] button for 1 second or
longer to switch to the adjustment selection
display.
2. Press the [a] or [d] button to select “DIM-
MER”.
3. Turning the [ROTARY] knob clockwise or
counterclockwise and select “ON” or “OFF”.
4. Press the [T] button to return to the previous
mode.
Dimmer in control
You can setting the dimmer in control AUTO or
ILLUMI.
∗ The factory default setting is “DMR-IN AUTO”.
1. Press and hold the [T] button for 1 second or
longer to switch to the adjustment selection
display.
2. Press the [a] or [d] button to select “DIM-
MER IN”.
3. Turning the [ROTARY] knob clockwise or
counterclockwise and select “DMR-IN AUTO”
or “DMR-IN ILLM”.
4. Press the [T] button to return to the previous
mode.
Adjusting the display contrast
You can adjust the display contrast to match the
angle of installation of the unit.
∗ The factory default setting is “8”. (Adjustment
level:1to 16)
1. Press and hold the [T] button for 1 second or
longer to switch to the adjustment selection
display.
2. Press the [a] or [d] button to select
“CONTRAST”.
3. Turning the [ROTARY] knob clockwise or
counterclockwise to adjust the contrast.
4. Press the [T] button to return to the previous
mode.
Anti-theft indicator
The red Anti-theft indicator is a function for pre-
venting theft. When the DCP is removed from
the unit, this indicator blinks.
∗ The factory default setting is “OFF”.
1. Press and hold the [T] button for 1 second or
longer to switch to the adjustment selection
display.
2. Press the [a] or [d] button and select
“BLINK LED”.
3. Turning the [ROTARY] knob clockwise to set
this function “ON” or turn it counterclockwise
to switch this function “OFF”.
4. Press the [T] button to return to the previous
mode.
Setting the Subwoofer
∗ The factory default setting is “SUB-W ON”.
1. Press and hold the [T] button for 1 second or
longer to switch to the adjustment selection
display.
2. Press the [a] or [d] button and select
“SUB-WOOFER”.
3. Turning the [ROTARY] knob clockwise or
counterclockwise and select “ON” or “OFF”.
4. Press the [T] button to return to the previous
mode.
Setting LOW PASS FILTER
∗ The factory default setting is “THRGH”.
1. Press and hold the [T] button for 1 second or
longer to switch to the adjustment selection
display.
2. Press the [a] or [d] button and select
“SUB-W LPF”.
3. Turning the [ROTARY] knob clockwise or
counterclockwise to select the setting. Each
time you turning the [ROTARY] knob, the set-
ting changes in the following order:
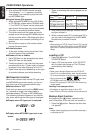
THRGH ➜ 50 Hz ➜ 80 Hz ➜ 120 Hz
4. Press the [T] button to return to the previous
mode.
Setting the external amplifier
∗ The factory default setting is “OFF”.
1. Press and hold the [T] button for 1 second or
longer to switch to the adjustment selection
display.
2. Press the [a] or [d] button and select
“AMP CANCEL”.