


6
Front Stage Loudspeakers
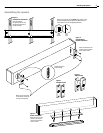
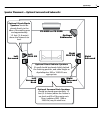
System Setup
System Setup
System Setup When Using an Optional Subwoofer
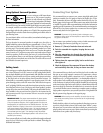
Some older surround sound decoders and receivers offer a choice of “Nor-
mal” or “Wide-band” modes for the center channel speaker. The Front Stage
Loudspeakers are designed to be used in the Normal mode.
Modern digital processing multi-channel systems provide a Bass Man-
agement menu, which typically requires you to select between “Small” or
“Large” speakers during system set-up. When using this speaker with a
dedicated subwoofer, please set all the speakers on the receiver’s set-up
menu to Small.
Many of the newer surround receivers and processors give you a choice
of subwoofer-to-satellite crossover frequency. If yours does, we recom-
mend that you start with a setting of around 80Hz for the smoothest blend
between the subwoofer and the Front Stage Loudspeaker.
System Setup Without a Subwoofer
For some listeners, a full home theater setup with a separate subwoofer and
rear surround speakers may not be feasible or desired. In that case, the Front
Stage Loudspeaker will provide high quality sound all by itself—far better
than the small speakers built into most televisions. In those situations, we
recommend you set your surround sound receiver’s set-up menu to “Sub-
woofer—No,” and “Surround Speakers—Off.” Set this way, most receivers
will blend some of the rear channel surround information into the front
channels, giving a more spacious sound.
ADVANCED USER SETUP:
For even better results, if your surround
receiver has an adjustable subwoofer crossover frequency, select
“Subwoofer—Yes” (even though you are not using a subwoofer) and
adjust the subwoofer lowpass control to 60Hz. That way, all the bass
from 60Hz and above will be sent to the Front Stage Loudspeaker,
which will result in a full-bodied, credibly full-range sound to be
reproduced, while at the same time, preventing the very low bass sig-
nals (below 60Hz) from overdriving the receiver’s amplifier section at
high output levels.
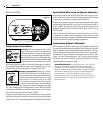
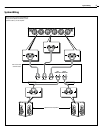
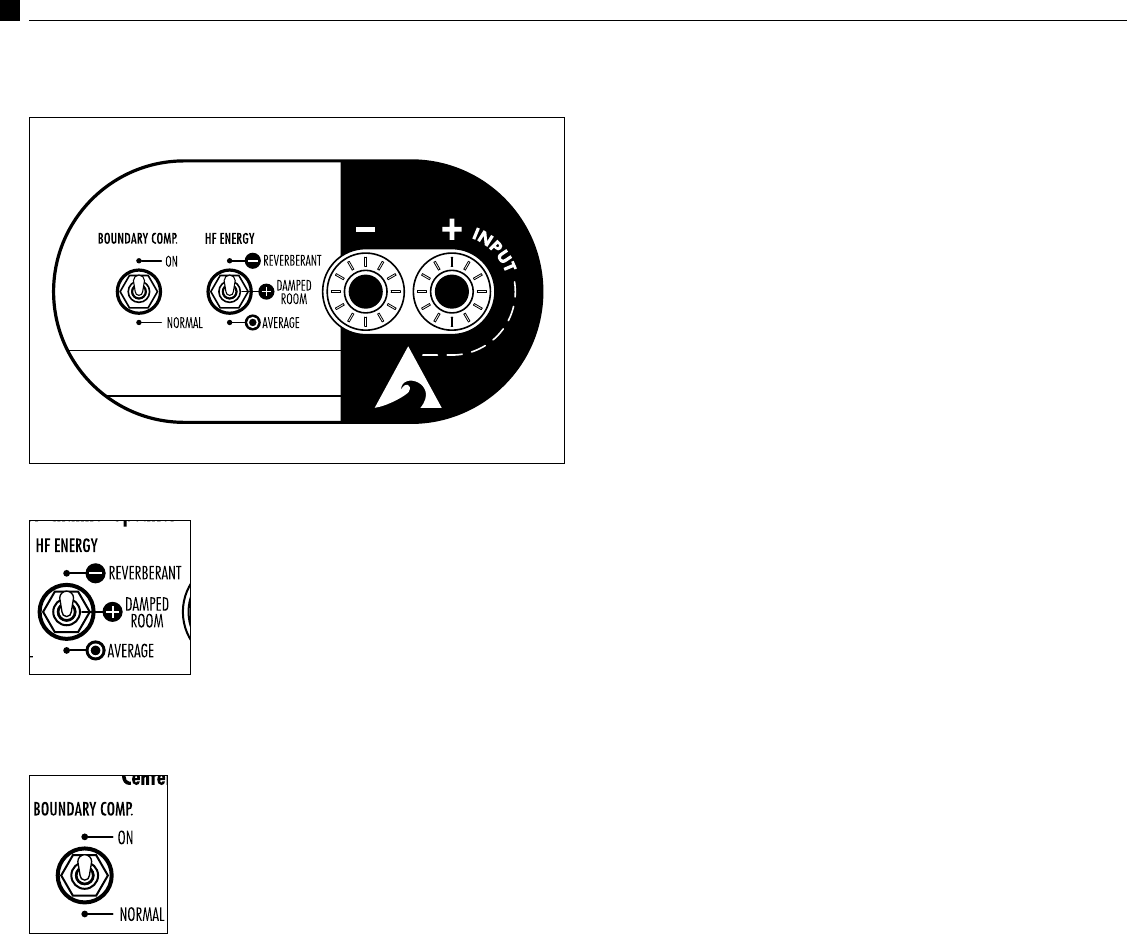
Figure 10
Using the Rear Panel Controls
HF Energy
This control changes the tilt or rolloff
slope of the tweeter in order to compensate for
varying room acoustics. Use the Average position
for rooms with a reasonably balanced combina-
tion of hard reflective surfaces (sliding glass doors
and bare walls) and soft absorptive surfaces (thick
carpeted floors and overstuffed furniture). The
Reverberant position is meant for rooms with an abundance of hard sur-
faces, while the Damped Room setting raises the tweeter’s output to coun-
teract the effect of an overly absorptive, acoustically “dead” room.
Boundary Compensation
Putting this switch to
the “On” position adjusts the lower frequency out-
put to compensate for the typical sound colorations
caused by placing the speaker very close to a large
surface, such as a TV screen, a wall, or on a shelf
in an enclosed entertainment unit. If your speaker
is mounted as described above, you may prefer its
sound when the Boundary Compensation controls are engaged. Conversely,
if it is free-standing, away from large surfaces (such as when the speaker
is placed on a stand shelf, away from other large surfaces), you may prefer
the sound with the position in the “Normal” position.
In all cases, we recommend you try both switches in their various positions
and use the settings that sound best in your particular room. Note that the
settings of the Left, Center, and Right speakers may differ from each other.