- 13 -
b)
Change Artist.
Use this option if you are adding a new artist name or renaming artist name.
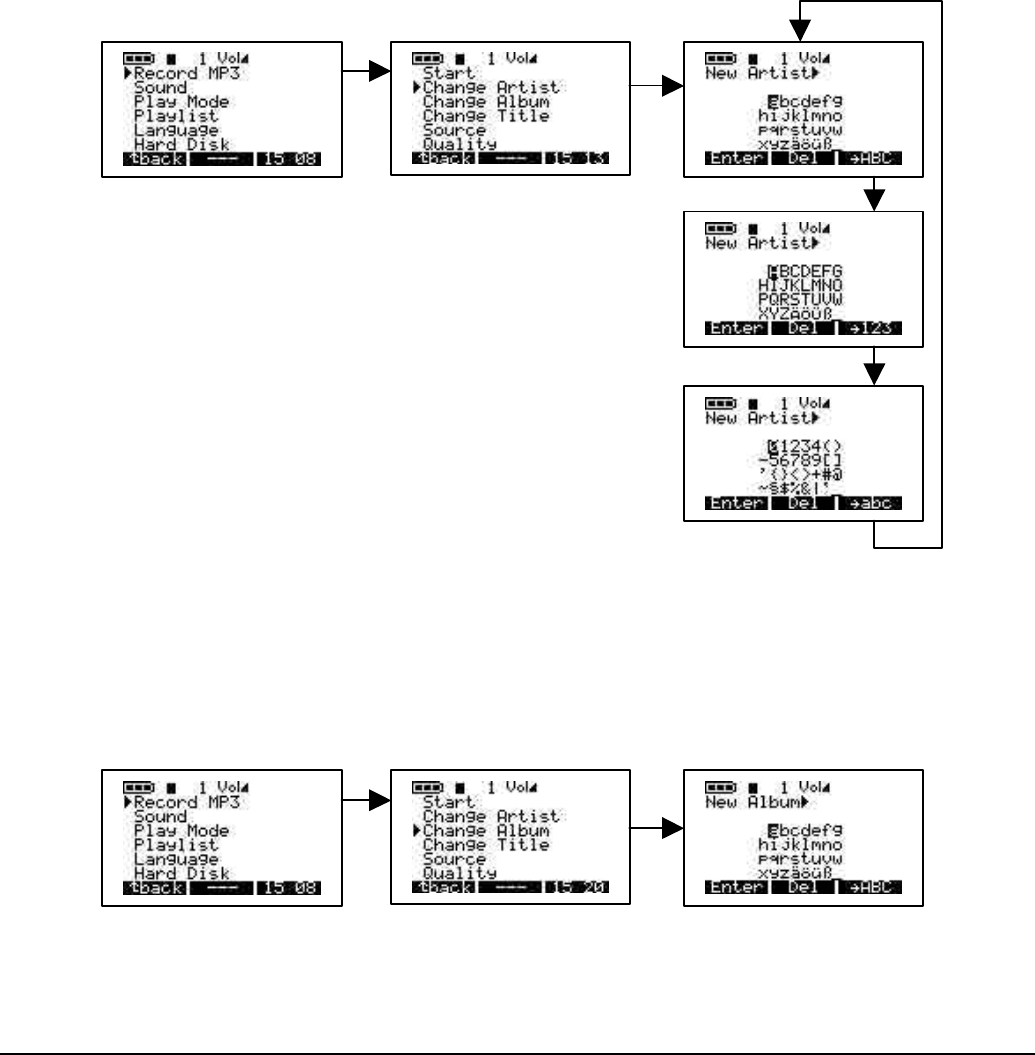
To access change artist, click on menu button, choose Recording MP3, click play/pause to
go to submenu of Recording MP3 and arrow down to change artist item. Click play/pause
button to start editing new name of artist. To input new artist name, use letter followed by
play/pause button to add the letter to the new artist list. Continue using letter follow by
play/pause button until all letters showing up on the new artist line. You can delete a letter
by clicking DEL button or clear the entire line by pressing DEL button for a long time. You
can also change to capital letters by pressing the button associated with ABC or digits by
pressing the button associated with 123. Once you complete inputing artist name, press
ENTER button to accept and exit to previous menu. Press BACK button to exit submenu for
Recording MP3. Press BACK button to go to root directory. For example if you want to
input new artist name PRINCE, Click on P followed by play/puse button, click on R followed
by play/pause button, click on I followed by play/pause button and so on.
c)
Change Album.
Use this option if you are changing the album name. To access Change
Album, click on MENU button, click on Recording MP3, click on play/pause to access
submenu of Recording MP3, arrow down to Change Album and press play/pause to enter
edit mode. Enter new album name. Follow same steps as change artist to add name. Once
finished adding new album, press ENTER button to accept changes and press BACK
button to exit to Recording MP3 submenu, press BACK to go to root directory.
d)
Change Title.
Use this option if you are changing the Title name. To access Change Title,
click on MENU button, click on Recording MP3, click on play/pause to access submenu of
Recording MP3, arrow down to Change Title and press play/pause to enter edit mode.
