


StorTrends® 3200 Set Up Guide (StorTrends iTX version 2.7)
2
Preparing for Setup
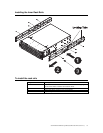
The box the StorTrends® 3200 Storage Appliance was shipped in includes the following:
• a 3200 Chassis
• Two Power Cords
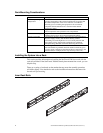
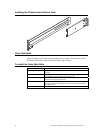
• Rails
• Rail Screws
Note: Your StorTrends® 3200 may or may not ship with everything listed in the Retail Packing
List. Contact your AMI authorized reseller to find out what is shipped with your
StorTrends® 3200 storage appliance if the contents do not match the ones listed in this
document.
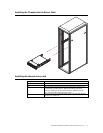
Choosing a Setup Location
• Leave enough clearance in front of the rack to enable you to open the front door
completely (~25 inches).
• Leave approximately 30 inches of clearance in the back of the rack to allow for
sufficient airflow and ease in servicing.
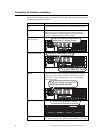
Warning
Rack Precautions
• Ensure that the leveling jacks on the bottom of the rack are fully extended to the
floor with the full weight of the rack resting on them.
• In a single rack installation, stabilizers should be attached to the rack.
• In multiple rack installations, the racks should be coupled together.
• Always make sure the rack is stable before extending a component from the rack.
• You should extend only one component at a time - extending two or more
simultaneously may cause the rack to become unstable.
Server Precautions
• Review the General Safety Precautions.
• Determine the placement of each component in the rack before you install the
rails.
• Install the heaviest server components on the bottom of the rack first, and then
work up.
• Use a regulating uninterruptible power supply (UPS) to protect the server from
power surges, voltage spikes and to keep your system operating in case of a
power failure.
• Allow the power supply units and hot plug Serial ATA drive to cool before
touching them.
• Always keep the rack's front door and all panels and components on the servers
closed when not servicing to maintain proper cooling.