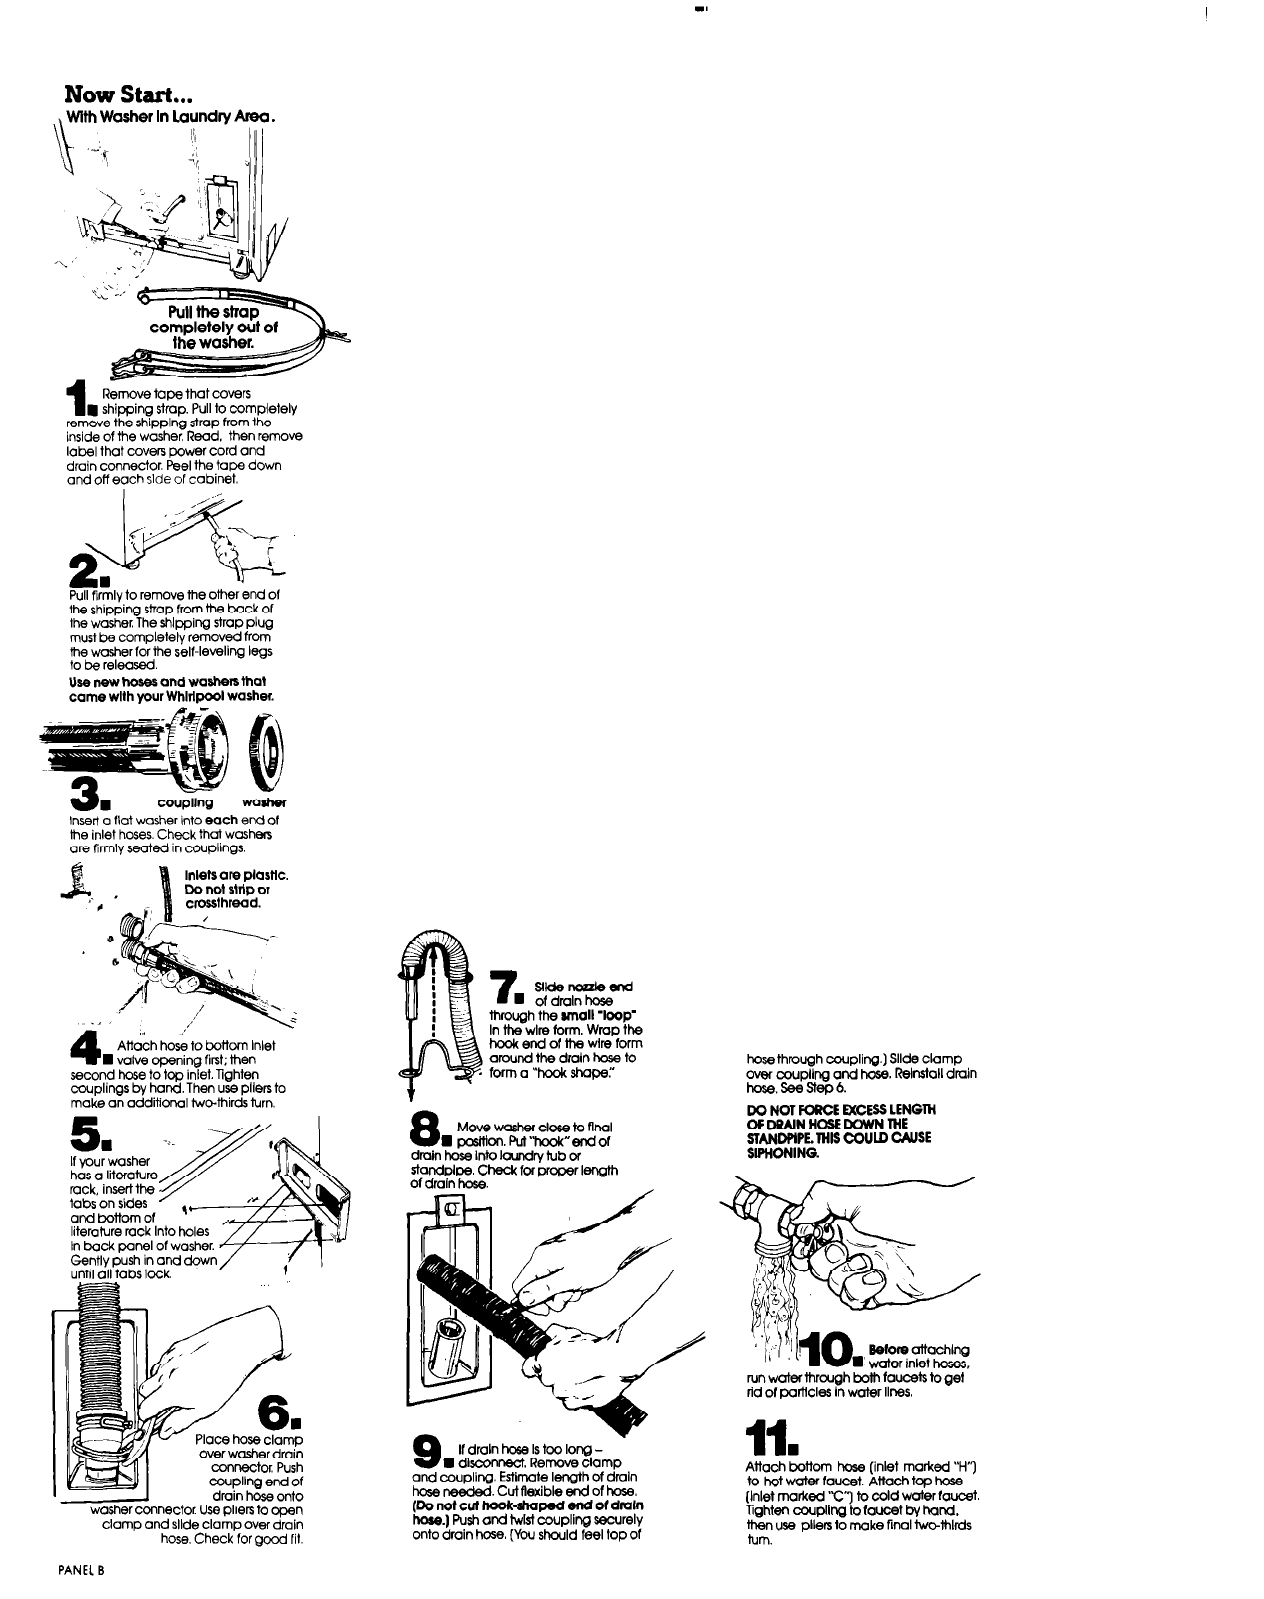
Now Start...
with Washer In laundry Area.
\
1~
Remove tape that covers
m shipping strap. Pull to completely
remove the shipplng strap from the
inside of the washer. Read. then remove
lobe that covers power cord and
drain connector. Peel the tape down
ond off each side of cabinet.
;i;;
fi?
c. *
2
“\
LY-r
1.
I
Pull flrmlv to remove me other end of
the shipping strap from the back of
the washer The shlpping strap plug
must be completely removed from
the washer for the self-leveling legs
to be released
Use new hoses and washers that
coupling
washer
Insert o flat washer into each end of
the inlet hoses. Check that washers
are firmly seated in couplings.
9
%
Inlets are
plastlc.
-?
I’ *
c
0
6
.1 ,
4
,,I
Attach hose to bottom Inlet
n
valve opening first; then
second hose to too inlet. Tiahten
couplings by ha&Then u& pllers to
make an additional twothirds turn.
5
n
If your washer
has a literature
rack, insert the
tabs on sides
and bottom of
’
-
literature rock Into holes
In back panel of washer.
Gently push in and down
until all tabs lock.
*
1
/
7.
6
Place hose clamo
over washer drain
connector Push
ooupllng end of
drain hose onto
washer connector Use pliers to open
clamp ond sllds clamp over drain
hose. Check for gocd fit.
7
slldenczzleJad
n
of draln hose
through the small ‘loop’
In the wire form. Wrap the
hook end of the wire form
around the draln hose to
form a “hcok shape:’
8
Move washer close to flnal
w posltlm. Pui”mok”en30f
drain hose into laundry tub or
standplpe. Check for prcper IMgth
of draln hose.
If draln hose Is too long -
n
disconnect. Remove clamp
and coupling Estimate 1-h of draln
hose needed. Cut flexible end of hose
(Do not cul hoohhapecl end of dmln
hoee.) Push and hvlst coupling securely
onto drain hose (You should feel top of
hose through coupling] Slide clamp
over coupling and hose. ReInstall drain
hos0.seestepd
DO NOT FORCE
EXCESS
LENGTH
OFDRAlNHOSEDOWNTHE
~~~Ar.DP~~‘HlS COULD CAUSE
!:f) i; 140
Wore attachlng
n
’ water inlet hoses,
run water through both faucets to get
rid of parttcles In water Ilnes.
11.
Attach bottom hose (inlet marked “H”J
to hot water faucet. Attach top hose
(Inlet marked ‘c’y to cold water faucet.
Tighten coupflng to faucet bv hand.
then use pllers lo make final twrMhlrds
turn.
PANEL B


