Display modes
Press the INFO/MENU button, and the bottom
section of the display will show a sub text menu
with various information about the current station.
Every press of the INFO/MENU button changes
the information displayed.
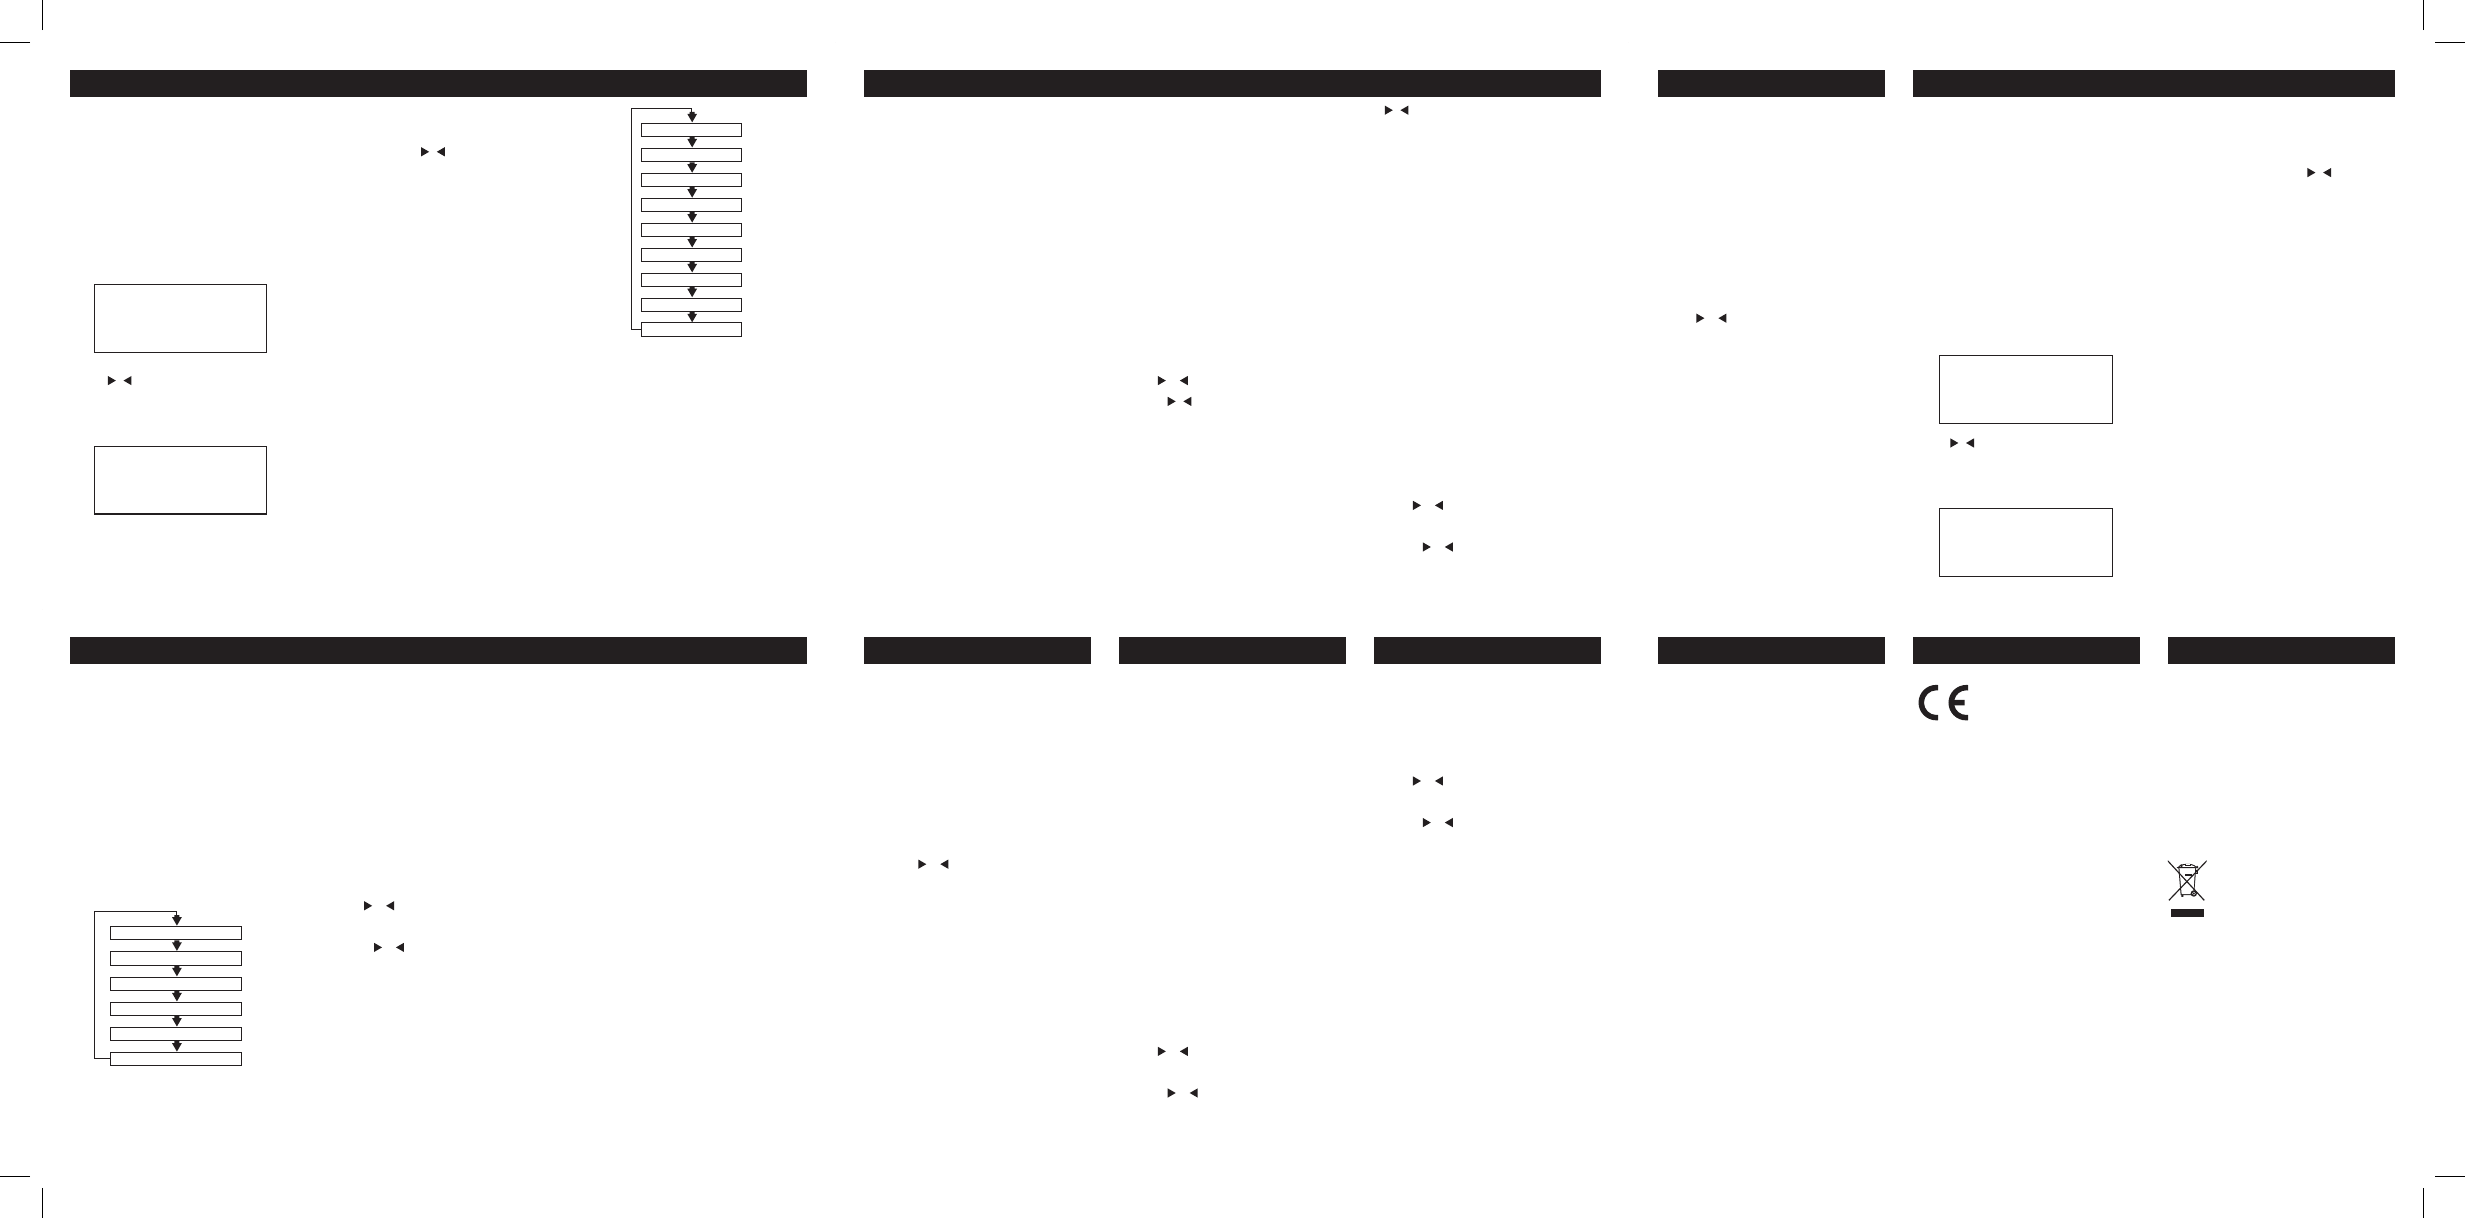
This can be better explained in a diagram showing
the order of sequence. NOTE: once you reach the
last info setting the next press will return you to
the rst setting.
Program type
This describes the “Style” or “genre” of music that
is being broadcast e.g. “Rock “or “Classical”.
Programme Name
Station name ( if broadcast ). Frequency of the
station if no name is broadcast.
Audio Mode (Stereo/Mono)
Denotes if the broadcast is in Stereo or Mono.
To specify that a station can be only played in
mono or that stereo is allowed.
1. Press and hold the INFO/MENU button for 3
seconds.
2. When the <Scan Setting> option appears press
either or and nd <Audio
Setting>, press the ENTER button.
3. Use the or buttons to cycle through the 2
options <Forced Mono> or <Stereo
Allowed>. Press ENTER to select.
Stereo allowed: Means any station broadcast in
stereo with a strong enough signal will be played
in stereo.
Mono only: Plays ALL stations in mono
regardless of the availability of a stereo signal.
Time
Displays the current time.
Date
Displays the current date.
Radio Text
Displays scrolling text broadcast by the station
( only if broadcast ).
Scan Modes
Auto Scan
The Auto scan setting will scan up or down
depending on where the starting frequency is.
Once it nds a station it will stop.
Ensure you are in the FM mode before following
the next steps.
DRC ( Dynamic Range Control )
This causes the radio to reduce the dynamic
range of the audio signal. The purpose of this is
to adapt the dynamic range of the audio signal to
listening in a noisy environment.
NOTE: this is not available on many DAB stations.
1. Press and hold the INFO/MENU button for 3
seconds.
2. When the <Auto Scan> option appears press
either
or and nd <DRC>, press
the ENTER button.
3. Choose between DRC off, DRC Low and
DRC High.
4. Press ENTER to save the setting.
Switching from DAB to FM
Press the DAB/FM button once to switch. The
display will show FM Mode.
Storing preset stations
it is possible to store up to 10 of your favourite
stations to the preset keys. This will enable you to
access your favourite stations quickly & easily.
To store a preset, you must rst be listening to the
station that you would like to save, press & hold
the PRESET button for 2 seconds. The LCD will
then show the following.
Use the / buttons to choose the preset
number from 1-10 you wish to use. Then press the
ENTER button to store.
Recalling a stored preset station
Once you have saved a station to one of the
preset buttons, you can recall by pressing the
PRESET button. Then use the
/ buttons to
select the desired preset station. Once selected
press the ENTER button to activate.
If you choose a preset that hasn’t been allocated a
station, then “Preset Empty” will be displayed.
Alternatively you can use the preset buttons.
Press one of the preset buttons to access presets
1-6, for 7-10 you will need to press and hold the
button.
Time & Date
The time & date is set automatically from the DAB
broadcast or set manually.
Program type
This describes the “Style” or “genre” of music that
is being broadcast e.g. “Rock “or “Classical”.
Ensemble/Multiplex (Group name)
A multiplex/ensemble is a collection of radio
stations that are bundled and transmitted on
INFO/MENU button for 3 seconds.
3. When the <Auto Scan> option appears press
the ENTER button.
Manual Tuning
As well as an auto tune function, you can manually
tune the receiver. This can help you when aligning
your aerial or when adding stations that were
missed while auto tuning.
1. Press and hold the INFO/MENU button for 3
seconds.
2. When the <Auto Scan> option appears press
either or & nd <Manual Tune>.
3. Use the
/ buttons to cycle through the DAB
channels, which are numbered
from 5A to 13F.
4. Now press the ENTER button to enter the
current ensemble/multiplex, the top line
will now display the rst station in the ensemble/
multiplex.
5. To see what stations are present in the found
ensemble/multiplex, just press either
/ buttons. When you’ve located a station
that you would like to listen to, just
press the ENTER button
6. Once you have reached the last station in the
found ensemble, it will revert back
to the rst station again. If you wish to exit the
manual tuning mode, just press the
ENTER button.
Pruning
When the radio has performed a Scan in several
locations you may nd there are stored stations
that you can no longer receive. This function
automatically removes them from the stored
station list.
1. Press and hold the INFO/MENU button for 3
seconds.
2. When the <Auto Scan> option appears press
either
or and nd <Prune>, press
the ENTER button.
3. Use the
or buttons to select YES or NO
and press ENTER to select.
Radio Text
Audio Mode (Stereo/Mono)
Programme Type
Program Name
Time
Date
NOTE: There are 2 options to note when using
this function.
1. Press and hold the INFO/MENU button for 3
seconds.
2. When <Scan Setting> appears press the
ENTER button.
3. You will have the choice of either <Strong
Stations Only> or <All Stations>
using the or buttons.
Strong stations only, will only stop at stations
with a strong signal.
All stations will stop at any station found with a
strong or weak signal.
4. Make your choice by pressing the ENTER
button to activate the setting.
5. Now press and hold the BACK/SCAN button,
the auto scan searches for available stations
based on the settings chosen above.
When a station is found the scan will stop, to nd
another station simply press and hold the BACK/
SCAN button again.
Storing preset stations
It is possible to store up to 10 of your favourite
stations to the preset keys. This will enable you to
access your favourite stations quickly & easily.
To store a preset, you must rst be listening to the
station that you would like to save, press & hold
the PRESET button for 2 seconds. The LCD will
then show the following.
Use the
/ buttons to choose the preset
number from 1-10 you wish to use. Then press the
ENTER button to store.
Recalling a stored preset station
You can recall presets by pressing the PRESET
button. Then use the / buttons to select the
desired preset station. Once selected press the
ENTER button to activate.
If you choose a preset that hasn’t been allocated a
station, then “Preset Empty” will be displayed.
Alternatively you can use the preset buttons.
Press one of the preset buttons to access presets
1-6, for 7-10 you will need to press and hold the
button.
Display modes
Press the INFO/MENU button, and the bottom
section of the display will show a sub text menu
with various information about the current station.
Every press of the INFO/MENU button changes
the information displayed.
This can be better explained in a diagram showing
the order of sequence. NOTE: once you reach the
last info setting the next press will return you to
the rst setting.
DAB OPERATION DAB OPERATION
Preset Store
< 1: (Empty) >
Preset 1
Stored
AFTER USING YOUR RADIO
• Set to Standby.
• Switch the unit off at the mains and unplug it if
you are leaving it unattended for a long period
(holidays etc).
CARE AND CLEANING
All care and cleaning operations should be carried
out with the unit unplugged from the mains
power.
Occasionally wipe the cabinet with a lint free
duster. Never clean the unit with liquids or
solvents.
FM OPERATION FM OPERATION BACKLIGHT CARE & MAINTENANCE WARRANTYSPECIFICATION
Your Tesco appliance is covered by a warranty
for 12 months from the date of purchase. If a fault
develops during this period, please contact the
TESCO electrical help line on 0845 456 6767.
Please have your original purchase receipt with
you when you call. This warranty in no way affects
your consumer rights.
UK: Waste electrical products /
batteries should not be disposed of with
household waste. Separate disposal
facilities exist, for your nearest facilities.
See www.recyclemore.co.uk or in-store for
details.
ROI: Produced after 13th August 2005.
Waste electrical products/batteries should
not be disposed of with household waste.
Please recycle where facilities exist. Check
with your Local Authority or retailer for
recycling advice.
Adaptor Input:100-240V 50/60Hz, 0.2A
M ain Unit Input: 8 V_........0 .75A or
9V....... (AA/UM3 x 6)
DAB: BAND III 174 -240 MHz
FM: 87.5-108 MHz
Sensitivity: -95dBm typical
Headphone Ouput: 3.5mm stereo jack
one frequency. There are national and local
multiplexes. Local ones contain stations that are
specic to that area e.g. MXR West.
NOTE: DAB – unlike normal radio, groups
together several radio stations and transmits them
on one frequency.
DLS (Dynamic Label Segment)
Dynamic label segment is a scrolling message
that the broadcaster may include with their
transmissions. This message usually includes
information, such as program detail etc.
Scan Modes
There are two types of scan, one is Quick scan
and the other is Auto scan.
Quick scan: searches the UK DAB band III
Auto scan: searches all DAB channels.
1. To activate the QUICK SCAN press and hold
the BACK/SCAN button.
2. To perform a AUTO SCAN, press and hold the
Preset Store
< 1: (Empty) >
Preset 1
Stored
Signal Error
Programme Type
DLS (scrolling text)
Bitrate
Time
Date
Ensemble Name
Channel Frequency
Signal Strength
DAB OPERATION FM OPERATION
SLEEP TIMER
To enable the sleep timer function, the radio must
be playing ( not in standby mode ).
1. To activate the timer press the SNOOZE/
SLEEP button once to open the option screen.
2. In order to set the timer duration you will need
to press the SNOOZE/SLEEP button
repeatedly until you reach the period you
require.
NOTE: The timer increases in increments of 15
minutes, 30minutes, 45minutes, 60minutes then
jumps to 90 minutes.
Factory Reset
To reset the radio to the factory settings follow
the next steps.
1. Press and hold the INFO/MENU button for 3S.
2. When the <Scan Setting> option appears press
either or and nd <System>, press the
ENTER button.
3. Use the or buttons to nd the <Factory
Reset> option and press ENTER.
4. Choose <Yes> and press the ENTER button.
8
5
9
6
10
7
To set the backlight
1. Press and hold the INFO/MENU button for 3
seconds.
2. When the <Scan Setting> option appears press
either or button and nd <System>, press
the ENTER button.
3. Use the or buttons nd the <backlight>
option, press the ENTER button to nd <Time
Out>.
4. Press the ENTER button to enter <time out>
and choose the available duration:
<OFF>, <10 sec>, <20 sec>, <30 sec>,
<45 sec>, <60 sec > , <90 sec>, <120 sec>
and <180 sec>.
~
______
______


