E-23
ON/OFF
POWER
LAMP
TEMP.
Basic Operation of the Projector
1
When the power is on, the LAMP
REPLACEMENT indicator flashes
to show the operating condition of
the lamp.
Green: Lamp is ready
Flashing green: Warming up
Red: Change bulb
ON
A.C.120V
C.A.120V
OFF
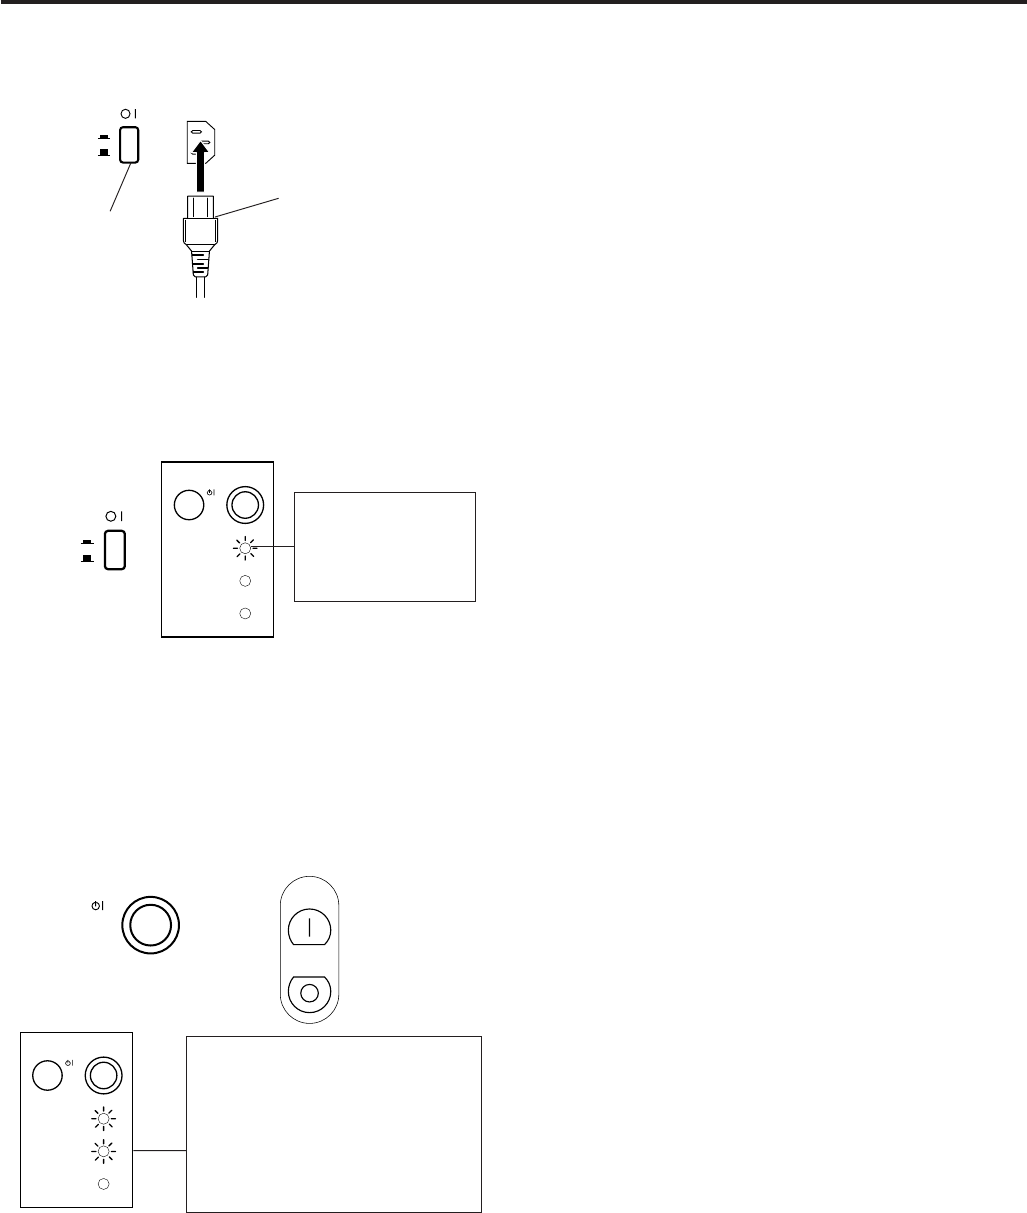
1 AC cord
1. Connect the AC cord.
Connect the supplied AC cord to the AC inlet on the side
of the projector .
2. Turn on the MAIN POWER.
Press the MAIN POWER switch on the side of the projec-
tor. The POWER indicator lights red and the projector
enters STANDBY mode.
3. Turn on the POWER.
Press the POWER ON/OFF button on the projector or the
POWER ON button on the remote control.
• When the power is turned off by pressing the POWER
ON/OFF button, the POWER indicator will not turn off
until the fan has stopped running.
• See page 32, “Lamp/Maintenance Indicators” for
details.
Notes:
• When the POWER indicator is not lit, the remote control cannot be
used to operate the projector.
• If the power is turned on immediately after it has been turned off, it
may take a short while before the lamp turns on. (During this period
the LAMP REPLACEMENT indicator flashes.)
• After the projector is unpacked and turned on for the first time, a slight
odor may be emitted from the exhaust fan. This odor will soon
disappear with use.
Caution:
• Be sure to take off the lens cap before operation of the projector. Do
not place the lens cap on the lens during operation. The lens cap may
become extremely hot.
2 MAIN
POWER
switch
Projector
ON/OFF
Remote control
ON/OFF
ON
OFF
ON/OFF
3
ON/OFF
POWER
LAMP
TEMP.
ON
OFF
When the MAIN
POWER is on, the
POWER indicator
lights red.
2


