5
3. Establish a Connection:
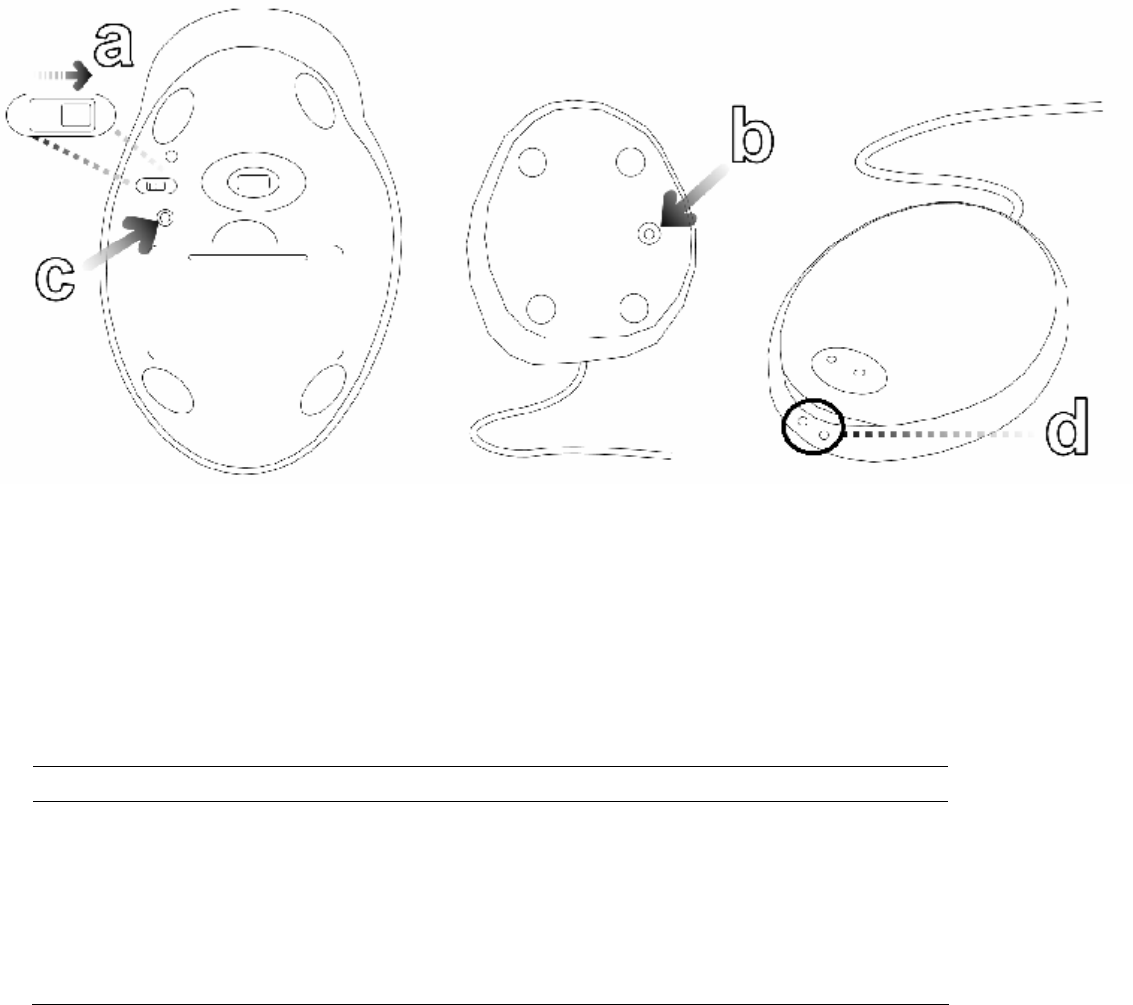
a. Turn on the Power Switch at the bottom of your Mouse. Your mouse will establish a connection with the receiver and is ready
for use. If a connection is not established, there might be a high level of surrounding interference, continue with the following
instructions to establish a connection manually.
b. Press the Connect Button on the bottom of the Wireless USB Receiver.
c. Press the Connect Button on the bottom of your Mouse. The LED Indicator above the Power Switch will turn on to indicate it
is scanning for a connection. The LED Indicator will turn off after a connection has been established.
d. The Connect LED Indicator on the Wireless USB Receiver indicates the status of the connection between your Mouse and
your computer:
LED Indicator Status Description
Connect LED (Green) LED Off No Power/Not Connected To Computer
Solid Green Connected/No Activity Detected
Blinking Green Scanning For Connection
Flashing Green Your Mouse Is In Active Mode
Charging LED (Red) LED Off Not Charging/Battery Fully Charged
Solid Red Charging
