5
Step 5
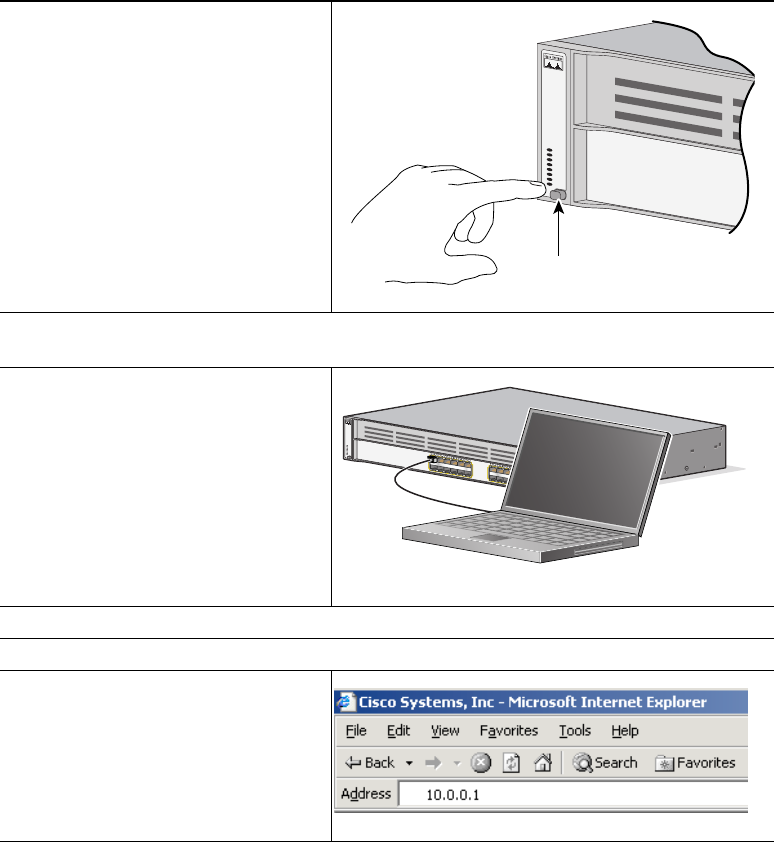
Press and hold the Mode button for
3 seconds. When all of the LEDs
above the Mode button turn green,
release the Mode button.
If the LEDs above the Mode button
begin to blink after you press the
button, release it. Blinking LEDs
mean that the switch has already
been configured and cannot go into
Express Setup mode. For more
information, see the “Resetting the
Switch” section on page 35.
Step 6
Verify that the switch is in Express Setup mode by confirming that all LEDs above the
Mode button are green. (On some switch models, the RPS LED remains off.)
Step 7
Connect a straight-through
Category 5 Ethernet cable (not
provided) to any 10/100/1000
Ethernet port on the switch front
panel and to the Ethernet port on the
PC.
Step 8
Verify that the LEDs on both Ethernet ports are green.
Step 9
Wait 30 seconds.
Step 10
Launch a web browser on your PC.
Enter the IP address 10.0.0.1 in the
web browser, and press Enter.
SYST
RP
S
M
ASTR
S
TA
T
D
UPLX
SPEE
D
ST
ACK
PoE
Mode button
C
a
t
a
l
y
s
t
3
7
5
0
G
SERIES
P
o
E
-
2
4
W
i
r
e
l
e
s
s
L
A
N
C
o
n
t
r
o
l
l
e
r
S
Y
S
T
R
P
S
M
A
S
T
R
S
T
A
T
D
U
P
L
X
S
P
E
E
D
S
T
A
C
K
P
o
E
1X
2X
11X
12X
1
2
3
4
5
6
7
8
9
1
0
11
1
2
13X
14X
23X
24X
1
3
1
4
1
5
1
6
1
7
1
8
1
9
2
0
2
1
2
2
2
3
24
2
5
2
6
DHCP-enabled PC
