2-18
Catalyst 3750-E and Catalyst 3560-E Switch Hardware Installation Guide
OL-9774-03
Chapter 2 Switch Installation
Installing the Switch
Table- or Shelf-Mounting
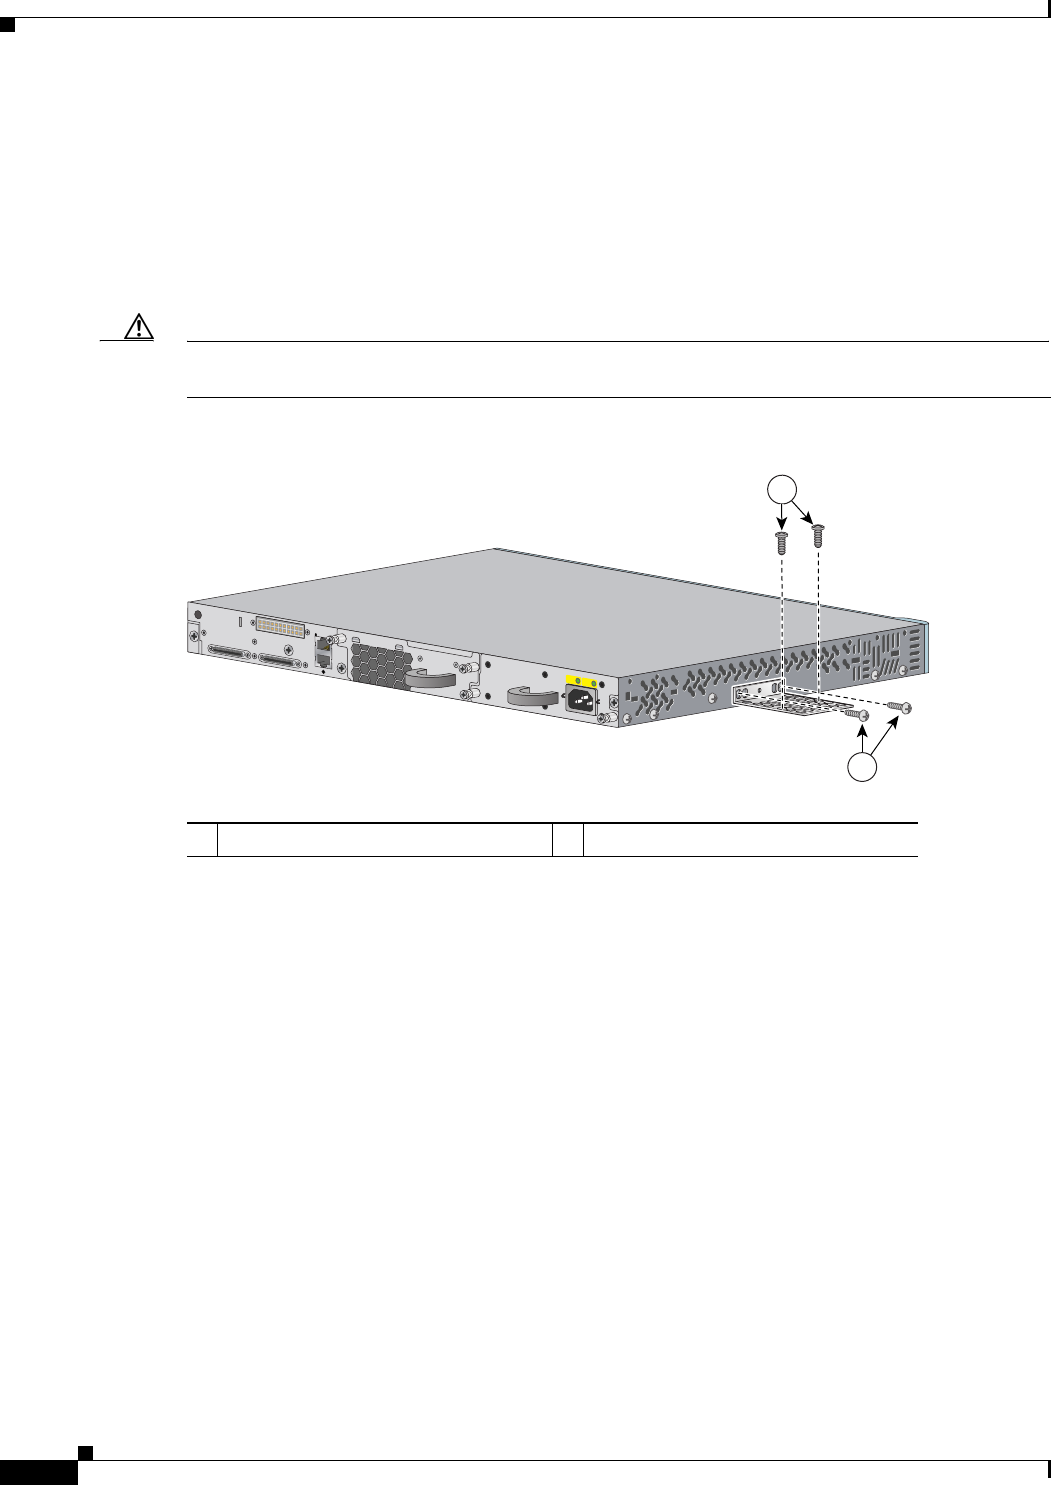
To install the switch on a table or shelf, locate the adhesive strip with the rubber feet in the mounting-kit
envelope. Attach the four rubber feet to the recessed areas on the bottom of the chassis.
Remove two Phillips truss-head screws from the switch side panels and use those screws to attach the
brackets to the switch (
Figure 2-16). Secure the brackets to the table or shelf with the appropriate
hardware.
Caution Do not use the 19-inch brackets to wall-mount the switch. The brackets are not suitable for
wall-mounting.
Figure 2-16 Attaching the 19-inch Brackets for Table- or Shelf-Mounting
158118
AC OK PS OK
100-240 V
10-5 A
50-60 H
Z
2
1
1 User-supplied screws 2 Phillips truss-head screws
When you complete the switch installation, see the “After Installing the Switch” section on page 2-18
for more information switch configuration.
After Installing the Switch
After the switch is installed, you might need to:
• Configure the switch by running Express Setup to enter the initial switch configuration. For
instructions, see the switch getting started guide that shipped with the switch and also on Cisco.com.
• Use the CLI setup program to enter the initial switch configuration. See Appendix C, “Configuring
the Switch with the CLI-Based Setup Program.”
• Connect to the front-panel ports. See the “Installing Devices in the 10-Gigabit Ethernet Slots”
section on page 2-20 and the “Connecting Devices to the Ethernet Ports” section on page 2-26.


