


6
Installing a Hard Drive
Installing a Hard Drive
If you purchased a StoreJet
™
2.5 that does not have a Hard Disk Drive already installed, please read this
section, otherwise you can skip to the “Driver Installation” section.
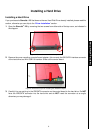
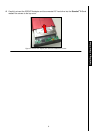
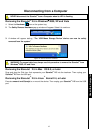
1. Open the StoreJet
™
2.5 by removing the two screws from either side of the top cover, as indicated in
the diagram.
Figure 2. Remove the screws from the top cover
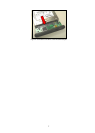
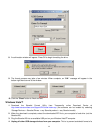
2. Remove the cover revealing a control board adapter; this converts the IDE/SATA interface connector
of the hard drive to a Mini USB 2.0 interface. Slide out the control board.
Figure 3. Remove the top cover revealing the IDE/SATA adapter
3. Carefully line up and plug in the IDE/SATA connector on the control board to the hard drive. Do NOT
force the IDE/SATA connector into the hard drive and do NOT insert the connector at an angle,
otherwise you may damage it.
Installing a Hard Drive