


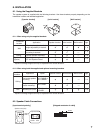
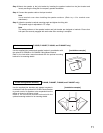

11
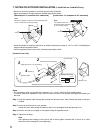
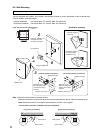
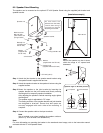
Step 3. Mount the speaker to the joint bracket by inserting the speaker bracket into the joint bracket and
loosely securing the fixing bolt for temporary speaker installation.
Step 4. Connect the speaker cable to the input terminal.
Note
Use a terminal cover when installing the speaker outdoors. (Refer to p. 6 for terminal cover
attachment.)
Step 5. Adjust the speaker's vertical mounting angle and tighten the fixing bolt.
The speaker angle is adjustable in 7.5º steps.
Note
The mating surfaces of the speaker bracket and joint bracket are designed to interlock. Ensure that
both parts are securely engaged with each other after mounting is complete.
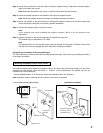
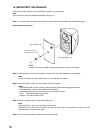
(F-2000B, F-2000BT, F-2000W, and F-2000WT only)
Use the supplied joint bracket and speaker bracket in combination with
the optional HY-CM20B or HY-CM20W Ceiling Mount Bracket.
Refer to the instruction manual enclosed with the optional mounting
bracket for its mounting details.
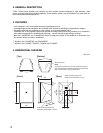
Horizontal orientation
[Installation example]
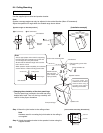
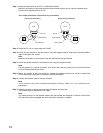
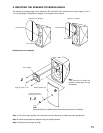
(F-2000B, F-2000BT, F-2000W, and F-2000WT only)
Use the supplied joint brackets and speaker brackets in
combination with the optional HY-CL20B Cluster Bracket
to permit a total of 4 speakers to be suspended from the
ceiling as shown in the figure at right.
Refer to the instruction manual enclosed with the
optional mounting bracket for its mounting details.
Cluster configuration assembly
[Installation example]