


14
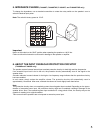
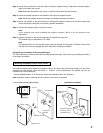
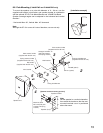
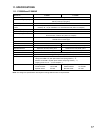
Step 1. Attach the wall bracket to the SP-131 Pole Mount Bracket.
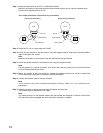
Match the orientation of the arrow label with the horizontal direction (left or right) the speaker faces.
Use the bolts supplied with the SP-131.
Joint bracket
Wall bracket
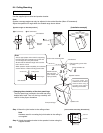
[Left-facing orientation]
[Right-facing orientation]
Arrow label
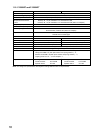
Joint bracket
Wall bracket
SP-131
Pole
SP-131
Pole
Arrow label
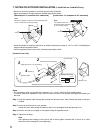
• Arrow label orientation (Viewed from top of brackets)
Step 2. Attach the SP-131 to a pole using the YS-60B.
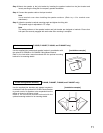
Step 3. Attach the joint bracket to the wall bracket using the supplied screws, adjust the horizontal speaker
angle, then tighten the screws.
Note
Match the orientation of the arrows on both the wall bracket and joint bracket.
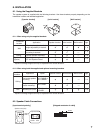
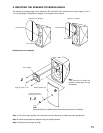
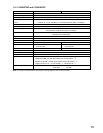
Step 4. Attach the speaker bracket to the speaker's rear using the supplied screws.
Note
Set the speaker in a vertical orientation, then attach the bracket so that the rear-mounted terminal
cover is positioned above the mount.
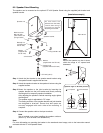
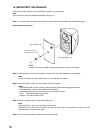
Step 5. Mount the speaker to the joint bracket by inserting the speaker bracket into the joint bracket and
loosely securing the fixing bolt for temporary speaker installation.
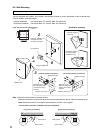
Step 6. Connect the speaker cable to the input terminal.
Note
Use a terminal cover when installing the speaker outdoors. (Refer to p. 6 for terminal cover
attachment.)
Step 7. Adjust the speaker's vertical mounting angle and tighten the fixing bolt.
The speaker angle is adjustable in 7.5º steps.
Note
The mating surfaces of the speaker bracket and joint bracket are designed to interlock. Ensure that
both parts are securely engaged with each other after mounting is complete.