


6
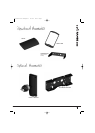
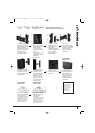
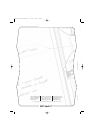
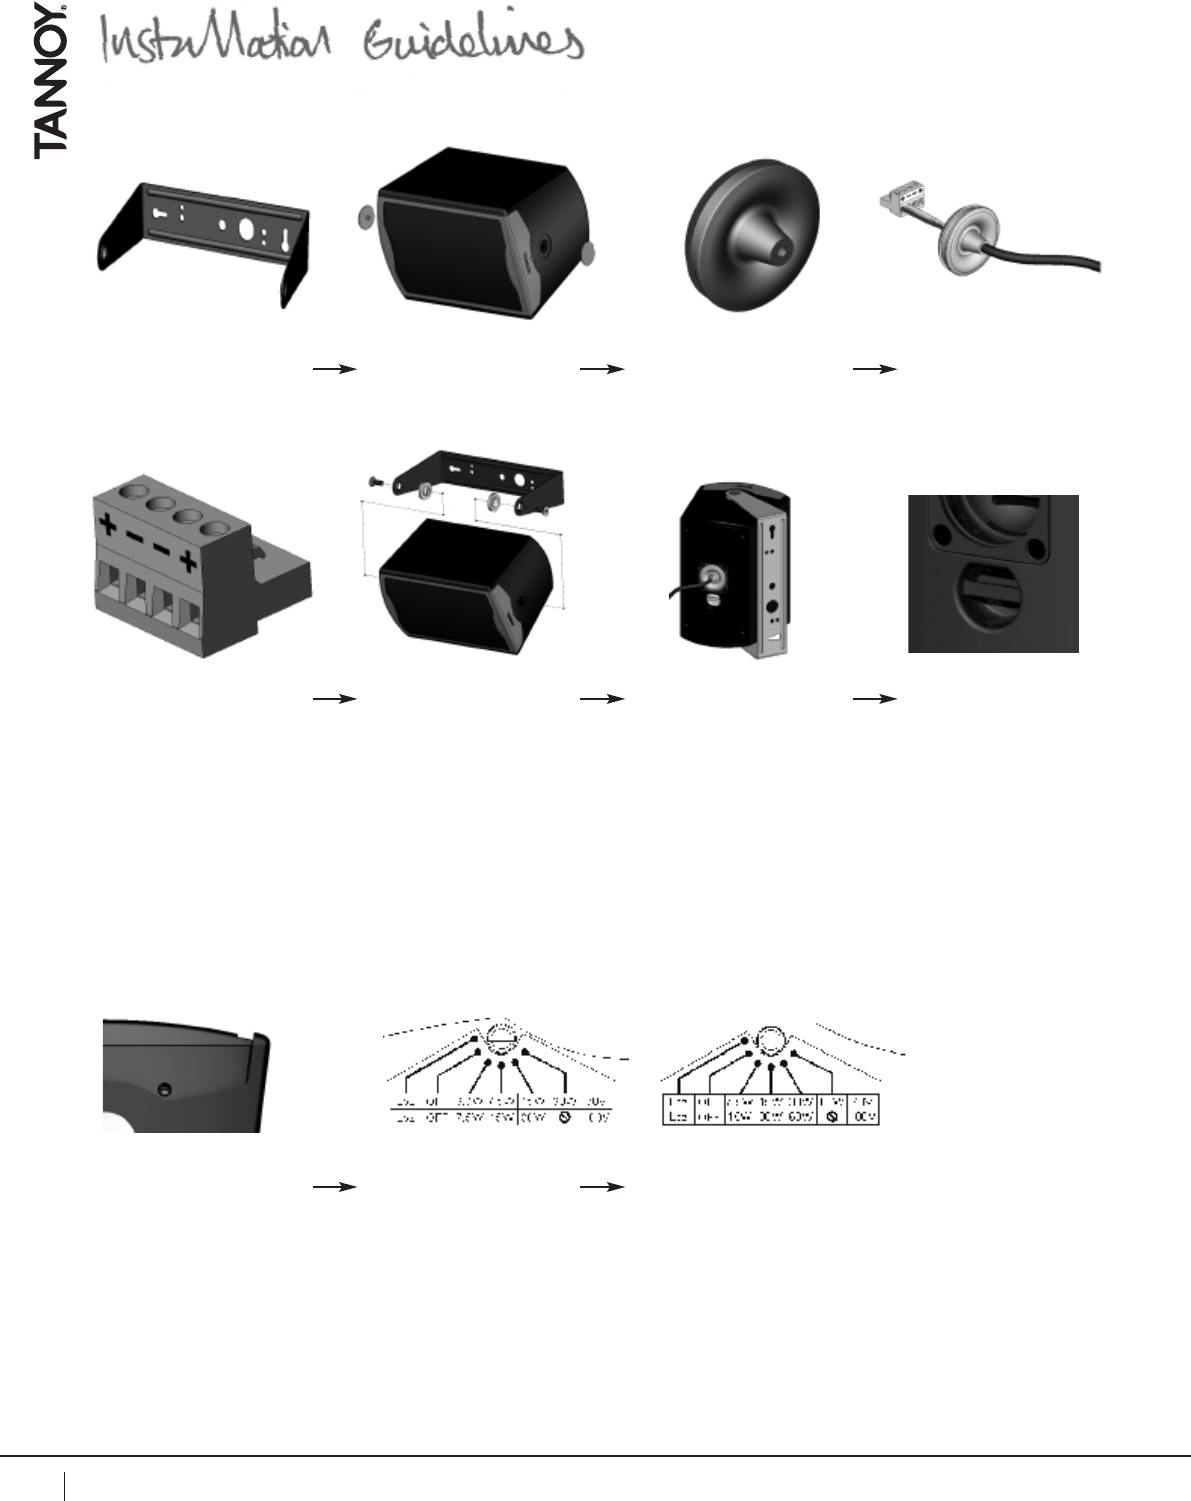
USING SUPPLIED YOKE BRACKET
1. Fix the yoke bracket
to the surface using a
suitable fixing method.
2. Remove the yoke
trims from the product
to access the bracket
fixing points.
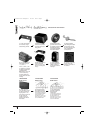
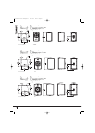
4. Feed the speaker
cable through the rubber
grommet then connect
the euro-type plug to the
wires, observing the
correct polarity.
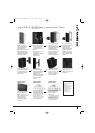
5. For connection to the
loudspeaker, use pins
1 (+) and 2 (-).
Pins 3 (-) and 4 (+) are
in parallel for connection
to additional speakers in
a distributed line.
Note: Even if pins 3 and
4 are not used, they
should be tightend to
prevent the screws from
vibrating.
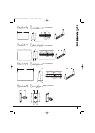
6. Offer the speaker up
to the bracket and
attach it using a 5mm
alan key and supplied
fixings.
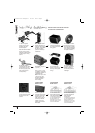
7. Connect the euro
plug then replace the
rubber grommet to
ensure the speaker is
watertight.
8. Connect a secondary
support line to the
safety tab at the rear of
the cabinet.
9. Lift the grille trim
using the tab to access
the rotary transformer
tapping switch. The
rotary switch is found on
the top of the Di5
models, and on the
bottom of the Di6 and
Di8 models.
TRANSFORMER
MODELS ONLY
TRANSFORMER
MODELS ONLY
TRANSFORMER
MODELS ONLY
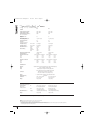
10. The Di5t and Di5
DCt models are fitted
with 30W transformers.
THE SPEAKER IS SUPPLIED
IN LOW IMPEDANCE MODE.
NEVER CONNECT THE
SPEAKER TO A 70/100 VOLT
AMPLIFIER WHILE IT IS SET
FOR LOW IMPEDANCE.
11. The Di6t, Di6 DCt,
& Di8 DCt models are
fitted with 60W
transformers.
THE SPEAKER IS SUPPLIED
IN LOW IMPEDANCE MODE.
NEVER CONNECT THE
SPEAKER TO A 70/100 VOLT
AMPLIFIER WHILE IT IS SET
FOR LOW IMPEDANCE.
3. Remove the rubber
grommet from the rear of
the speaker. Inclusion of
the rubber grommet is
only required if installing
the product outdoors.
Di Manual 8-2-07 AW:Layout 1 21/2/07 10:52 Page 6