


POWER ON/OFF
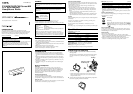
Hook (L, R)
Driver Unit
TUNE +*
2
/–
Display
MEGA BASS/CLOCK
ENTER
MODE
BAND
VOL*
1
TV/WB/FM SENS
DX/LOCAL
L (Left)
R (Right)
Hang the hooks on
your ears.
Neckband
Neckband
Battery compartment lid
Light reflector (R, L)
This reflector reflects
car lights at night for
your safety.
*
1
There is a tactile dot beside volume to show
the direction to turn up the volume.
*
2
The TUNE + button has a tactile dot.
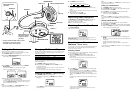
Setting the Clock
The clock time display of this unit is a 12-hour system.
When the battery is first installed, “AM 12:00” flashes in the display.
1 Set POWER to OFF to turn off the power.
2 Hold down MEGA BASS/CLOCK for more than 2 seconds
until “AM 12” starts flashing.
3 Press TUNE + or – to adjust the hour, then press MEGA
BASS/CLOCK.
If you hold down TUNE + or –, the digit changes rapidly.
“AM 12:00 ”= midnight, “PM 12:00 ”= noon.
4 Repeat step 3 above to adjust the minute.
“:” starts flashing and the clock starts operating.
To set the current time exactly to the second, adjust the minute and
then press MEGA BASS/CLOCK to synchronize with a time signal
(such as the telephone time signal).
Note
If you do not press TUNE + or –, or MEGA BASS/CLOCK within one
minute, the clock setting mode will be canceled.
Changing AM Channel Step
The AM channel step differs depending on areas. The channel step of this
unit is factory-set to 10 kHz. Change the settings as shown below to be
able to listen to the radio.
Area Channel step
North and South American countries 10 kHz
Other countries 9 kHz
Note
When the AM channel step is changed, only the preset stations on the AM
band will be initialized.
1 Set POWER to OFF to turn off the power.
2 While holding down MODE, hold down TUNE + or – for
more than 5 seconds.
The channel step will change and “9” kHz (or “10” kHz) will flash for
3 seconds in the display.
If you proceed to step 2 again, the channel step changes again.
Playing the Radio — Manual Tuning
1 Set POWER to ON to turn on the power.
2 If “PRESET” is displayed, press MODE so that “PRESET”
disappears.
Pressing MODE will switch over between manual tuning mode and
preset tuning mode.
3 Press BAND to select the band.
Each press changes the band as follows:
AM FM TV WEATHER
4 Press TUNE + or – to select the desired frequency.
If you hold down TUNE + or –, the frequency or channel changes
rapidly.
When the frequency matches the broadcast frequency, the broadcast
will be received.
5 Adjust the volume using VOL.
To turn off the radio, set POWER to OFF.
Improving Radio Reception
TV/WEATHER/FM: Set TV/WB/FM SENS to LOCAL if interference is
prevalent when radio wave intensity is dramatically stronger.
Under normal conditions, set to DX.
AM: Move around to obtain better reception.
Obtaining Powerful Bass Sound
Press MEGA BASS/CLOCK.
“MB” appears in the display.
If the sound is distorted, or if you want to reduce the bass tone, press
MEGA BASS/CLOCK again to turn off this function.
The MEGA BASS setting is not canceled even if the radio is turned off.
Presetting your Favorite
Stations
— Preset Tuning
You can preset up to 5 stations each for TV, WEATHER and AM, and 15
stations for FM. Also, you can delete the preset station whether it is
factory-set or preset by yourself.
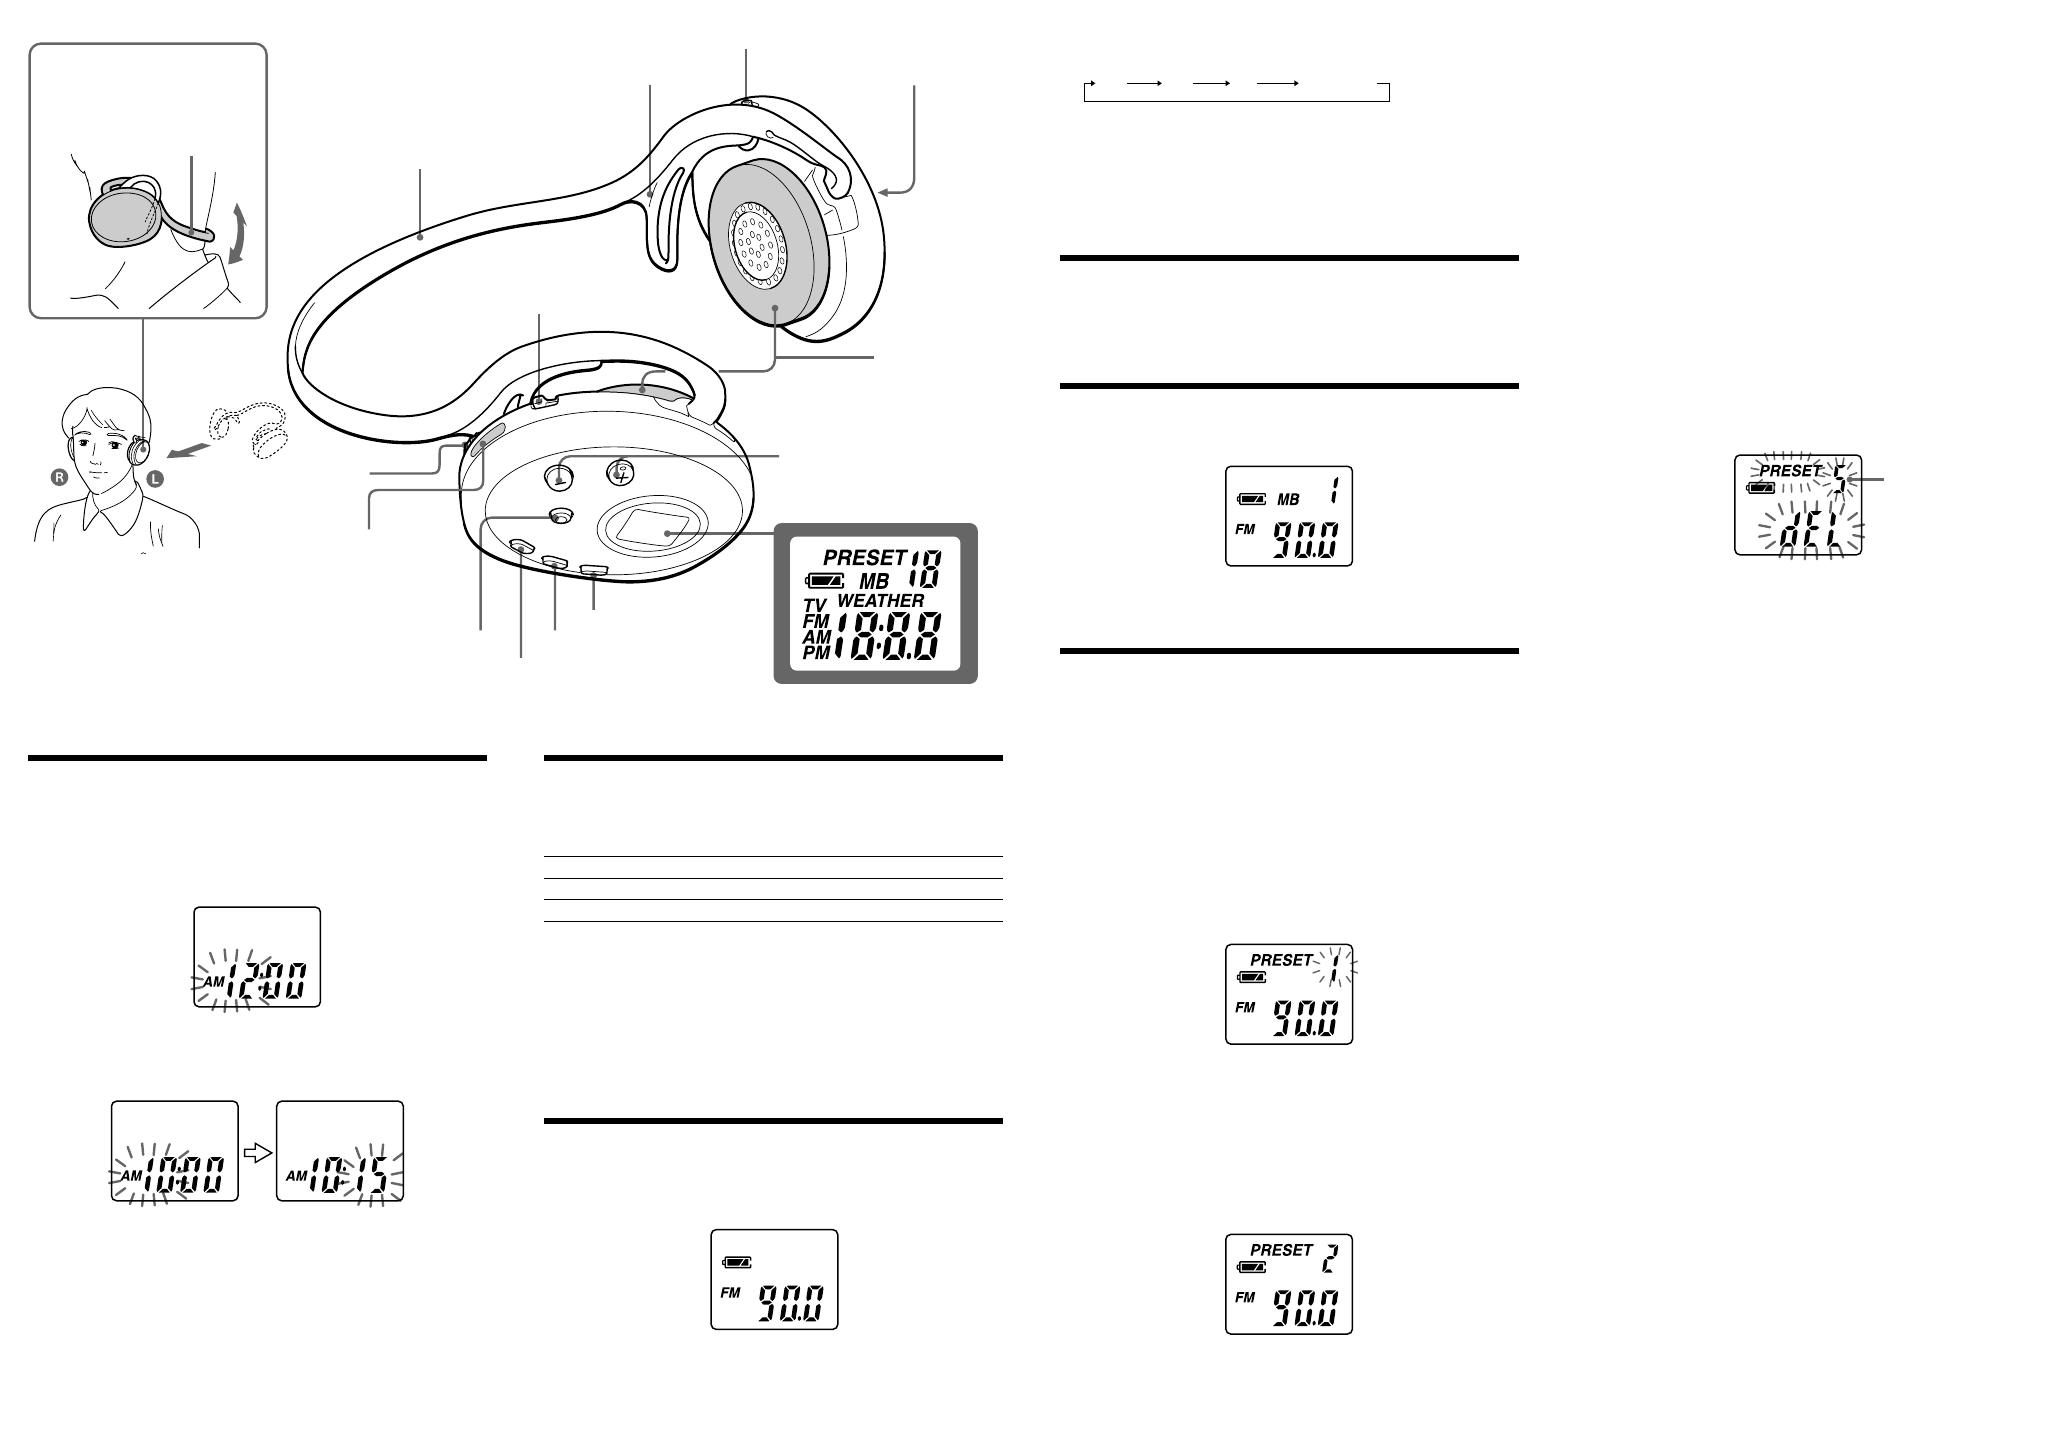
Presetting a Station
1 Follow steps 1 to 5 in “Playing the Radio” and manually tune
in to the station you wish to preset.
2 Hold down ENTER until the preset number flashes.
If there is a preset number that has no preset station, that preset
number flashes.
When all the preset numbers are set to certain stations (factory-set),
“1” flashes and “PRESET” appears.
3 Press TUNE + or – to select the number you wish to preset,
then press ENTER.
When you select the preset number using TUNE + or –, “PRESET”
appears if that number has a preset station. If it has no preset station,
only the number flashes and “PRESET” does not appear.
When you press ENTER, the selected preset number lights up in the
display.
Example: Display window when you preset FM 90.0 MHz in preset
number 2.
To preset another station, repeat these steps.
To change the preset station, preset a new station. The previous
station will be canceled.
Note
If you do not press TUNE + or –, or ENTER within one minute, the preset
tuning mode will be canceled.
Tuning in to a Preset Station
1
Set POWER to ON to turn on the power.
2 Press MODE so that “PRESET” and preset number appear.
3 Select the band with BAND.
4 Press TUNE + or – to select the desired preset number.
5 Adjust the volume using VOL.
To turn off the radio, set POWER to OFF.
Note
If you hold down MODE for more than 2 seconds, the unit enters the
preset station deleting mode. Press MODE again to return to the previous
mode.
Deleting a Preset Station
1 Follow steps 1 and 2 in “Tuning in to a Preset Station”.
2 Select the band with BAND.
3 Press TUNE + or – to select the preset number to be deleted.
4 Hold down MODE for more than 2 seconds until “PRESET”,
“dEL” and the preset number flash.
5 While the letters and the preset number are flashing, press
ENTER.
The station set to the preset number just before the deleted station will
be displayed.
To delete other stations, repeat steps 2 to 5.
If all the preset stations are deleted, “PRESET -” appears in the
display.
To cancel deleting, press MODE while “PRESET”, “dEL” and the preset
number are flashing.
preset number
to be deleted