


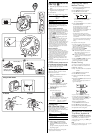
Installing the Batteries
(See Fig.
A
)
1 Slide and open the lid at the rear of the
radio.
2 Insert two size AAA(R03) batteries (not
supplied) with correct polarity.
3 Close the lid.
Battery Life (approximate hours) (EIAJ*)
Sony Sony
alkaline size AAA
size AAA (R03)
(LR03)
FM reception 30 13
AM reception 40 17
*Measured value by the standard of EIAJ
(Electronic Industries Association of Japan)
The battery life may shorten depending on the
operation of the unit.
When to replace the batteries
• When the batteries become weak, the sound
becomes weak or distorted. When the batteries
are completely exhausted, the power is turned
off and “
” in the display window
flashes. When the power is turned on with the
indication flashing, the power will be turned
off right away.
When “
” starts flashing, replace both
batteries with new ones.
•
Replace the batteries within about 40 seconds
after removing the batteries. If you do not
replace them within 40 seconds, the preset
stations may be erased, the clock setting may be
cleared and “AM 12:00” flashes in the display.
• When the batteries are removed for a long
time, preset stations will be erased and “AM
12:00” will flash in the display. Store stations
and set the clock again.
Notes on batteries
• Do not charge the dry batteries.
• Do not carry the dry batteries with coins or
other metallic objects. It can generate heat if the
positive and negative terminals of the batteries
are accidentally contacted by a metallic object.
• When you are not going to use the unit for a
long time, remove the batteries to avoid
damage from battery leakage and corrosion.
• Do not use different types of batteries at the
same time.
• When you replace the batteries, replace all with
new ones.
To attach the battery compartment lid if
it is accidentally detached (see Fig. B)
1 Put in one side of the lid as illustrated.
2 Push the other side to attach.
Setting the Clock
The display will flash “AM 12:00” when the
batteries are first inserted.
1 Hold down CLOCK for more than 2
seconds.
The hour flashes in the display.
2 Press TUNE/TIME SET + or – until the
correct hour appears in the display.
To set the current time rapidly, hold down
TUNE/TIME SET + or –.
3 Press CLOCK.
The minutes starts to flash.
Repeat step 2 and 3 to set the minute.
After setting the minute, press CLOCK again. The
clock starts operating and “ : ” starts flashing.
• 12-hour system: “AM 12:00” = midnight
“PM 12:00” = noon
Changing
AM Channel Step
The AM channel step differs depending on areas.
The channel step of this unit is factory-set to
10 kHz to match the frequency allocation system
of the country as listed.
You can change the channel step.
Area Channel step
North and South
10 kHz
American countries
Other countries 9 kHz
1 Press POWER to turn off the power.
2 While holding down BAND, keep
pressing PRESET 4 for more than 5
seconds. The AM channel step will be
changed.
If you proceed step 2 again, the channel
step changes again.
• When the AM channel step is changed, the
preset stations will be erased.
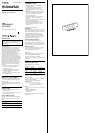
Playing the radio
Manual Tuning
1 Connect the supplied headphones to
the i (headphones) jack.
2 Press POWER to turn the radio on.
3 Press BAND to select the band.
Each press changes the band as follows:
* When using FM1 or FM2 preset mode, you
may listen to the radio on either mode.
(See “preset Tuning”)
4 Press TUNE/TIME SET + or – to tune in
to the desired station.
The FM channel step is set to 0.1 MHz and
the AM channel step is set to 10 kHz.
(North and South American model)
The FM channel step is set to 0.05 MHz* and
the AM channel step is set to 9 kHz.
(Other models)
* The FM frequency display is raised or
lowered by a step of 0.1 MHz. For example,
frequency 88.00 and 88.05 MHz is displayed
as “88.0 MHz.”
Two short beeps sound when the minimum
frequency of each band is received during
tunig.
5 Adjust the volume using VOL.
• To see the current time while listening to the
radio, press CLOCK. The current time will
appear for a few seconds and then the display
returns to the radio frequency.
• To turn off the radio, press POWER.
• To improve the radio reception
FM: Extend the headphones cord so that the
FM sensitivity will be increased, as it
serves as the FM antenna.
AM: Rotate the unit horizontally for optimum
reception. A ferrite bar antenna is built
into the unit.
• For FM, set FM SENS to LOCAL if interference
is prevalent and reception is too strong.
Under normal conditions, set it to DX.
Preset Tuning
You can preset 10 stations in FM (5 stations in
FM1, 5 stations in FM2) and 5 stations in AM.
Presetting a station
Example: To set FM 90 MHz in Preset button 2
for FM2
1 Press POWER to turn the radio on.
2 Press BAND to select FM2.
3 Tune in to FM 90 MHz (See “Manual
Tuning”).
4 Hold down PRESET button 2 for more
than 2 seconds.
Two beeps sound and the preset number “2”
appears in the display.
To preset another station, repeat these steps.
• To change the preset station, tune in to the
desired station and hold down PRESET 1 to 5.
The new station will replace the previous
station on the preset button.
Tuning in a preset station
1 Press POWER to turn the radio on.
2 Press BAND to select the band.
3 Press the desired preset tuning button.
4 Adjust the volume using VOL.
Using other Functions
To prevent Accidental
change –HOLD function.
Press HOLD. “ - ” is displayed, indicating that
all the functions of the buttons are locked.
To release the key protection, press HOLD again
to disappear “ - ”.
Note
If you press any button as long as “ - ” appears
in the display, five short beeps sound.
1
2
VOL
A
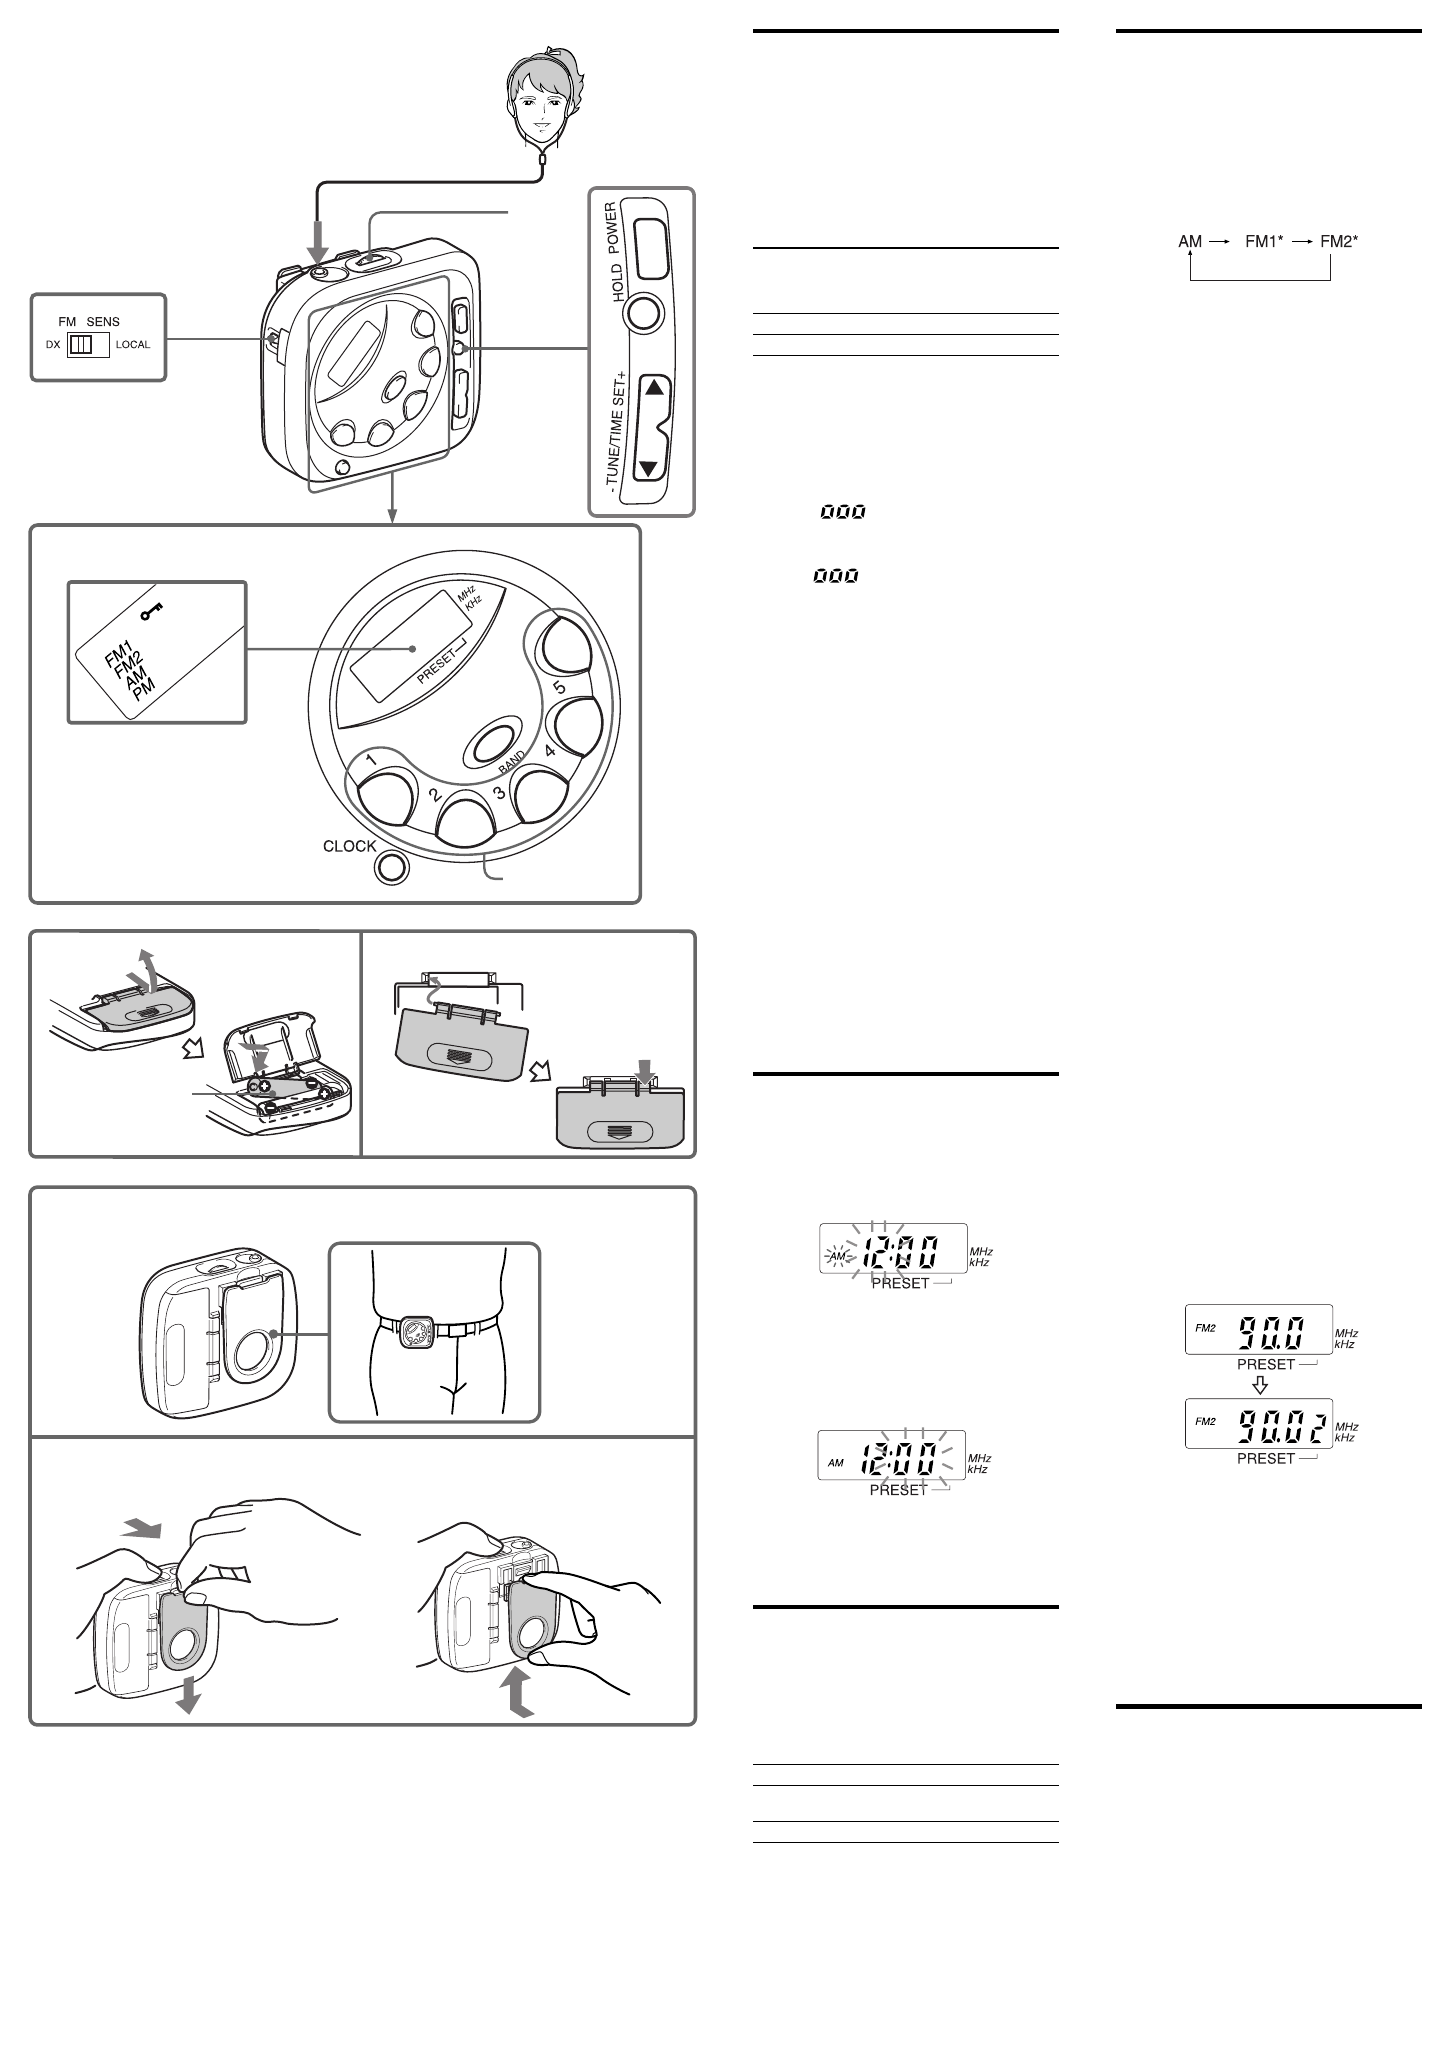
Using the Belt Holder
i
B
Size AAA (R03) × 2
Insert the # side of
the battery first.
To detach
To attach
PRESET 1–5