


ZS-S2iP_U2 [US] 3-271-628-15(1)
Basic Operations
VOLUME +
and
have a tactile dot.
VOLUME +
have a tactile dot.
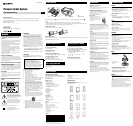
Opening/closing the Sliding Tray
Setting the iPod
1 Press the PUSH OPEN/CLOSE button
.
The Sliding Tray
is ejected half way.
2 Pull the Sliding Tray
all the way out.
3 Attach the iPod Universal Dock Adapter if
necessary (not supplied).
4 Place your iPod on the Sliding Tray
.
5 Push in and adjust the Sliding Tray
so that the
iPod fits on the Back Support
.
Closing the Sliding Tray
1 Remove the iPod
2 Push the Sliding Tray
until it clicks.
3 Press the PUSH OPEN/CLOSE button
.
4 Push the Sliding Tray
into the unit.
Notes
• Do not carry the unit with an iPod set on the connector. Doing so
may cause a malfunction.
• Be sure to store the Sliding Tray
before moving the unit.
Playing the iPod
1 Press iPod
(direct power-on).
“DC OUT” appears in the display (AC only).
2 Press
.
The iPod begins to play.
You can operate the connected iPod by the unit or the
iPod buttons.
To Press
Pause playback
To resume play, press it again.
Stop playback
Go to the next
track
Go back to the
previous track
Locate a point
while listening to
the sound
(forward) or
(backward)
while playing and hold it until
you find the point.
Locate a point
while observing
on the iPod
display
(forward) or
(backward)
in pause and hold it until you
find the point.
Select a menu Press MENU and
or
on the
remote to select a menu, and then
press ENTER
.
Go back to the
previous menu
Press MENU
on the remote.
Notes
• You may use the universal adaptor supplied with your iPod for a
more customized fit. The iPod may be docked without the use of an
adaptor.
• If you connect the iPod when another function is in use, the
function will change to iPod automatically.
• Apple’s iPod Universal Dock Adapter (not supplied) can be used
with this unit.
• To use an iPod, refer to the user’s guide of your iPod.
• Before disconnecting the iPod, pause playback.
To use the unit as a battery charger (AC
only)
You can use the unit as a battery charger. The charging
status appears in the iPod display. For details, see the
user’s guide of your iPod.
On copyrights
• iPod is a trademark of Apple Inc., registered in the U.S.
and other countries.
• All other trademarks and registered trademarks are
of their respective holders. In this manual, ™ and ®
marks are not specified.
• Apple is not responsible for the operation of this device
or its compliance with safety and regulatory standards.
Selecting the play mode
Press MODE
until “ 1”, “ ”, “SHUF”, “SHUF”
and “ ”, “PGM”, or “PGM” and “ ” appear in
the display. Then proceed as follows:
To Select Select Then do this
Repeat a
single track
“ 1” Press
or
to
select the track that you want
to repeat, then press
.
Repeat all
tracks
“ ” Press
.
Shuffle play “SHUF” Press
.
Repeat tracks
in random
order
“SHUF”
and “ ”
Press
.
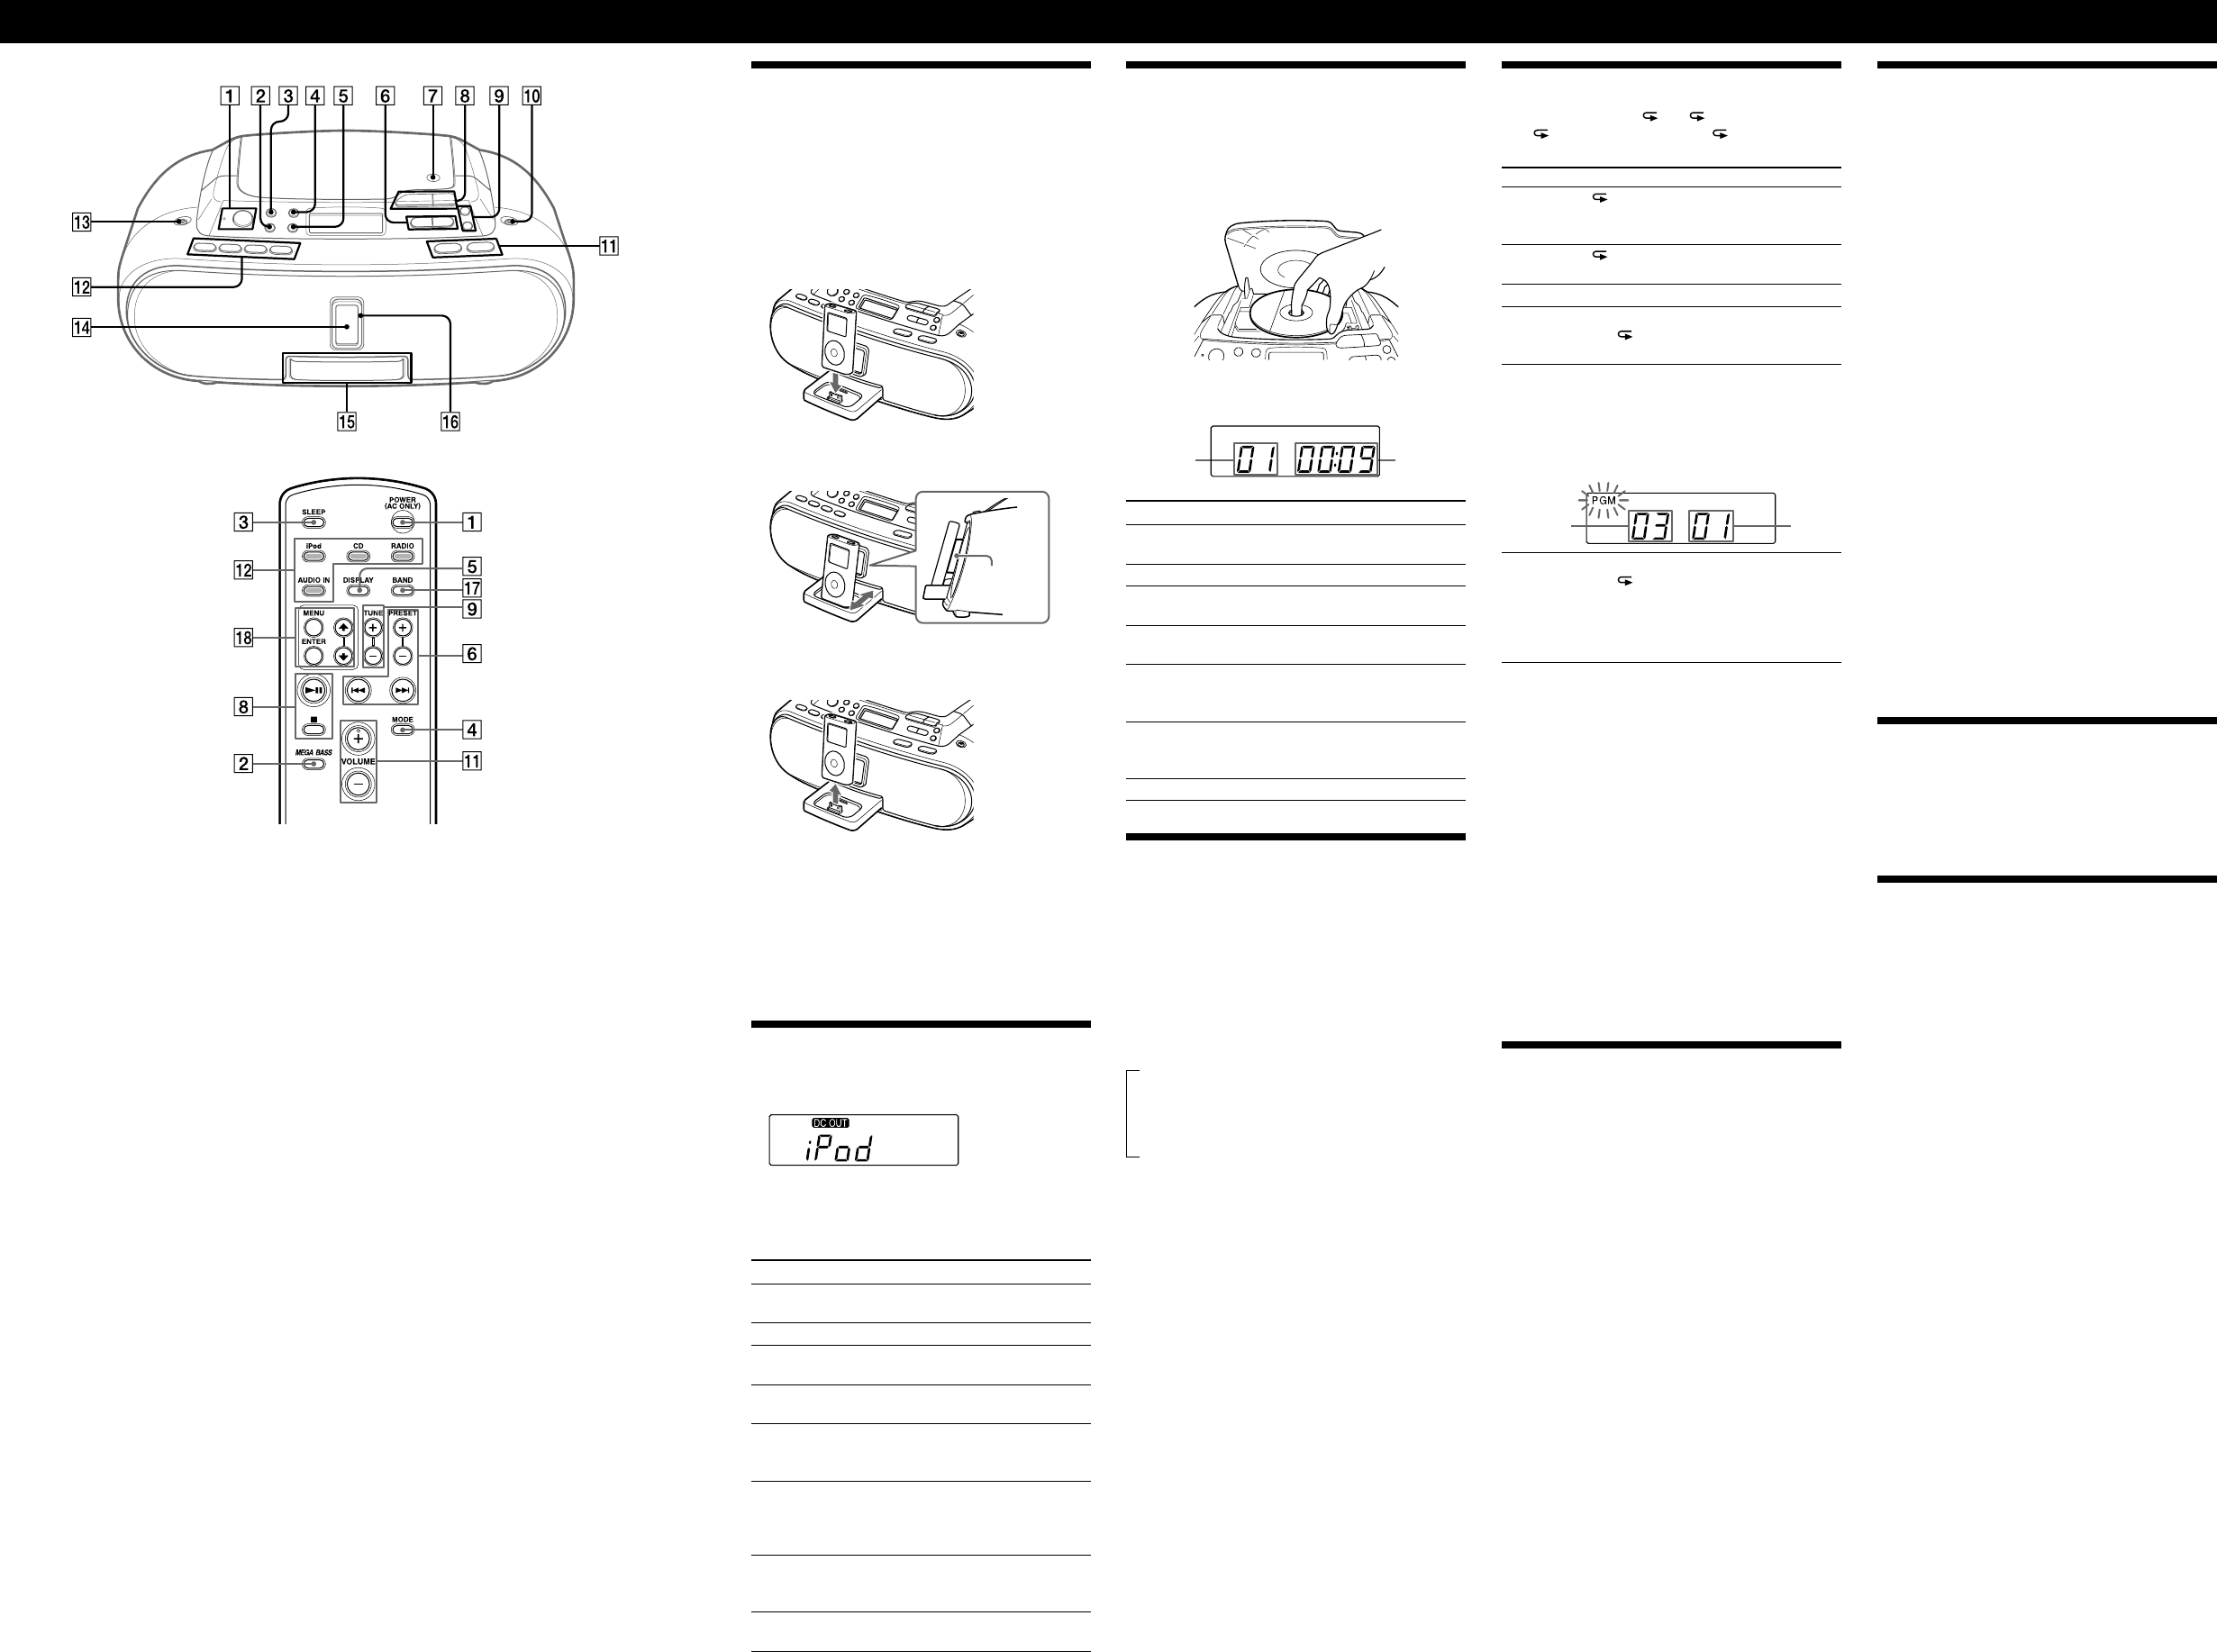
Program
play
“PGM” Press
or
then
press DISPLAY•ENTER
or ENTER
on the remote
for the tracks (up to 20) you
want to program in the order
you want. Then press
.
Programed
track
Playing
order
Repeat
programed
tracks
“PGM”
and “ ”
Press
or
then
press DISPLAY•ENTER
or ENTER
on the remote
for the tracks (up to 20) you
want to program in the order
you want. Then Press
.
To cancel the selected play mode
Press MODE
repeatedly until the selected mode
disappears from the display.
To check the programed track and playing
order in the display
To check the order of tracks before play, press
DISPLAY•ENTER
or ENTER
on the remote.
Every time you press the button, the track number
appears in the programed order.
To change the current program
Press
once if the CD is stopped and twice if the
CD is playing. The current program will be erased.
Then create a new program following the programing
procedure.
Tip
You can play the same program again, since the program is saved
until you open the CD compartment.
Listening to the radio
1 Press RADIO•BAND•AUTO PRESET
repeatedly (direct power-on) or press RADIO
and press BAND
repeatedly on the remote.
Each time you press the button, the indication
changes as follows:
“FM” “AM”
2 Hold down TUNE + or –
until the frequency
digits begin to change in the display.
The player automatically scans the radio frequencies
and stops when it finds a clear station.
If you can’t tune in a station, press the button
repeatedly to change the frequency step by step.
When an FM stereo broadcast is received, “ST”
appears.
Tips
• If the FM broadcast is noisy, press MODE
until “Mono” appears
in the display and the radio will play in monaural.
• If you touch or operate an iPod connected to this unit while
listening to AM/FM, noise may occur. Avoid touching or operating
the iPod in this case.
• If you hear noise from the AM/FM while supplying power to
iPod (“DC OUT” indicator appears in the display), press and hold
MODE for a few seconds to stop the power supply to the iPod (“DC
OUT” indicator disappears from the display).
Presetting radio stations
You can store radio stations into the player’s memory.
You can preset up to 30 radio stations, 20 for FM and 10
for AM in any order.
1 Press RADIO•BAND•AUTO PRESET
or
BAND
on the remote to select the band.
2 Hold down RADIO•BAND•AUTO PRESET
or RADIO
on the remote for 2 seconds until
“AUTO” flashes in the display.
3 Press DISPLAY•ENTER
or ENTER
on the
remote.
The stations are stored in memory from the lower
frequencies to the higher ones.
If a station cannot be preset automatically
You need to preset a station with a weak signal
manually.
1 Press RADIO•BAND•AUTO PRESET
or
BAND
on the remote to select the band.
2 Tune in a station you want.
3 Hold down DISPLAY•ENTER
or ENTER
on the remote for 2 seconds until the preset
number flashes in the display.
4 Press PRESET + or –
until the preset number
you want for the station flashes in the display.
5 Press DISPLAY•ENTER
or ENTER
on the
remote.
The new station replaces the old one.
Tip
The preset radio stations remain in memory even if you unplug the
AC power cord or remove the batteries.
Playing preset radio stations
1 Press RADIO•BAND•AUTO PRESET
or
BAND
on the remote to select the band.
2 Press PRESET + or –
to tune in the stored
station.
Connecting optional components
You can enjoy the sound from an optional component
such as a portable digital music player through the
speakers of this unit. Be sure to turn off the power of
each component before making any connections. For
details, refer to the instruction manual of the component
to be connected.
1 Connect the AUDIO IN jack
on the unit to
the line output jack of the portable digital music
player or other components using an audio
connecting cable (not supplied).
2 Turn the unit and the connected component on.
3 Press AUDIO IN
and start playing sound on
the connected component.
The sound from the connected component is output
from the speakers.
To connect the unit to a TV or VCR, use an extension
cable (not supplied) with a stereo-mini jack on one
end and two phono plugs on the other end.
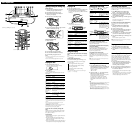
Playing a CD
1 Press CD
(direct power-on).
2
Press PUSH OPEN/CLOSE
and place a disc
with the label side up in the CD compartment.
To close the CD compartment, press PUSH OPEN/
CLOSE
.
3 Press
.
The player plays all the tracks once.
Track
number
Playing
time
To Press
Pause playback
To resume play, press it again.
Stop playback
Go to the next
track
Go back to the
previous track
Locate a point
while listening to
the sound
(forward) or
(backward)
while playing and hold it until
you find the point.
Locate a point
while observing
the display
(forward) or
(backward)
in pause and hold it until you
find the point.
Remove the CD
PUSH OPEN/CLOSE
Using the display
To check the total track number and playing
time
In stop mode, press DISPLAY•ENTER
or DISPLAY
on the remote.
To check the remaining time
Press DISPLAY•ENTER
or DISPLAY
on the
remote repeatedly while playing a CD. The display
changes as follows:
The current track number and playing time
The current track number and the remaining
time of the current track*
The number of tracks left and remaining
time on the CD
* For a track whose number is more than 20, the remaining time
appears as “- -:- -” in the display.
Back
Support