


2
Select the group you want.
Press (Clock and calendar), (Slideshow), (Index), or
(Single) on the remote. Or press to move the cursor to
group area and then press on the photo frame to select the
group you want.
Tips
The image illustration is the view mode screen of the clock and calendar. Slideshow, index, and single
has each view mode screen.
3
Select the style you want.
Press to select the style you want, the press .
Let's use various functions
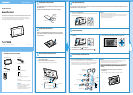
The displaying screen
Refer to “Changing the display” on the operating instruction.
Clock and Calendar display
Note
You cannot perform the setting operation of the menu when you display the clock and calendar display.
Slideshow
Tips
The playback order of the images is same as the one you selected in [Listing Order] on [General Settings].
Refer to the “Changing the settings” in the operating instructions.
When you select [Time Machine] in a slideshow mode (DPF-D72 only), the day when the image is shot or
the day the file was updated is displayed.
Index image display
Tips
The listing order of the images is same as the one you selected in [Listing Order] on [General Settings].
Single view mode
Various function (Setting using the MENU button)
Adding image to the internal memory
Refer to “Adding image to the internal memory” in
the operating instructions.
Auto power on/off
Refer to “Changing the settings of the auto power
on/off function” in the operating instructions.
(This window is displayed only when you are using
DPF-D72.)
Changing the settings
Refer to “Changing the settings” in the operating
instructions.
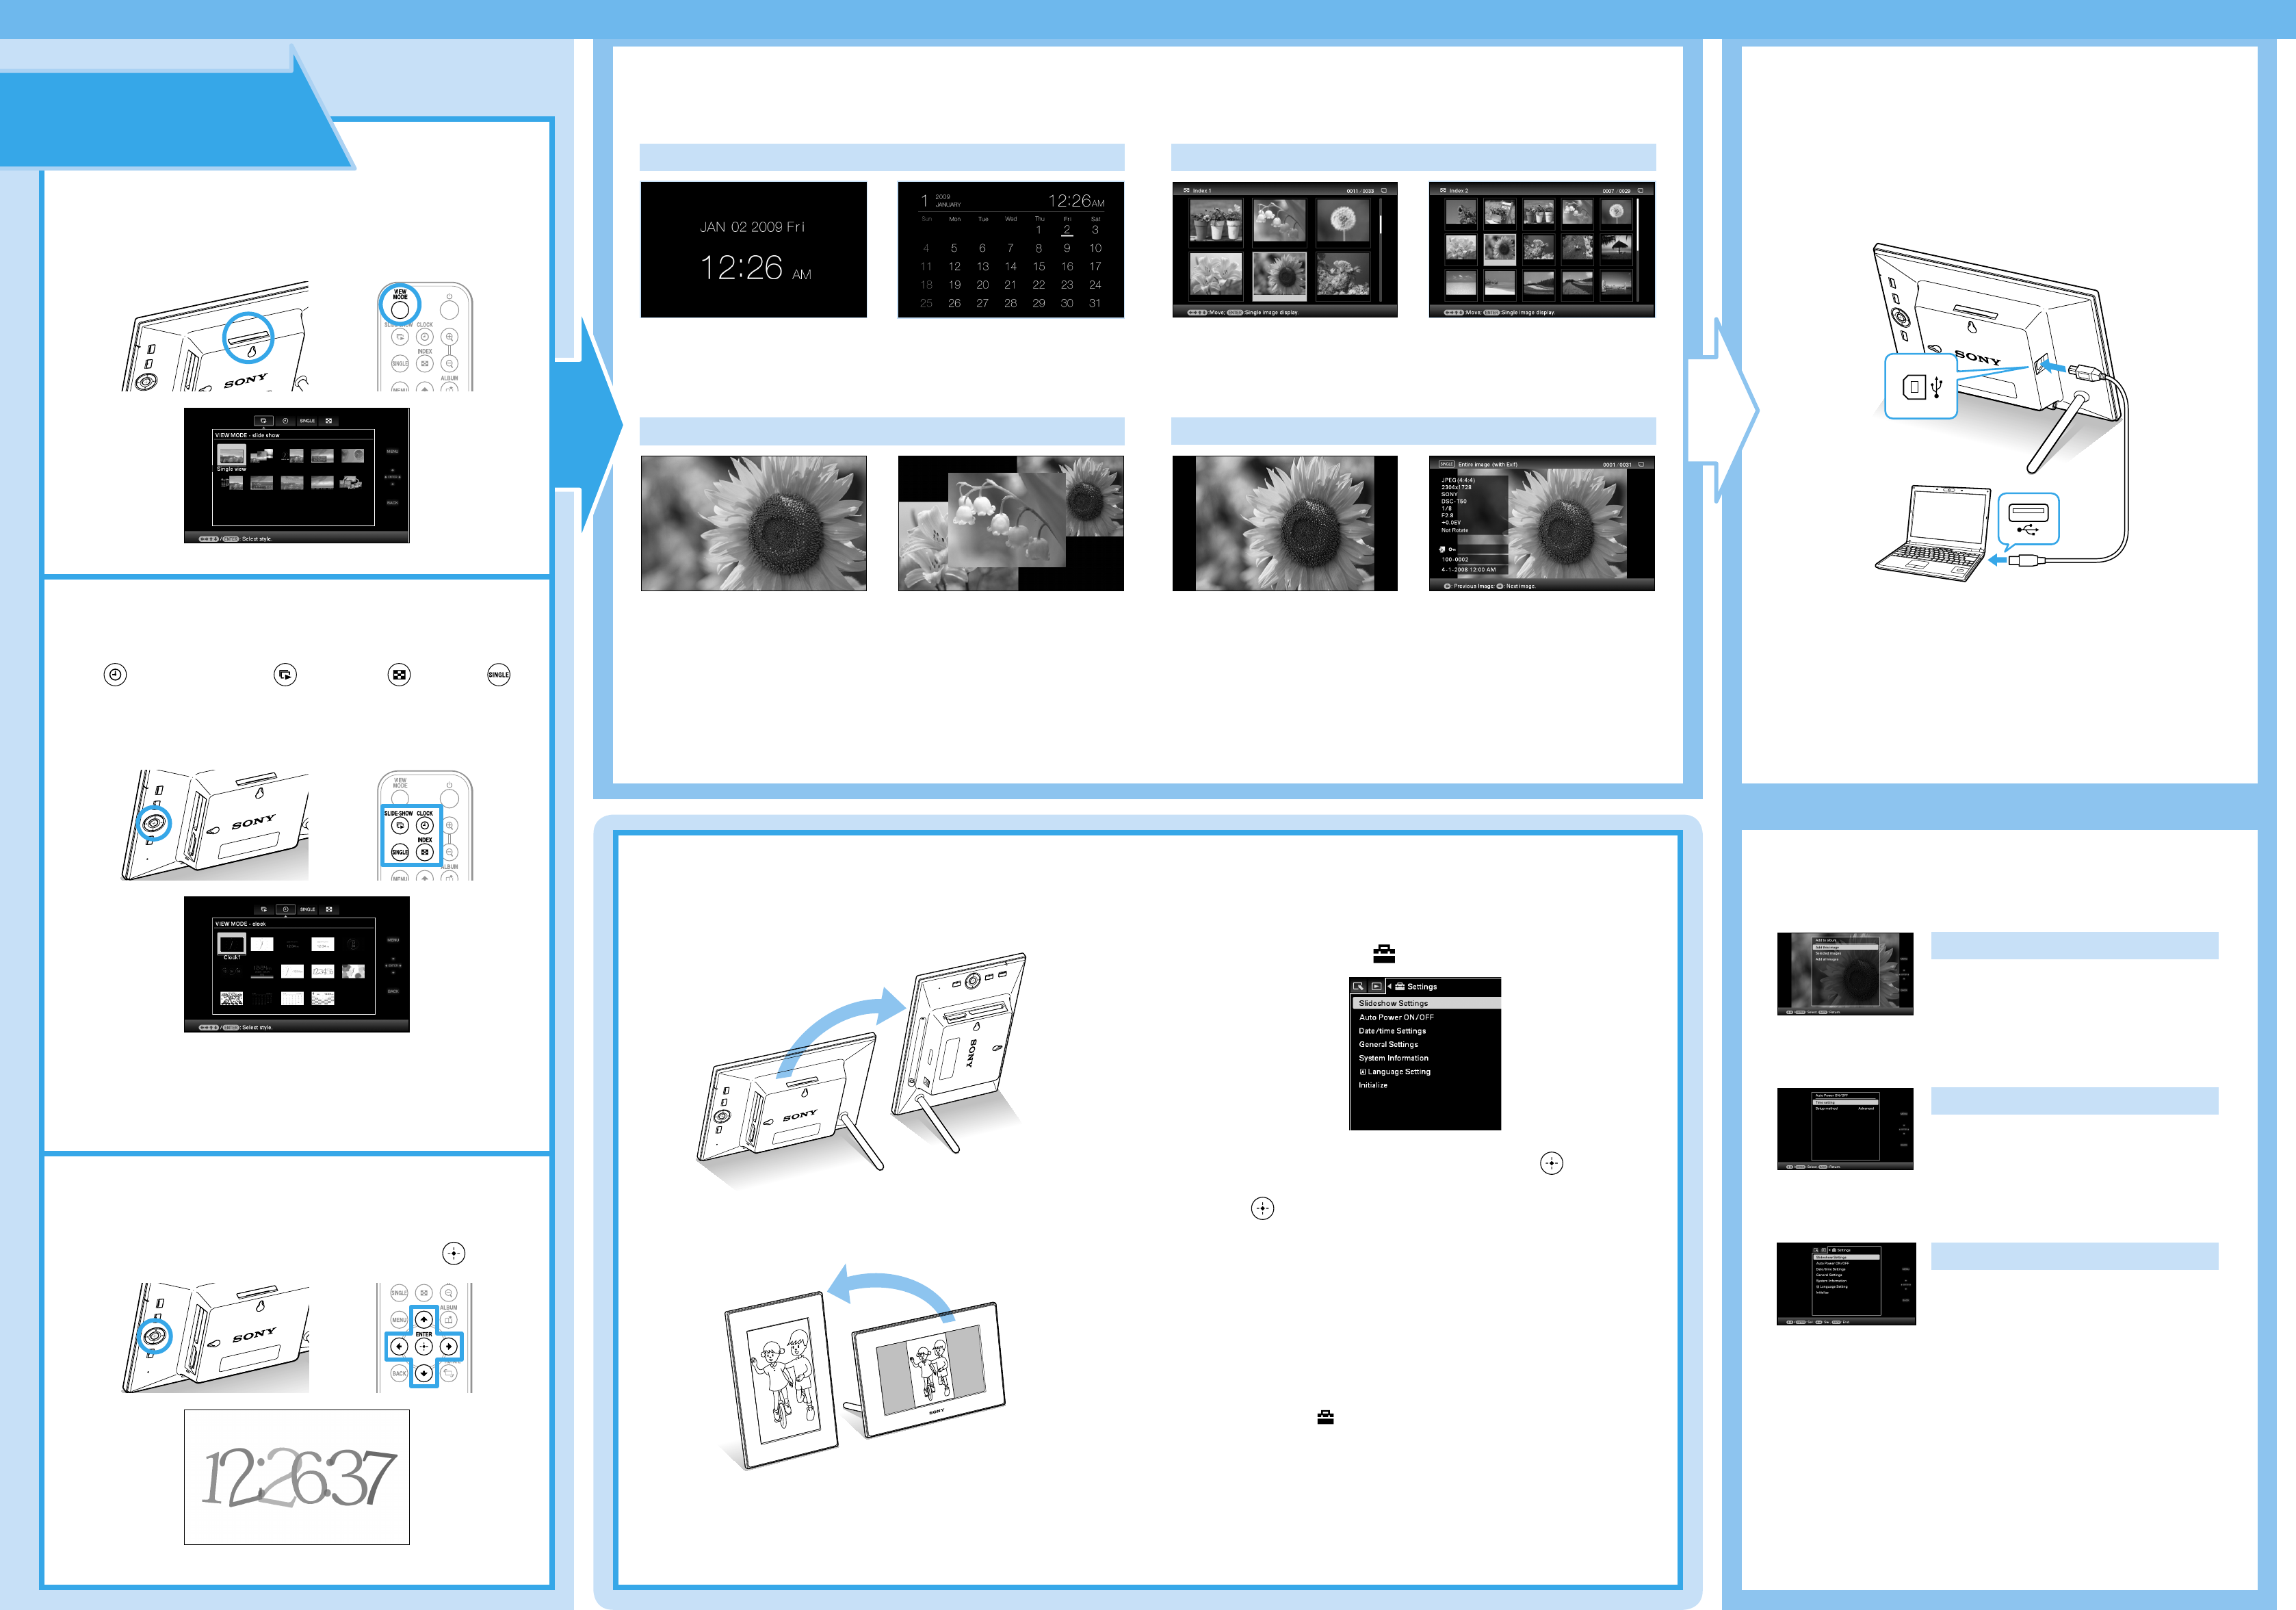
Connecting to a computer
You can connect to a computer to view and copy images from the
internal memory of the photo frame to the computer, and copy
images from the computer to the photo frame.
Refer to “Connecting to a computer” in the operating instructions.
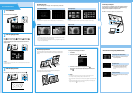
About the display orientation
You can set the photo frame to portrait or landscape orientation by rotating it without
moving the stand. You can also use this function when you display the photo frame on
the wall.
When the photo frame is placed in the portrait orientation, the image is also
automatically rotated to its proper orientation.
Setting the Auto display orientation
1
Press MENU.
2
Press to select the (Settings) tab.
3
Press to select [General Settings] and press .
Then press to select [ON] in [Auto display orientation] and
press .
Notes
Check whether the stand is stable. If the stand is not set properly, the photo frame may fall over.
Store the stand in the storage slot when you display the photo frame on the wall.
When the photo frame is rotated to the portrait orientation, the Sony logo doesn't light up (DPF-A72/D72
only).
The photo frame does not detect and rotate the orientation of images when [General Settings]-[Auto
display orientation] on the (Settings) tab is set to [OFF].
1
Press VIEW MODE.
The view mode screen is displayed.