


Setting the clock
1 Plug in the unit.
2 Press and hold CLOCK until the hour
flashes in the display.
The hour starts to flash in the display.
3 Press ALARM/CLOCK + or – repeatedly
to set the hour.
4 Press CLOCK.
5 Repeat steps 3 and 4 to set the minute,
and then press CLOCK.
The seconds start incrementing from zero.
Notes
If you do not press any button for about 1
minute while setting the clock, the clock setting
will be canceled.
When pressing any of the rear buttons, hold the
unit firmly to prevent slippage.
To change the display to the daylight
saving time (summer time) indication
Change the daylight saving time (summer time)
adjustment setting according to the following
procedures.
Press DST/SUMMER TIME.
“ ” appears in the display and the time indication
changes to the daylight saving time (summer
time).
To deactivate the daylight saving time (summer
time) adjustment, press DST/SUMMER TIME
again. “ ” disappears.
Setting the brightness
of the display
Four levels of brightness are available by pressing
SNOOZE/BRIGHTNESS.
Playing the radio
There are two ways to tune.
To switch between the two tuning methods
(manual tuning or preset), press TUNE MODE/
ENTER MEMORY.
Auto preset
You can preset 20 stations for FM.
1 Press FM to turn on the radio.
2 Press and hold FM until “AP” appears in
the display.
3 Press TUNE MODE/ENTER MEMORY.
The unit automatically presets the available
channels in order.
If a station cannot be preset
automatically
You need to preset a station with a weak signal
manually.
1 Follow steps 1 and 2 in “Manual tuning
mode” to tune the frequency you wish to
preset.
2 Press and hold TUNE MODE/ENTER
MEMORY for preset number until the
flashes.
3 Press TUNE/PRESET or to
select the preset number, then press
TUNE MODE/ENTER MEMORY.
The frequency is stored with the selected
preset number.
Example: The following display appears
when you preset FM 105.7 MHz to preset
number 2 for FM.
The display shows the frequency for about 10
seconds, and then returns to the current time.
To preset another station, repeat these steps.
Note
If you try to store another station with the same
preset number, the previously stored station will
be replaced.
Preset tuning mode
1 Press FM to turn on the radio.
Check that the preset mode is selected.
2 Press TUNE/PRESET or to
select the desired preset number.
3 Adjust the volume using
VOLUME + or –.
Manual tuning mode
1 Press FM to turn on the radio.
Check that the manual tuning mode is
selected.
2 Press TUNE/PRESET or to
tune in to a desired frequency.
3 Adjust the volume using
VOLUME + or –.
Tuning in to a station
The unit automatically scan FM stations.
1 Press FM to turn on the radio.
Check that the manual tuning mode is
selected.
2 Press and hold TUNE/PRESET or
.
: scans upward through the frequency
bands.
: scans downwards through the
frequency bands.
Scanning starts from the currently-tuned
frequency. When a station is received,
scanning stops.
3 Adjust the volume using
VOLUME + or –.
Improving the
reception
FM: Extend the FM wire antenna fully to increase
reception sensitivity.
Notes on radio reception
Keep digital music players or mobile phones
away from the FM antenna, as this may lead to
reception interference.
When you are listening to the radio with an
iPhone connected to the unit, interference with
radio reception may occur.
When you are listening to the radio while
charging an iPod, interference with radio
reception may occur.
Do not place the FM antenna close to the AC
power adaptor as noise may result.
Playing an iPod
You can enjoy audio from iPod by connecting to
this unit. To use an iPod, refer to the user’s guide
of your iPod.
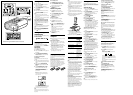
If you are using an iPhone, iPhone 3G, iPhone
3GS or iPhone 4, attach the supplied universal
dock adapter for iPhone, iPhone 3G, iPhone 3GS
or iPhone 4 before connecting.
The adapter number, , or , is shown on
the bottom-rear of the supplied universal dock
adapters. is for the iPhone, is for the iPhone
3G & iPhone 3GS and is for the iPhone 4.
Check the adapter number before use.
Universal dock adaptor
Notes
When inserting an iPod into the unit, be sure to
use the universal dock adaptor supplied with
your iPod or commercially available from
Apple Inc.
The connector of the unit is exclusively for use
with an iPod.
Sony cannot accept responsibility in the event
that data recorded on an iPod is lost or
damaged when using an iPod connected to this
unit.
For details of environmental conditions for
operating your iPod, check the website of Apple
Inc.
1 Attach the adaptor for your iPod/iPhone.
2 Insert your iPod/iPhone into the
connector of the unit.
3 Press iPod & iPhone .
The iPod begins to play automatically.
You can operate the connected iPod by this
unit or the buttons on iPod.
4 Adjust the volume using VOLUME + or
–.
To Press
Turn off the iPod
OFF, or press and
hold iPod &
iPhone
Pause playback
iPod & iPhone
To resume play,
press it again.
Go to the next track
Go back to the previous
track
*
Locate a point while
listening to the sound
(forward) or
(backward)
while playing and
hold it until you
find the point.
Locate a point while
observing the display
(forward) or
(backward)
in pause and hold
it until you find
the point.
* During playback, this operation goes back to
the beginning of the current track. To go back
to the previous track, press twice.
Notes
When placing or removing the iPod, hold the
iPod at the same angle as that of the connector
on this unit, and do not twist or bend the iPod
as connector damage may result.
Do not carry the unit with an iPod set on the
connector. Doing so may cause a malfunction.
When placing or removing the iPod, hold the
iPod firmly so as not to topple the unit.
Before disconnecting the iPod, pause playback.
To use the unit as a battery charger
You can use the unit as a battery charger.
Charging begins when the iPod is connected to
the unit.
Charging status appears in the display of iPod. For
details, see the user’s guide of your iPod.
On copyrights
iPhone, iPod, iPod classic, iPod nano, and iPod
touch are trademarks of Apple Inc., registered in
the U.S. and other countries.
“Made for iPod,” and “Made for iPhone” mean
that an electronic accessory has been designed to
connect specifically to iPod or iPhone,
respectively, and has been certified by the
developer to meet Apple performance standards.
Apple is not responsible for the operation of this
device or its compliance with safety and
regulatory standards. Please note that the use of
this accessory with iPod or iPhone may affect
wireless performance.
Setting the alarm
This clock radio is equipped with 3 alarm
modes—iPod, radio and buzzer. Before setting the
alarm, make sure to set the clock (see “Setting the
clock”).
To set the alarm
1 Press and hold ALARM SET.
“WAKE-UP” appears, and the hour flashes in
the display.
2 Press ALARM/CLOCK + or – repeatedly
until the desired hour appears.
To cycle the hour rapidly, press and hold
ALARM/CLOCK + or –.
3 Press ALARM ON/OFF.
The minute flashes.
4 Repeat step 2 to set the minute.
5 Press ALARM ON/OFF.
The alarm mode setting is entered.
6 Press ALARM/CLOCK + or – repeatedly
until the desired alarm mode flashes.
You can choose one of 3 settings: “iPod”, “FM”
or “BUZZER.” Set the alarm mode as follows:
– iPod: see “ Setting the alarm for iPod.”
– FM: see “ Setting the radio alarm.”
– BUZZER: see “ Setting the buzzer alarm.”
Setting the alarm for iPod
1 Perform steps 1 to 6 in “To set the
alarm.”
2 Press ALARM ON/OFF to select alarm
mode for “iPod”.
“VOL” appears in the display.
3 Press ALARM/CLOCK + or – to adjust
the volume.
4 Press ALARM ON/OFF.
The setting is entered.
5 If “ALARM” does not appear in the
display, press ALARM ON/OFF again.
The iPod will sound at the set time.
When using an iPod touch/iPhone
To wake up to music stored in an iPod touch/
iPhone, connect the iPod touch/iPhone to the
unit first, follow the steps above to set alarm
time, and then select the music function.
Even if the alarm setting for iPod is complete, if
you turn the power of iPod touch/iPhone off
before inserting the iPod touch/iPhone into the
unit, the alarm for iPod will not work.
Setting the radio alarm
1 Perform steps 1 to 6 in “To set the
alarm.”
2 Press ALARM ON/OFF to select “FM”
alarm mode.
“FM”, “PRESET” number or “– –” flashes.
“– –” is the last station received.
3 Press ALARM/CLOCK + or – to select
the desired preset number or “– –”.
4 Press ALARM ON/OFF.
“VOL” appears in the display.
5 Press ALARM/CLOCK + or – to adjust
the volume.
6 Press ALARM ON/OFF.
7 If “ALARM” does not appear in the
display, press ALARM ON/OFF again.
The radio will turn on at the set time.
Setting the buzzer alarm
1 Perform steps 1 to 6 in “To set the
alarm.”
2 Press ALARM ON/OFF to select
“BUZZER” alarm mode.
The setting is entered.
3 If “ALARM” does not appear in the
display, press ALARM ON/OFF again.
The buzzer will sound at the set time.
Note
The volume cannot be set for the buzzer alarm.
To confirm an alarm time setting
Turn off the “ALARM” indicator in the display,
and press the ALARM ON/OFF button once.
To change an alarm setting
Set the alarm again.
To doze for a few more minutes
Press SNOOZE/BRIGHTNESS.
The sound turns off but will automatically come
on again after about 10 minutes.
You can change the snooze time by pressing
SNOOZE/BRIGHTNESS repeatedly within
4 seconds.
The maximum length of the snooze time is
60 minutes.
To stop the alarm
Press ALARM RESET OFF to turn off the alarm.
The alarm will sound again at the same time the
next day.
To deactivate the alarm
Press ALARM ON/OFF to turn off the “ALARM”
indicator from the display.
Note on the alarm in the event of a power
interruption
In the event of a power interruption, the alarm
will work until the battery is totally discharged.
However, certain functions will be affected as
follows:
The backlight will not light up.
If the alarm mode is set to iPod or radio, it will
change to BUZZER automatically.
If a power interruption occurs while the alarm
is sounding, the alarm will stop.
If ALARM RESET OFF is not pressed, the
alarm will sound for about 5 minutes.
If “
” appears in the display, the alarm will
not sound in the event of power interruption.
Replace the battery if “
” appears.
The snooze function will not work.
During a power interruption, the alarm will
sound at the set time only once.
Setting the sleep timer
You can fall asleep to the music, etc., using the
built-in sleep timer that turns off the unit
automatically after a preset duration.
1 Press SLEEP while the unit is turned on.
“SLEEP” appears and the sleep time flashes in
the display.
2 Press SLEEP to set the sleep timer
duration.
Each time you press SLEEP, the duration (in
minutes) changes as follows:
90 60 30 15
OFF
The display returns to clock mode for about
4 seconds after you have finished the duration
setting and released SLEEP, and then the sleep
timer starts.
The unit will play for the duration you set, and
then shut off.
To turn off the unit before the preset
time
Press ALARM RESET OFF.
To change the sleep timer setting
You can press SLEEP repeatedly to select the
desired sleep timer setting even after the sleep
timer has been activated.
To deactivate the sleep timer
Press SLEEP repeatedly to set the sleep timer to
“OFF” in step 2.
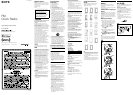
The iPod & iPhone and VOLUME + buttons have a tactile dot.
AC power
adaptor
FM wire antenna