8
7
MP3 Player
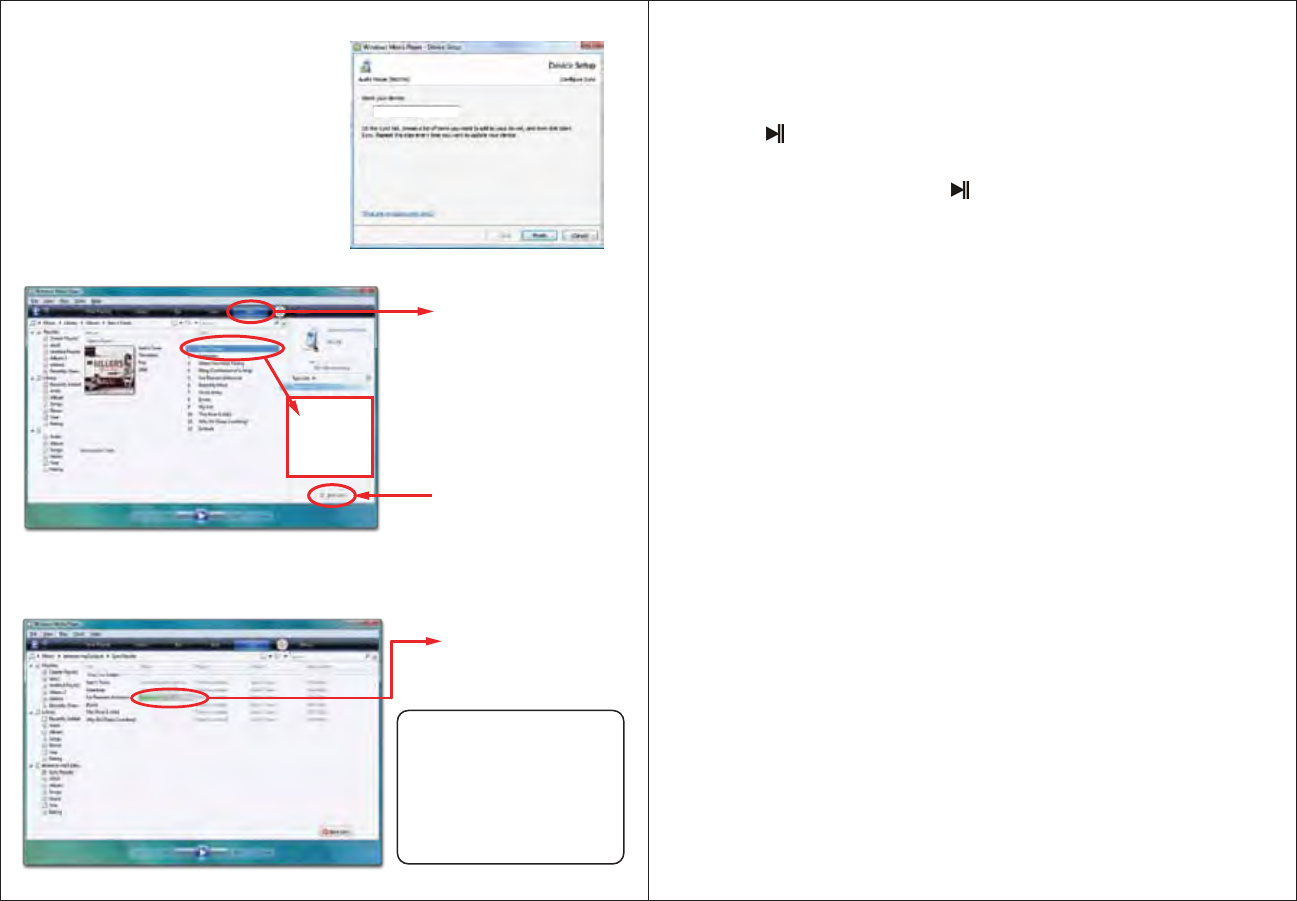
Getting music on your MP3 Player using Windows Media Player 11
1. Open Windows Media Player.
2. Windows Media Player will display the
music that you have on your computer
(you will need to search for your music
files if they are not located in the default
folder).
3. Connect your MP3 Player to the USB
port of the computer.
4. Click on the “Sync” tab.
5. To easily identify your player within
Windows Media Player, name it in the
“Device Setup” screen.
“Device Setup” window
6. Drag the songs you would like to sync to your MP3 Player, and click on the
“Start Sync” button.
7. The selected songs will sync to your MP3 Player.
“Sync” Tab
Click on “Start Sync”
Drag your
songs here
Sync in Progress
You may also transfer music
files by dragging / copying
them directly into your player.
See “Transferring media
files to the player” on
page 4.
Music
Store and playback music on your MP3 Player. See “Transferring media files to
the player” (page 4) to transfer songs to the MP3 Player
1. Select “Music” from the main menu, and press the [ ] button.
2. Press the [ ] button to
While playing music you can:
● Pause/Resume Playing: Press the [
] button to pause or resume playback.
● Skipping Tracks: Use the [
] or [
] button to skip to the previous or next
track.
● Adjust Volume: Press the [ ] or [ ] to decrease or increase the volume.
● Main Menu: Press and HOLD the [ ] button to return to the main menu.
Using the music menu
While the music is in the STOP MODE, press the [ ] button to access Music
Menu #1.
1. Use the [
] or [] button to select among “Local folder”, “Delete”,
“Delete all”, or “Exit”.
2. Press the [ ] button to enter, and confirm your selections.
● Local folder: Display all of the files in the local disk.
● Delete: Delete the current file.
● Delete all: Delete all of the files in the current folder.
● Exit: Return to the main music screen.
V-
V
+
M
begin playback.
M
M
M
● Press and Search backward or forward:
HOLD
[
] or [
] buttons.
