


®ÂØÒňÎ
®
VS-880
Digital Audio Workstation
Supplemental
Notes
March 17, 1998
© 1998 Roland Corporation U.S. Connecting Multiple VS-880s - V-Xpanded Page 1 of 5
Connecting Multiple VS-880s — V-Xpanded
The ability to synchronize multiple VS-880s allows you to greatly expand your recording environment. You gain additional
tracks, inputs, effects, and more while maintaining the incredible sound quality, compatibility, and user interface that the
VS-880 provides. Think about the possibilities of owning two VS-880s: 16 tracks for playback, 128 Virtual Tracks, 4 digital
stereo effects processors (with two optional VS8F-1s), and 28 channels of automated mixing. This document will explain
how to connect multiple VS-880s so that they play in sync with each other and the audio from both VS-880s is monitored
from the master unit. There are different methods for synchronizing VS-880s, depending on the number of VS-880s you
are syncing, the mixer mode you are using, and the operating system that you are using. In this document we will show
you how to synchronize multiple VS-880s using two different methods: MIDI Time Code (MTC) and MIDI Machine
Control/Digital Clock. We will begin by explaining how this is accomplished with VS-880s using the V-Xpanded (2.xx and
higher) operating system. Then, we will explain the same procedures for VS-880 owners using a pre-expanded (1.xx)
operating system.
I. Connecting Two VS-880s (V-Xpanded Version 2.xx and Higher)
The following section will explain the procedure for synchronizing two VS-880s that use the V-Xpanded (2.xx and higher)
operating system. We will use MIDI Time Code (MTC) to synchronize the two VS-880s and we will route the audio from
the slave VS-880’s digital output to the master VS-880’s digital input so that the audio from both VS-880s is sent through
e mix output of the master VS-880.
th
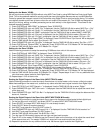
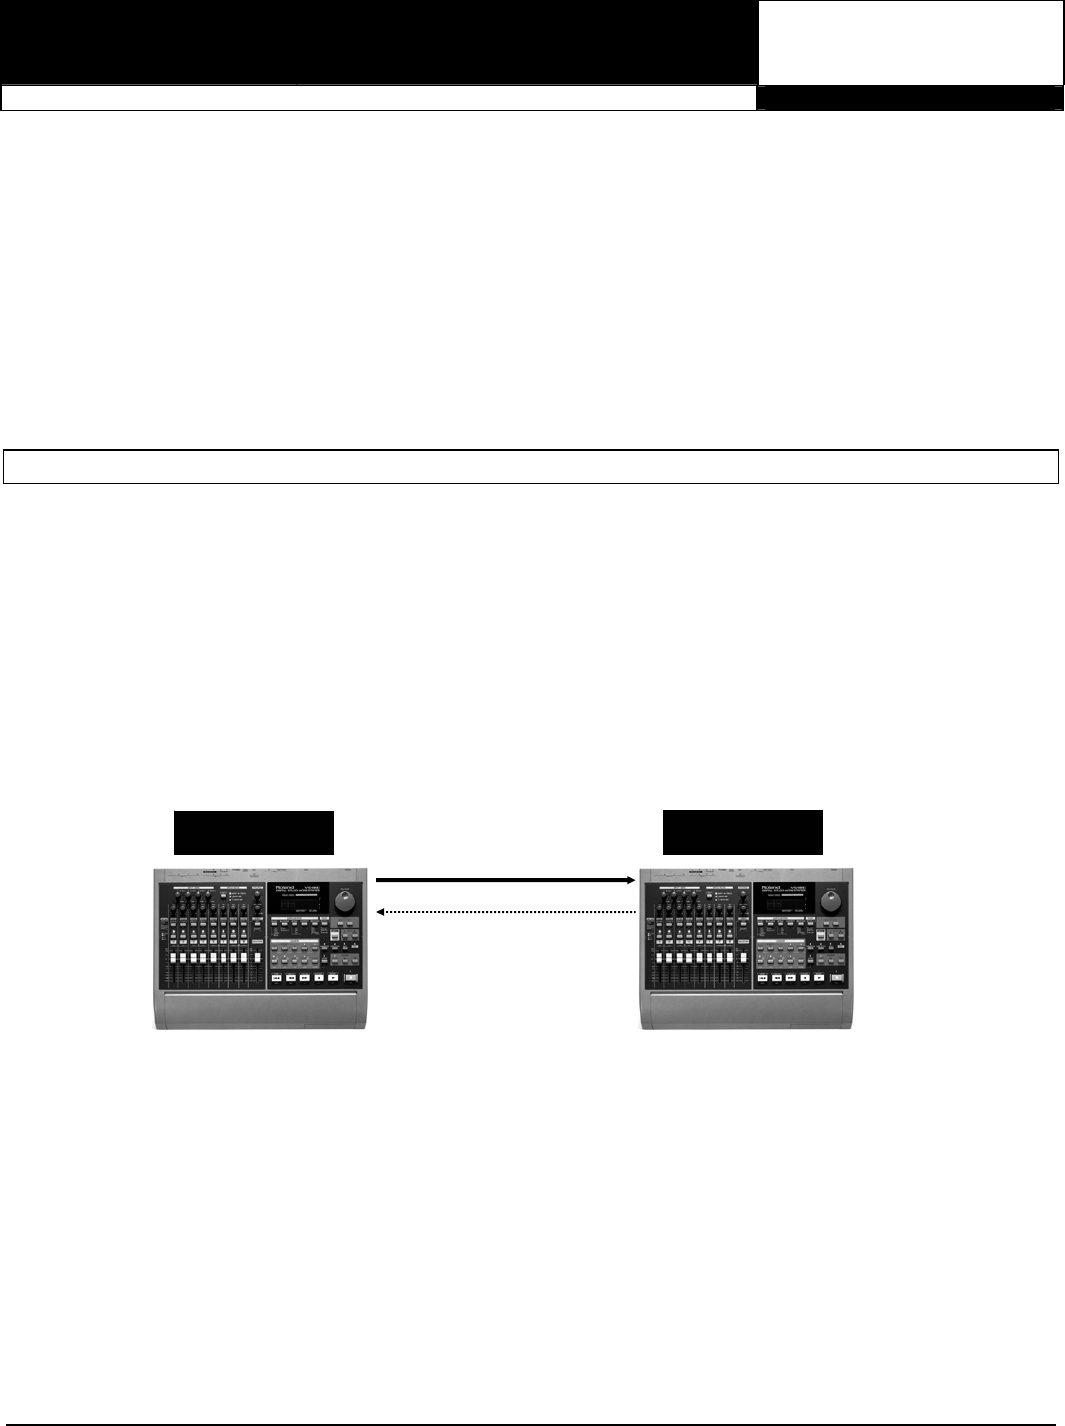
Connections
1) Connect the MIDI OUT port of the master VS-880 to the MIDI IN port of the slave.
2
) Connect the Digital output of the slave VS-880 to the Digital input of the master.
NOTE: Make sure that both VS-880s are powered on and that the current song’s sampling rate (48kHz,
44.1kHz, or 32kHz) is the same on both units. If you are unsure what the current song’s sampling rate is set to, press
PLAY/DISPLAY to access the Play screen (if necessary). Then, hold SHIFT and press SONG. The sampling rate will
be displayed under “SYNC MODE.” The sampling rate is linked to the song. If the sampling rates do not match, you will
need to create a new song on one of the VS-880s with a sampling rate that matches the other unit.
Slave Unit
Master Unit
MIDI IN
MIDI OUT
Digital Out
Digital In
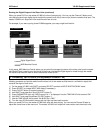
Settings for the Master VS-880
One of the easiest ways to sync two VS-880s together is to designate one of them as the master unit sending MIDI
Time Code and the other unit as the slave set to external sync. Use the following procedure to setup a VS-880 as a
master device in this scenario.
1) Press SYSTEM until “MIDI PRM?” is displayed. Press YES/ENTER.
2) Press PARAMETER right until “MIDI Thru” is displayed. Use the TIME/VALUE dial to select “MIDI Thru = Out.”
3) Press PARAMETER right until “SysEx Tx” is displayed. Use the TIME/VALUE dial to select “SysEx Tx = On.”
4) Press PARAMETER right until “MMC” is displayed. Use the TIME/VALUE dial to select “MMC = MASTER.”
5) Press PARAMETER right until “CtrLocal” is displayed. Use the TIME/VALUE dial to select “CtrLocal = On.”
6) Press PARAMETER right until “CtrType” is displayed. Use the TIME/VALUE dial to select “CtrType = Off.”
7) Press SYSTEM until “Sync/Tempo PRM?” is displayed.
8) Press YES/ENTER and “Syn:Source” will be displayed. Use the TIME/VALUE dial to select “Syn:Source = INT.”
9) Press PARAMETER right until “Syn:Gen” is displayed. Use the TIME/VALUE dial to select “Syn:Gen = MTC.”
10) Press SYSTEM until “System PRM?” is displayed. Press YES/ENTER and “SYS Master Clk” will be displayed.
1
1) Use the TIME/VALUE dial to select “SYS Master Clk = DIGITL.”