


EN
EN
What your warranty covers:
• Defects in materials or workmanship.
For how long after your purchase:
• One year from date of purchase.
The warranty period for rental units begins with the first rental or 45 days from date of shipment to the
rental firm, whichever comes first.
What we will do:
• Provide you with a new, or at our option, a refurbished unit. The exchange unit is under warranty for
the remainder of the original product’s warranty period.
• Proof of purchase in the form of a bill of sale or receipted invoice which is evidence that the product
is within the warranty period must be presented to obtain warranty service. For rental firms, proof of
first rental is also required.
How to make a warranty claim:
• Properly pack your unit. Include any cables, etc., which were originally provided with the product.
We recommend using the original carton and packing materials.
• Include evidence of purchase date such as the bill of sale. Also print your name and address and a
description of the defect. Send via standard UPS or its equivalent to:
Thomson Inc.
Product Exchange Center
11721 B Alameda Avenue
Socorro, Texas 79927
• Insure your shipment for of loss or damage. Thomson accepts no liability in case of damage or loss en
route to Thomson.
• Pay any charges billed to you by the Exchange Center for service not covered by the warranty.
• A new or refurbished unit will be shipped to you freight prepaid.
What your warranty does not cover:
• Customer instruction. (Your Owner’s Manual provides information regarding operating Instructions
and user controls. For additional information, ask your dealer.)
• Installation and set-up service adjustments.
• Batteries.
• Damage from misuse or neglect.
• Products which have been modified or incorporated into other products.
• Products purchased or serviced outside the USA.
• Acts of nature, such as but not limited to lightning damage.
14
U.S. Warranty
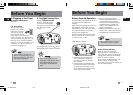
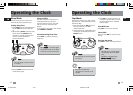
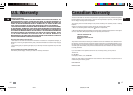
Snooze Alarm Operation
This operation allows extra sleep time
after the alarm is on. The alarm will
be off by pressing SNOOZE until the
snooze period is over. Snooze function
can be used repeatedly up to 2 hours.
After this, the alarm will turn off until
the next alarm conditions are met. Set
the “quiet” period as follow:
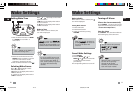
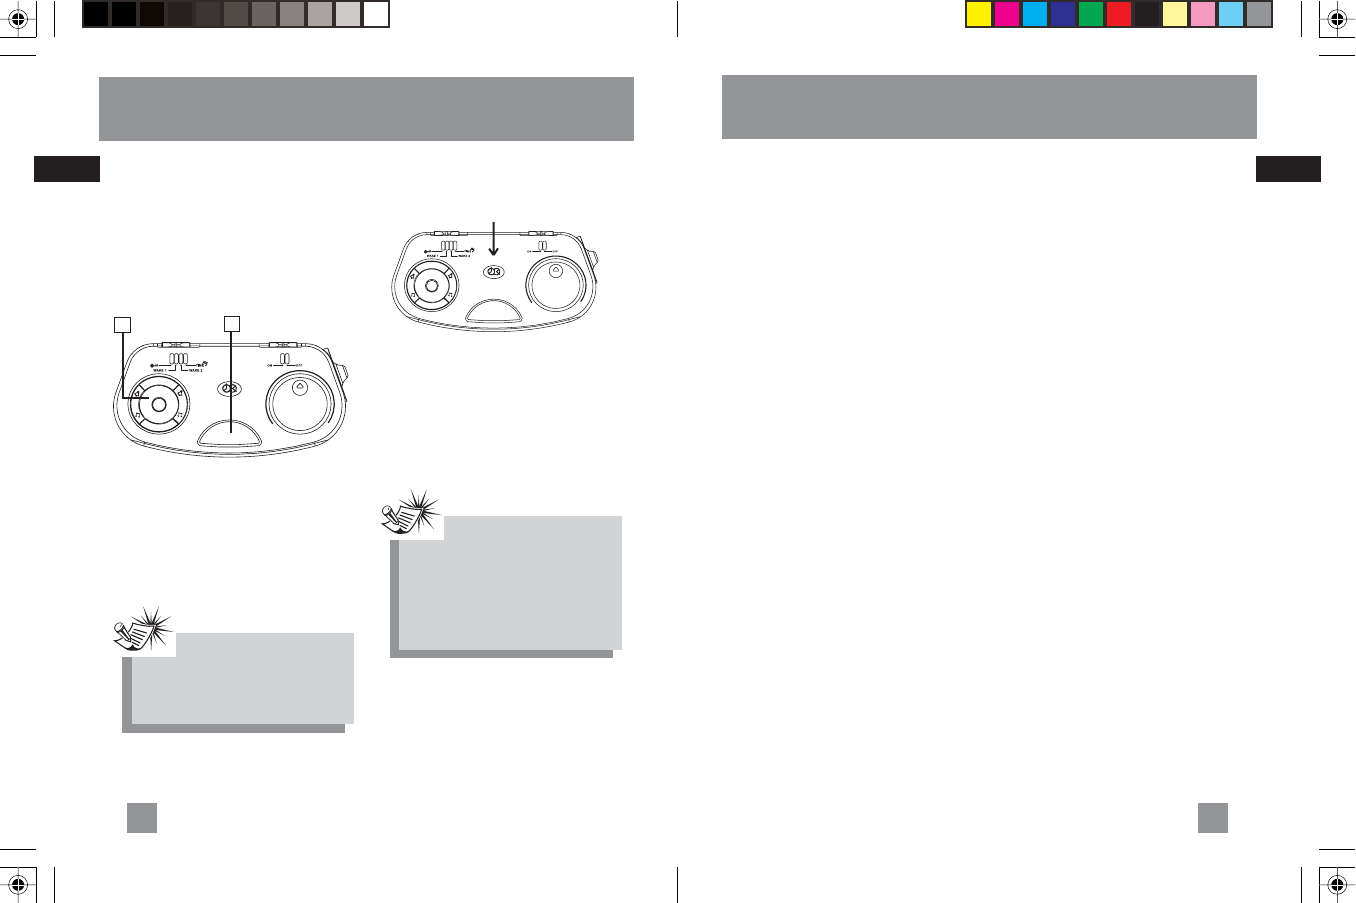
Auto Brightness Control
There is a brightness control sensor
located on the top of the unit.
Slide the AUTO BRIGHTNESS switch to
ON to turn on auto brightness control.
The brightness of the LED display will
vary automatically according to the
environment.
Slide to the OFF position, the display
will remain at its brightest level.
Operating the Clock
15
1
2
ON
OFF
DUAL WAKE
M
I
N
M
A
X
V
O
L
U
M
E
C
O
N
T
R
O
L
C
A
N
C
E
L
S
L
E
E
P
SNOOZE
AUTO BRIGHTNESS
W
A
K
E
W
A
K
E
Note:Note:
Note:Note:
Note:
Avoid putting anything on top of
the unit that causes the sensor
to be covered. If the sensor is
cover, there will be no effect for
Auto Brightness Control even if
it is set to the ON position.
Note:Note:
Note:Note:
Note:
The “quiet” period is from 1
minute to 30 minutes. (the
default time is 9 minutes)
1
2
ON
OFF
DUAL WAKE
M
I
N
M
A
X
V
O
L
U
M
E
C
O
N
T
R
O
L
C
A
N
C
E
L
S
L
E
E
P
SNOOZE
AUTO BRIGHTNESS
W
A
K
E
W
A
K
E
2
1
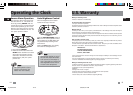
1. Press and hold SNOOZE.
2. Rotate the scroll wheel around the
ON/OFF button clockwise to increase
snooze time and rotate it counter-
clockwise to decrease snooze time.
Release button, then, the “quiet”
period is set.
A_RP3720 EN 3/25/04, 9:21 AM18-19