


Adjust the LCD Screen
You can adjust Brightness, Ratio and Contrast of the LCD screen.
1. Press the VIDEO MODE button.
2. Press the / button to select Brightness, Ratio or Contrast.
3. Press the / button to change the setting.
4. Press the VIDEO MODE button to exit the menu.
This owner’s manual explains the basic instructions for operating this unit. Some DVDs are produced in a
manner that allows specic or limited operation during playback. Therefore, this unit may not respond to
all operating commands. THIS IS NOT A DEFECT. Please refer to the instructions accompanying the specic
DVD in question for more information about the options available on that DVD.
“ ” may appear on the screen during operation. A “ ” means the desired operation is not permitted
by the unit or disc.
Playing a Disc
1. Slide the CHARGE / STANDBY / ON switch on the left side of the unit to the ON position.
See Customizing the function settings before proceeding to step 2.
2. Press the OPEN knob to open the disc door.
3. Hold the disc by its sides and carefully place it onto the spindle with the label side facing up, pushing
gently until you hear a “click”.
4. Close the disc door. It takes a short while for your unit to load the disc. After loading, the unit will
automatically bring you to the main menu of the DVD or start playing the DVD.
5. If the unit does not automatically start playing the DVD, press the P L AY button on the remote control
or button on the unit.
Pausing Playback (Still Mode)
Press the PAUSE button. To resume normal playback, press the PLAY button on the remote control or
button on the unit.
For a DVD, each time you press the PAUSE button on the remote control, the picture advances one frame.
Stopping Playback
Press the STOP button at the location where you want to interrupt playback. To resume playback at the
position where the disc was stopped, press the PLAY button on the remote control or button on the unit.
If you press the STOP button twice, the unit’s memory will be cleared and pressing the PLAY button on the
remote control or button on the unit will reset the DVD to the beginning.
Fast Forward / Fast Reverse
1. Press the SEARCH or SEARCH button when a disc is
playing. Each time you press the SEARCH or SEARCH
button, the playback speed changes in the following
sequence:
2. Press the P LAY button on the remote control or press the button on the unit when you reach the
desired point to resume normal playback.
Note:
• TheDVDplayermutessoundandsubtitlesduringreverseandforwardscanofDVDs.
• Thefastplaybackspeedmaydierdependingonthedisc.
Skip Forward / Reverse
• Pressthe NEXT button to advance titles, chapters/tracks.
• Pressthe PREV button to go back to current or previous titles, chapters/tracks.
• ForanAudioCD,usethenumberbuttonsontheremotecontroltogodirectlytothedesiredtracknumber.
Audio Selection
On some DVDs, the sound is recorded in two or more formats. Follow the directions below to select the preferred
language and sound system.
1. While a disc is playing, press the AUDIO button to show the current
audio format number.
2. Press the AUDIO button repeatedly to select the desired audio format.
Note:
• IfonlyoneaudioformatisrecordedontheDVD,thenumberdoesnotchange.
• SomeDVDsallowyoutochangeaudioselectionsusingthediscmenuonly.Ifthisisthecase,pressthe
MENU button and choose the appropriate language on the disc menu.
• Youcanselectdifferentaudiochannels(Left,Right,MonoorStereo)onanAudioCDbypressingthe
AUDIO button repeatedly.
Subtitle Selection
1. While a DVD is playing, press the SUBTITLE button to display the
current language setting, as shown in the example.
2. Press the SUBTITLE button repeatedly to select the desired subtitle language. You can turn subtitles o by
pressing the SUBTITLE button repeatedly until the “ OFF ” is displayed.
Note:
• SomeDVDsaresettodisplaysubtitlesautomatically,andyoucannotturnthemoffevenifyousetthe
subtitle function to o.
• Duringsomescenes,thesubtitlesmaynotappearimmediatelyafteryouselectyourdesiredscene.
• Thenumberofsubtitlelanguagesrecordeddiersdependingonthedisc.Ifonlyonelanguageisrecorded,
the language does not change.
• Thisfunctioncanonlybeusedfordiscsonwhichsubtitleshavebeenrecordedinmultiplelanguages.
• SomeDVDsallowyoutochangesubtitlesusingthediscmenuonly.Ifthisisthecase,presstheMENU
button and choose the appropriate subtitle on the disc menu.
Angle Selection
Some DVDs contain scenes that have been shot from a number
of dierent angles. For these discs, the same scene can be viewed
from each of these dierent angles.
1. While you are playing a DVD with different angles recorded,
press the ANGLE button to view the number of current angles
available.
2. Press the ANGLE button repeatedly to change the scene to the
next recorded angle.
• Afterapprox.twoseconds,playbackwillcontinue
from the new angle selected.
• Ifnobuttonispressedwithin10seconds,playback
continues without changing the current angle.
Note:
This function can only be used for discs on which scenes
shot from multiple angles have been recorded.
Display Function
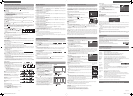
While the disc is playing, press the DISPLAY button
repeatedly to display information on operation status.
Elapsed Time:
Elapsed time from the beginning of the chapter/title
which is currently playing.
Remaining Time:
Remaining time of the chapter/title which is currently
playing.
Playing a Disc (Basic Playback)
[ 1 ENGLISH ]
[ 1 ENGLISH D5.1CH ]
E - 5
You can play a specic DVD title or chapter repeatedly (title repeat, chapter repeat, A-B repeat).
Repeating a Chapter
1. While the DVD is playing, press the REPEAT DISC button until the “ Repeat Chapter ” indicator displays on
the screen. The current chapter is played repeatedly.
Repeating a Title
2. While the DVD is playing, press the REPEAT DISC button until the “ Repeat Title ” indicator displays on the
screen. The current title is played repeatedly.
To Resume Normal Playback
3. While the DVD is playing, press the REPEAT DISC button until the “ Repeat all ” indicator displays on the
screen.
You can play a single CD track or the whole disc repeatedly.
Repeating a Single Track
1. While the CD is playing, press the REPEAT DISC button until the “ Repeat single ” indicator displays on the
screen. The current track is played repeatedly.
Repeating the Whole Disc
2. While the CD is playing, press the REPEAT DISC button until the “ Repeat all ” indicator displays on the
screen. The whole disc is played repeatedly.
To Resume Normal Playback
3. While the CD is playing, press the REPEAT DISC button until the “ O ” indicator displays on the screen.
Repeating a Specic Section
You can play a specic section repeatedly.
1. While the disc is playing, press the REPEAT A-B button at the beginning of the section (“ Repeat A- ” is
displayed) you want to play repeatedly.
2. Press the REPEAT A-B button again at the end of the section (“ Repeat A-B ” is displayed).
3. The unit will immediately begin replaying your selection.
To Resume Normal Playback
4. While the disc is playing, press the REPEAT A-B button until the “ Repeat A-B O ” indicator displays on
the screen (the repeat indicator disappears from the screen for a CD). The system will return to normal
playback.
Note:
• SomediscsmaynotpermitA-Brepeatoperation.
• YoucannotsettheA-Brepeatfunctionforasegmentthatincludesmultiplecameraangles.
• Youcanspecifyasegmentonlywithinthecurrenttitleortrack.
• TheremaybeaslightdifferencebetweenpointAandthelocationwhereplaybackactuallyresumes
depending on the disc.
Repeat Playback
PlayingDivX®VideoorPictureles
ThisunitcanplayDivX®andpicturelesrecordedonCD-R/CD-RWdiscs,USBashdriveandSDcard.
To play video les on this product you must rst convert them to DivX format using the DivX Plus Player
on your PC or MAC. This application can be downloaded at www.divx.com. Please do so, and then install
on your PC or MAC.
PlayingDivX®Video/PictureFiles
If playing DivX video or picture files from a USB drive or SD card, see note
below.
1. Press the OPEN knob to open the disc door.
2.PlaceaDivX®/picturelediscontothetraywithlabelsideup.
3. Close the disc door.
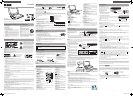
4. A selection menu will appear on the screen.
5. Press or button to select the picture or video icon, and then
press ENTER.
If picture mode is selected, use below to nevigate the menu:
/ : selects a le
/ : page up or down
RETURN : returns to previous menu
ENTER : plays your selected le
Note:
•ForplayinglesonUSBashdriveorSDcard,youshouldplugintheUSBashdriveorSDcardwhenthe
unit is in STANDBY mode. then follow step 5.
•Youcanpressthe button to interrupt playback, and press the PLAY button to resume playback.
•YoualsocanusetheGOTObuttonorusethenumberedbuttonstoenteraphotonumberandquicklyselect
any image.
•Duringplayback,pressANGLEbuttonrepeatedlytorotatethepicture.
ABOUTDIVXVIDEO:DivX®isadigitalvideoformatcreatedbyDivX,Inc.ThisisanocialDivXCertieddevice
that plays DivX video. Visit www.divx.com for more information and software tools to convert your les into
DivX video.
ABOUTDIVXVIDEO-ON-DEMAND:ThisDivXCertied®devicemustberegisteredinordertoplayDivXVideo-
on-Demand (VOD) content. To generate the registration code, locate the DivX VOD section in the device setup
menu. Go to vod.divx.com with this code to complete the registration process and learn more about DivX
VOD.
DivXCertifed®toplayDivX®video,includingpremiumcontent.
ENTER
Language Setup
1. Press the SETUP button on the remote control or MENU button on the
unit in stop mode (when disc is not playing).
2. Press the button to select Language Menu.
3. Press the / button to select the option, then press the button.
4. Press the / button to select your preferred language, then press the
ENTER button to conrm.
5. Repeat steps 3 and 4 to adjust other options.
6. Press the SETUP or RETURN button to exit the menu.
Note:
• SomeDVDsmaynotplayintheaudiolanguageyouselected.Apriorlanguagemaybeprogrammedonthedisc.
• SomeDVDsmaybesettodisplaysubtitlesinalanguageotherthantheoneyouselected.Apriorsubtitle
language may be programmed on the disc.
• SomeDVDsallowyoutochangesubtitleselectionsusingthediscmenuonly.Ifthisisthecase,pressthe
MENU button and choose the appropriate subtitle language from the selection on the disc menu.
• SomeDVDsmaynotincludeyourpre-selectedlanguage.Inthiscase,
the DVD player automatically displays disc menus consistent with the
disc's initial language setting.
Video Setup
1. Press the SETUP button on the remote control or MENU button on the
unit in stop mode (when disc is not playing).
2. Press the / button to select Video Menu.
3. Press the / button to select the option, then press the button.
4. Press the / button to adjust the setting, then press the ENTER
button to conrm.
5. Repeat steps 3 and 4 to adjust other options.
6. Press the SETUP or RETURN button to exit the menu.
Customizing the Function Settings
E - 6 E - 7
Dolby Digital
Dolby Digital is a technology developed by Dolby Laboratories. Soundtracks encoded in Dolby Digital can
reproduce from one to 5.1 discrete channels of excellent quality audio.
The unit automatically recognizes the Dolby Digital bitstream and provides a downmix suitable for two-
channel listening. An additional Dolby Digital decoder is required for reproduction of the discrete multi-channel
soundtracks available on many DVDs.
Manufactured under license from Dolby Laboratories.
Dolby and the double-D symbol are trademarks of Dolby Laboratories.
Sound System
E - 8
Troubleshooting Guide
Printed in China
811-938091W040
Symptom Cause (and remedy)
No power.
The remote
control does
not function.
No sound or
only a very
low-level
sound is
heard.
No picture.
The picture is
not clear.
Severe hum or
noise is heard.
The disc does
not play.
No sound is
input from the
HDMI IN.
•EnsuretheACpoweradapterisconnected.
• Theunitisnotturnedon.
•Makesuretheinfraredremotesensorisnotblocked.
• Makesuretheplasticsheethasbeenremovedfromtheremotecontrol.
• Pointtheremotedirectlyattheinfraredremotesensorontheunit.
• Replacethebatteryintheremotecontrolwithanewone.
•Thevolumecontrolislocatedonthesideoftheunit–pleasetryadjustingthis.
• Thesystemisinpausemode.Pressthe button to return to normal play mode.
• Theunitisinfast-forwardorfast-reversemode.Pressthe PLAY button on remote control
to return to normal play mode.
• MakesuretheAUDIO/VIDEOoutputconnectionsarecorrect.
• TheDTSDVDcannotbedecodedtohavespeakeroutput.
• Theunitistoohot;shutotheunitfor30minutestocoolitdown.
• Theregionnumberofthediscdoesn'tmatchtheregion
number of this unit.
• Cleanthedisc.
• Thediscisscratched.
• AdjusttheLCD'sbrightnessandcontrastusingthe VIDEO MODE button on the remote control.
• Theplugsandjacksaredirty.Wipethemwithaclothslightlymoistenedwithalcohol.
• Cleanthedisc.
• Thereisnodiscinside(“NoDisc”appearsonthescreen).
• Insertthedisccorrectlywiththeplaybacksidefacingdown.
• Cleanthedisc.
• Anon-NTSCdischasbeeninserted.Theunitanddiscregionnumberareincompatible.
• Condensationmayhaveformedinsidetheunitduetoasuddenchangeintemperature.
Wait about an hour for it to clear and try again.
• ChecktheconnectionbetweenthisunitandtheHDMIINjackofotherequipment.
• SeeifyourTVsupportsthis480p/576p/720p/1080iDVDsystem.
• MakesureyourTVsupportsHDCP(HighBandwidthDigitalContentProtection).
Need More Help?
Please visit online help at http://www.RCAav.com
Specications and external appearance are subject to change without notice.
System Setup
1. Press the SETUP button on the remote control or MENU button on the
unit in stop mode (when disc is not playing).
2. Press the / button to select TV System Menu.
3. Press the / button to select the option, then press the button.
4. Press the / button to adjust the settings, then press the ENTER
button to conrm.
5. Repeat steps 3 and 4 to adjust other options.
6. Press the SETUP or RETURN button to exit the menu.
Default
It takes 3-5 seconds to reset the DVD settings to the factory default.
View DivX(R) VOD
DivX® Registration
DivX®registrationcodeallowsyoutorentandpurchasemoviesusingtheDivX®VODservicefromtheinternet.
This menu setting will display the registration code of your unit as follows:
YOU MUST REGISTER YO UR DEVICE TO PLA Y
DIVX PROTECTED VIDEOS.
REGISTRATION CODE:
REGISTER AT HTTP://VOD.DIVX.COM
Registration service at http://vod.divx.com
Follow the instructions and download the movie from your computer onto a CD-R/RW or DVD+R/-R or
DVD+RW/-RW for playback on the unit.
Note:
• ThisregistrationcodeisforDivX®Video-On-Demandonly.Donotapplythiscodeforotherapplicationsor
websites.
• Ifyouhavealreadyregisteredthisproduct,selectingtheViewDivX(R)VODsettingwillallowyoutoderegister
(deactivate) the product for DivX playback - we recommend you DO NOT deregister the product.
Screen Saver
To turn on or o the screen saver (screen protection to prevent image burn).
Note:
When you leave the unit in DVD stop mode for approxiamtely 5 minutes, the screen saver of the unit
automatically appears if you set the Screen Saver to On mode. To turn o the screen saver, press the PLAY
button.
TV Display
Depending on the format of the DVD disc, you can choose the picture format (aspect
ratio) best suited the format of your TV screen.
4 : 3PS
• Whenwide-screenvideoisplayed,thismodeclipstherightandleftsidesofthe
image so that it can be viewed on a conventional screen.
• Somewide-screenDVDsthatdonotpermitPanScanmodeplaybackareautomatically
played in letterbox mode (black bands that appear at the top and bottom of the
screen).
4 : 3LB
• Whenwide-screenvideoisplayedinthismodeonaconventionalscreen,blackbands
appear at the top and bottom of the screen.
16 : 9
• Thisisthecorrectmodeforplayingwide-screenvideosontheunitscreenorother
external wide-screens.
Note:
• ThedisplayablepicturesizeispresetontheDVD.Thereforetheplaybackpictureof
some DVDs may not conform to the picture size selected.
• WhenyouplayDVDsrecordedinthe4:3aspectratio,theplaybackpicturewillalways
appear in the 4:3 aspect ratio regardless of the TV display setting.
• Select16:9toconformtheLCDscreenontheunit.AlwaysbesurethatyourTVdisplay
conforms to the actual TV in use if you connect the unit to a TV.
HDMI Res. (Resolution)
You can set the HDMI Res. (Resolution) to be Auto, 480p, 720p, 1080i or 1080p, according to the connected TV.
Note:
• SelecttheHDMIresolutionaccordingtotheperformanceoftheconnectedTV.
• IftheVideooutisnotsettoHDMI,youcannotselecttheHDMIRes.
JPEG Interval
To set the JPEG Interval for slide show playback. Select O to disable the slide show feature.
O: Plays back one le at a time.
5 seconds Plays back images in the form of a slide show at 5 seconds interval.
10 seconds Plays back images in the form of a slide show at 10 seconds interval.
15 seconds Plays back images in the form of a slide show at 15 seconds interval.
Locating a Desired Section
Locating a Specic Chapter / Title
If you know the chapter/title number for the chapter/title that you want to play, you can locate it by directly
selecting that number.
1. Press the GOTO button.
2. Press the / button to highlight chapter/title number, then press the corresponding number buttons for
the chapter/title you want (for example: 02, 08, 10 or 15). Press the ENTER button to conrm.
3. Playback starts from the selected chapter/title.
Note:
• Ifthechapter/titlenumberenteredisnotpermitted.Repeatsteps1and2tore-enterthecorrectnumber.
• Somediscsmaynotrespondtothisprocess.
• Thismethodoflocatingachapter/titleisavailableonlyonaDVDthatcontainschapter/titlenumbers.
Locating a Specic Time
You can move to a specic location by entering its corresponding time (hours, minutes, seconds).
1. Press the GOTO button.
2. Press the corresponding number buttons (5 digits: X:XX:XX,
for example:
0 30 05, 1 08 23, 1 22 56) for the setting point you want.
3. Playback starts from the selected section.
Note:
• IfthetimeenteredisnotpermittedbytheDVD," " will display. You should re-enter the correct time.
• Somediscsmaynotrespondtothisprocess.
• Somescenesmaynotbelocatedaspreciselyasyouspecied.
• ThismethodforaccessingspeciclocationsisavailableonlywithinthecurrenttitleoftheDVD.
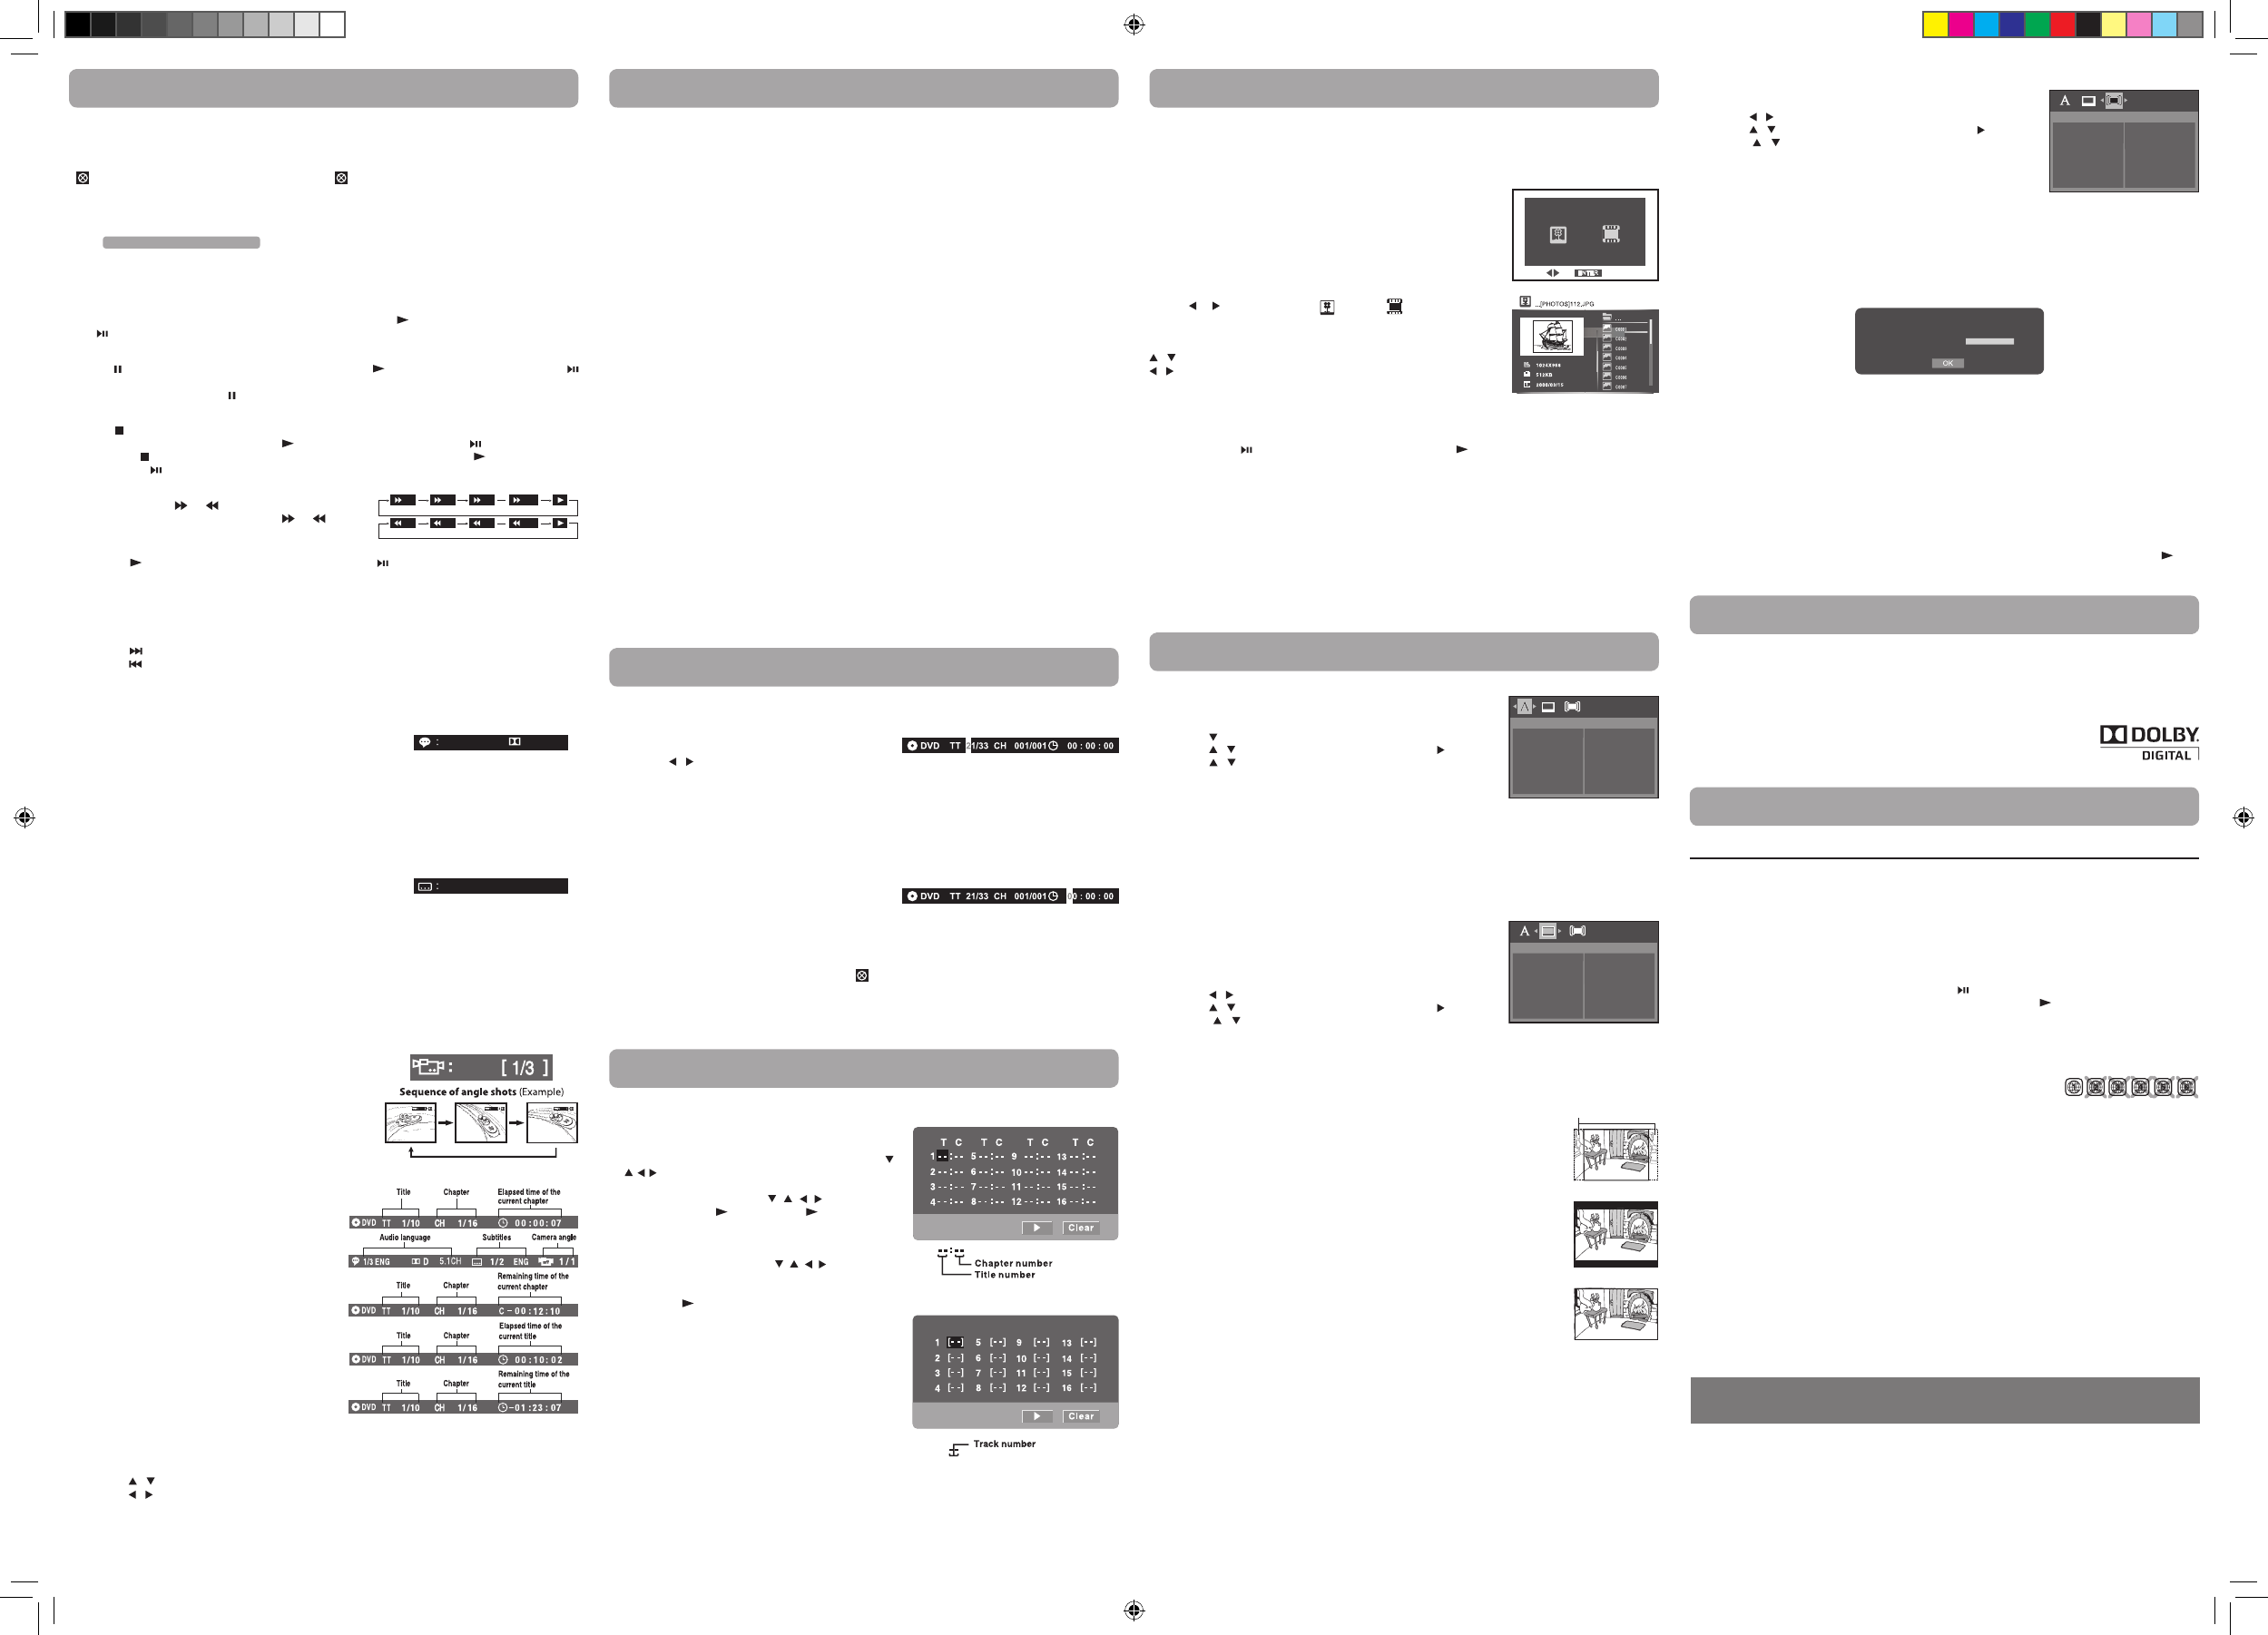
You can combine your favorite titles/chapters/tracks and play
them in the order you determine.
1. Press the MEMORY button and a program screen appears.
2. Select the items in the order you want by pressing the
number buttons. Each time you press the Cursor buttons ( ,
, , ), the space is highlighted. Highlight where you want
to enter, then press the corresponding number buttons.
3. Press the Cursor buttons ( , , , ) to move the
highlighted bar to , then press the PLAY or ENTER
button. The DVD player starts memory playback.
4. To resume normal playback from memory playback
a) Press the MEMORY button.
b) Press the Cursor buttons ( , , , ) to move the
highlighted bar to “Clear”, then press the ENTER button.
All the input programs will be cleared.
c) Press the PLAY button to resume normal playback.
Note:
• Ifthetitleorchapternumbersyouenteredisnot
permitted by the DVD, after you press the ENTER button,
it will restore to [- -]. You should re-enter correct numbers.
• Somediscsmaynotpermitmemoryplaybackoperation.
• Ifyouselectrepeatduringmemoryplayback,theDVD
player repeats the current memory playback.
• IfyoupresstheMEMORY button while the display
appears on the TV screen, the display disappears.
• Theprogrammedselectionswillbeclearedwhenyou
open the disc tray or turn o the DVD player.
Programmable Memory
e.g. DVD
e.g. CD
x2 x4 x8 x20
x2 x4 x8 x20
Language
Player Menu
Subtitle
Audio
Disc Menu Lang
Video
TV Display
HDMI Res.
JPEG Interval
Default
View DivX(R) VOD
Screen Saver
TV System
16 : 9
4 : 3PS
Cut o when a wide-
screen video image
is played.
4 : 3LB
DRC99380U_ENGLISH IB_May 4.indd 2 2010-5-4 17:12:40