


3
Notes:
• The unit can be installed on the vehicle
or the ships.
• Choose the mounting location where
the unit will not interfere with the normal
driving function of the driver.
• Before finally installing the unit, connect
the wiring temporarily and make sure
it is all connected up properly and the
unit and the system work properly.
• Use only the parts included with the
unit to ensure proper installation. The
use of unauthorized parts can cause
malfunctions.
• Consult with your nearest dealer if
installation requires the drilling of holes
or other modifications of the vehicle or
the ship.
• Install the unit where it does not get in
the driver’s way and cannot injure the
passenger if there is a sudden stop,
like an emergency stop.
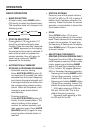
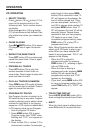
• If installation angel exceeds 30¢Xfrom
horizontal, the unit might not give its
optimum performance.
30˚
• Avoid installing the unit where it would
be subject to high temperature, such
as from direct sunlight, or from hot air,
from the heater, or where it would be
subject to dust, dirt or excessive
vibration.
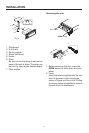
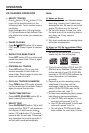
TAKE OUT SCREW BEFORE INSTALL
Before install the unit, please remove the
two screws.
NOTE: If this unit is installed on the ship,
you should use two pieces of plastic film
(30mmx20mm) supplied with the unit to
seal the two holes after remove the
screws. And this will be waterproof.
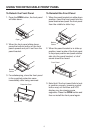
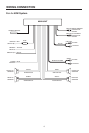
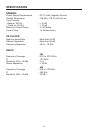
DIN FRONT-MOUNT
Installing the unit
1. Dashboard
2. Holder
After inserting the holder into the
dashboard, select the appropriate tab
according to the thickness of the
dashboard material and bend them
inwards to secure the holder in place.
3. Screw
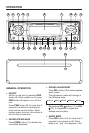
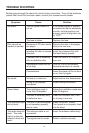
INSTALLATION
(Fig. 1)
1
3
2
182
53
Take out screw before installation