


5
Using the Unit with Optional Accessories
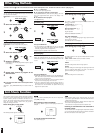
Using the unit with an audio system
Use stereo connection cable (not included) to listen to CDs
through your home audio system.
≥Turn off the amplifier power and connect the cable.
≥Do not connect the cable to the PHONO jacks on the amplifier.
≥Obtain the optional connecting cable if the amplifier comes with
mini-phone jacks.
≥Adjust the volume on the amplifier.
Note!
≥Sound quality changes when S-XBS, TRAIN or LIVE is select-
ed, but volume is reduced by about half.
≥You can connect speakers, active or otherwise, with an imped-
ance of 1 k≠ or less to the headphone jacks. Set the unit’s vol-
ume between 4 and 6.
Using the unit with a car audio
system
Items to be purchased
For connection to the car audio system:
Car stereo cassette adaptor (SH-CDM10A)
For securing the unit and connecting the power
supply:
≥Car adaptor (SH-CDC9)
≥Car mounting kit (SH-CDF7)
≥Car mounting arms, Car insulator
Note.
It may not be possible to use the unit with some types of car
stereo owing to restrictions imposed by the construction of the
car stereo cassette adaptor.
For further details, refer to the instructions of the part concerned.
RESUMERANDOM
NORMAL
HOLD
OUT
4
5
6
L
R
Maintenance
If the surfaces are dirty
To clean this unit, wipe with a soft, dry cloth.
If the surfaces are extremely dirty, use a soft cloth dipped in a
soap-and-water solution or a weak detergent solution.
≥Never use alcohol, paint thinner or benzine to clean this unit.
≥Before using chemically treated cloth, read the instructions that
came with the cloth carefully.
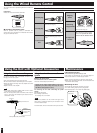
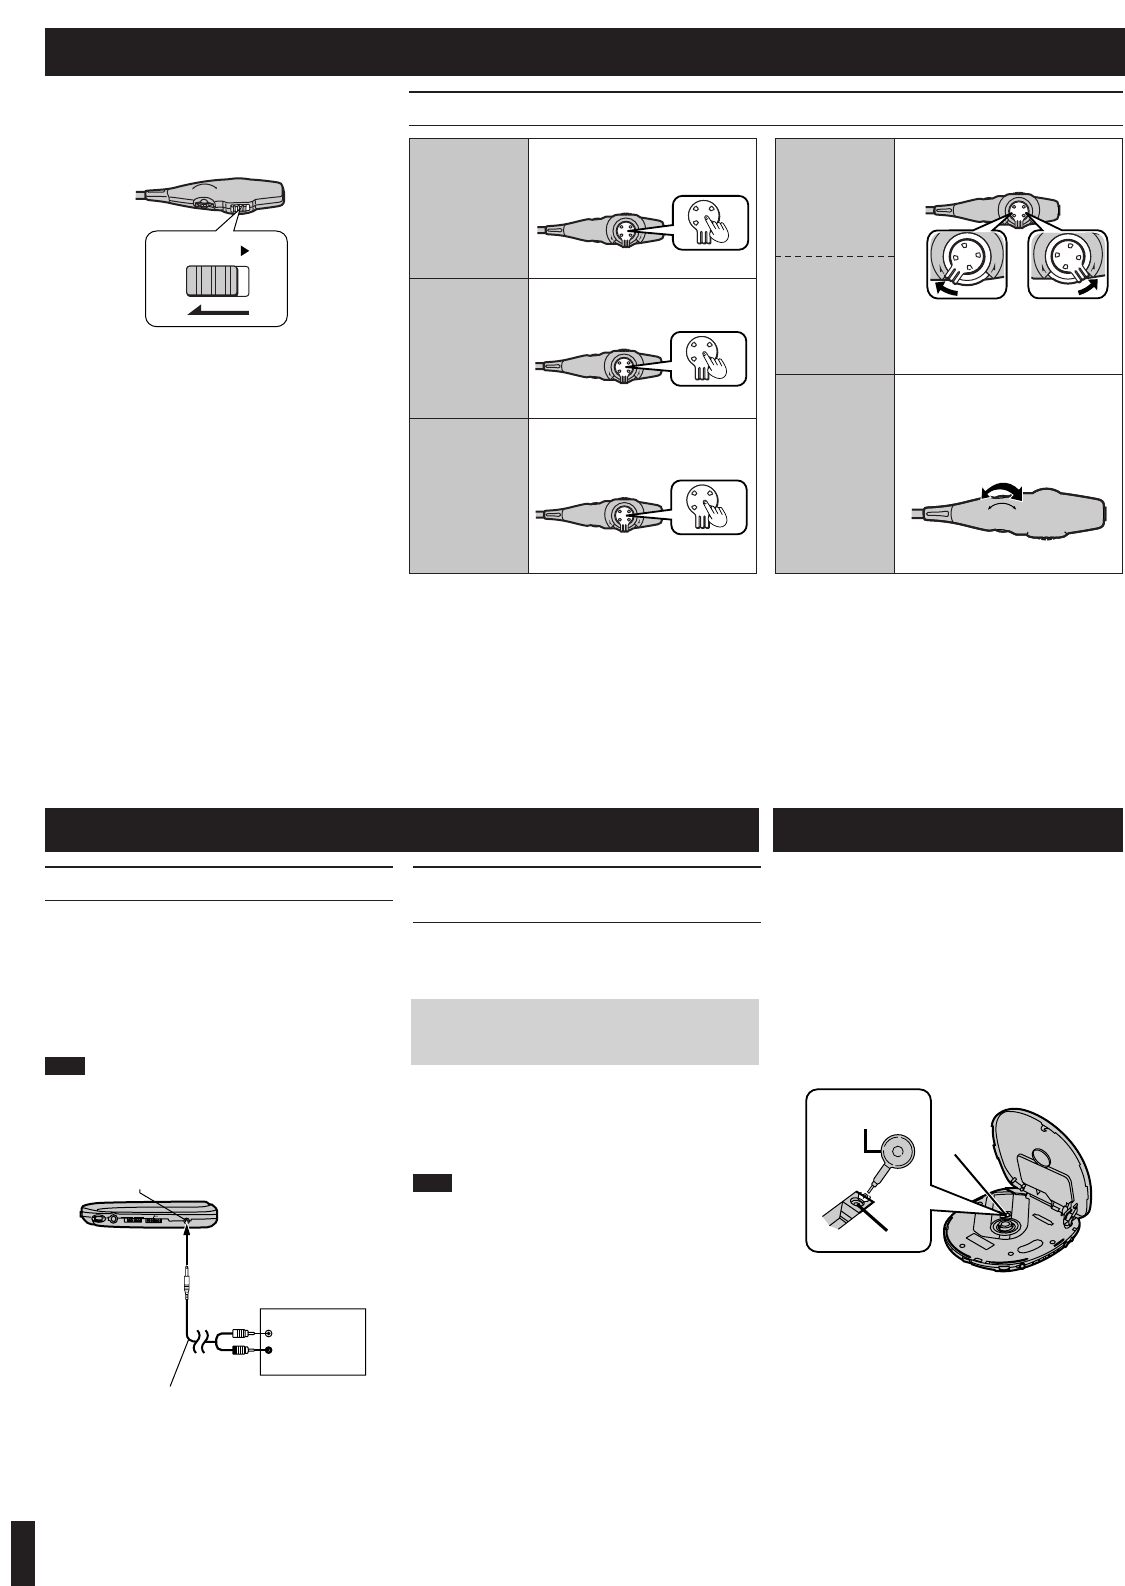
Maintaining the lens
Open the lid and clean the lens as shown in the figure.
Use a cotton swab to gently wipe off any finger-prints.
Recommended product: Lens cleaner kit (SZZP1038C)
OUT jack
Side panel of the unit
(Red)
(White)
Stereo phono cable (not included)
To CD or AUX
terminals
Amplifier
Air blower for
camera lens
Lens
Lens
Connect the car stereo cassette adaptor to the unit’s
headphone jack. (When doing this, keep the unit’s
VOLUME at a setting between 4 and 6.)
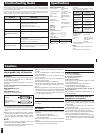
Using the Wired Remote Control
The remote control can be operated regardless of the hold mode
of the unit.
Preparation:
Release the remote control from the hold mode.
∫ Operation confirmation tones
When an operation button is pressed, a confirmation tone
sounds. Refer to the parentheses in the illustration for the differ-
ent types of confirmation tones.
How to use the wired remote control
To start play
To stop play
To turn off the
unit
Press once during off or stop mode.
Press once during play.
Press and hold during play or stop
mode.
Skipping
tracks
Searching
through tracks
To adjust the
volume
Turn during play.
Turn and hold during play.
When adjusting the volume using the
remote control, position the volume
control on the unit between 4 and 6.
H
O
L
D
2
HOLD
r
s
VOLUME
PUSH
PUSH
PUSH
s
r
s
r
PU
S
H
P
U
SH
r
s
HOLD
2
VOLUME
(Beep...Beep)
(Beep)
(Beep...Bee...p)
(Beep Beep)(Beep Beep Beep)
Backward
Forward