


0
5
0
1
0
0
R
E
C
M
O
D
E
E
R
A
S
E
H
R
E
C
S
T
O
P
VOL
L
MIC SENSE
MICROPHONE
USB
Release
HOLD
before
operation
HOLDHOLD
F
O
L
D
E
R
/
M
E
N
U
54
1
Press [
$
FOLDER/
%
MENU] to select
the folder.
3
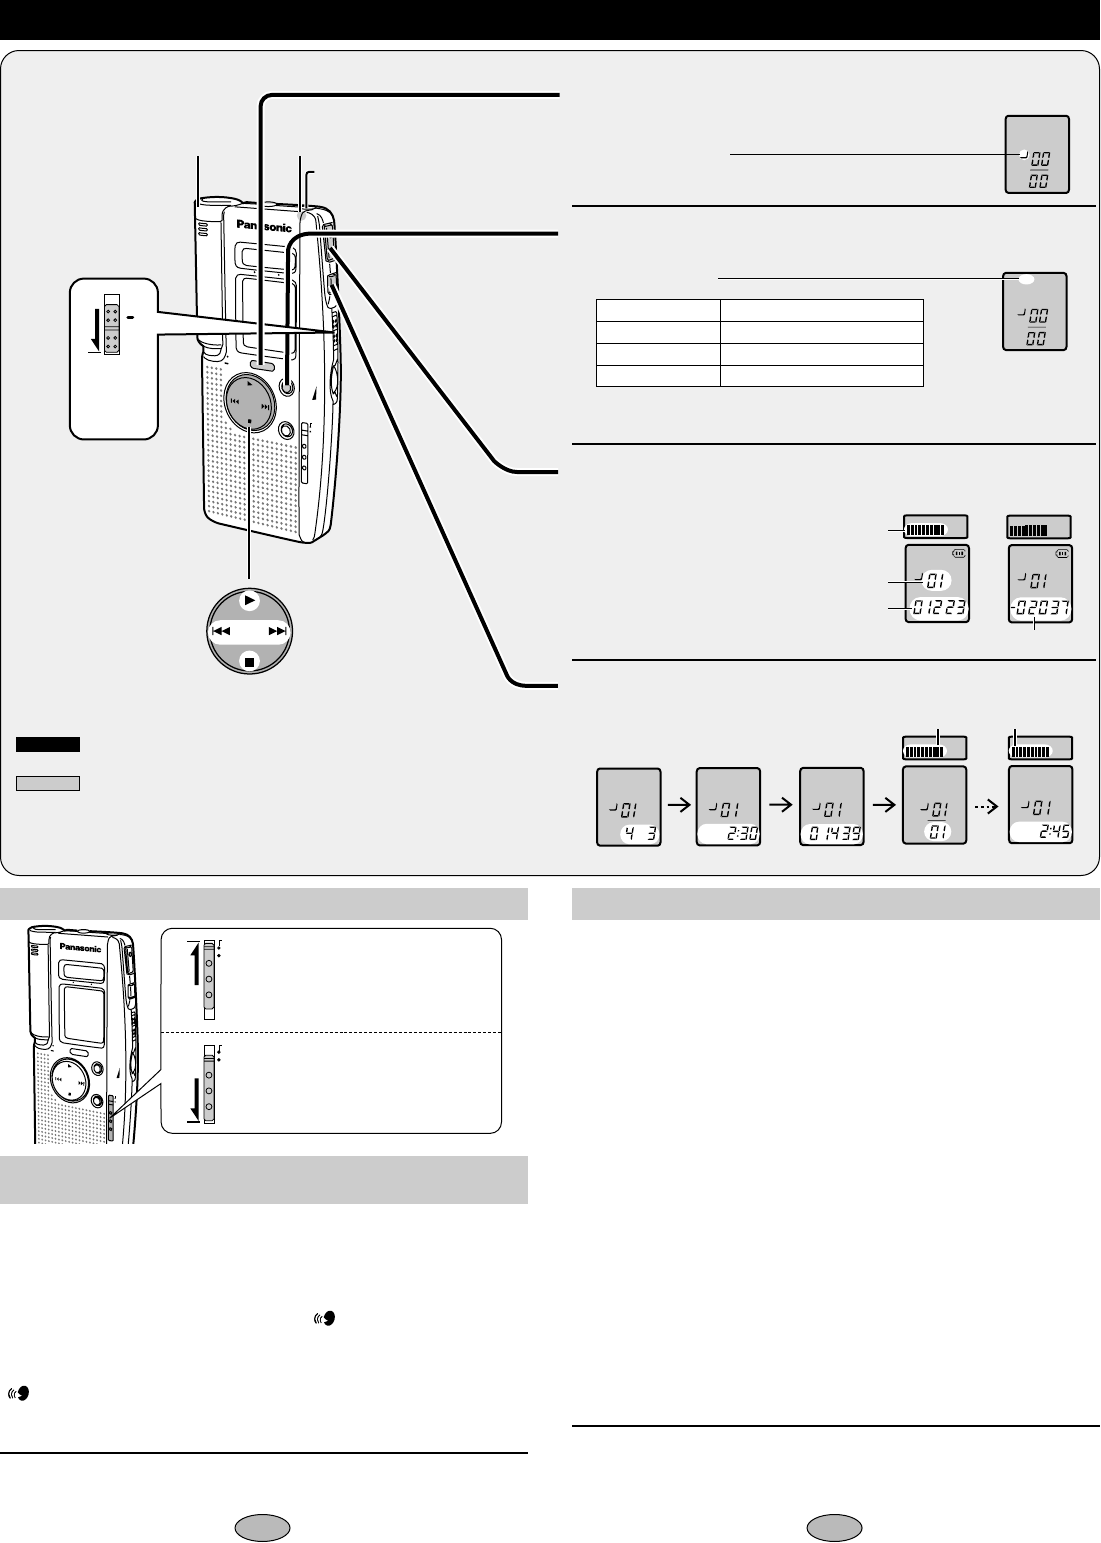
Press [REC] to start recording.
The recording indicator lights.
4 Press [STOP] (or [∫]) to stop recording.
Information for the file appears one after the other:
Recording time
No. of files
File number
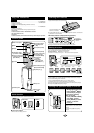
∫ Recording through the external microphone
The built-in microphone switches off.
Connect the included microphone to the [MIC] jack.
Use a condenser microphone without a built-in power supply.
Plug type: 3.5 mm (
1
⁄8 in.) monaural
Store files in 4 folders (A, B, C and D). Each folder holds up to 99 files.
B
MS
HQ
H
0 50 100
B
MS
HQ
H
0 50 100
HQ
B
Date
Time Recording time
External microphone jack
[MIC (PLUG IN POWER)]
Built-in
microphone
Recording indicator
≥
Available recording time also
appears when the remaining
time becomes very short.
Recording
0
50
100
R
E
C
FOLDER/
MENU
MODE
E
R
A
S
E
H
REC
STOP
V
O
L
L
MIC SENSE
MICROPHONE
MIC SENSEMIC SENSE
H
L
MIC SENSEMIC SENSE
H
L
H (High): Relatively soft sounds are
recorded.
L (Low): Only relatively louder
sounds are recorded.
Use when recording close
to the mouth.
B
HQ
M
D
REC
DATE
B
HQ
REC
DATE
PM
B
HQ
HQ
M
S
H
B
B
HQ
PM
0 50 100 0 50 100
Recording level
B
HQ
Each time you press the button:
A
)
B
)
C
)
D
^_____----------n
2 Press [REC MODE] to change the recording quality.
Each time you press the button:
HQ
)
SP
)
LP
^_____-----n
,.
Each time you press [
$
FOLDER/
%
MENU
]:
Recording time
Available recording time
Remaining memory
Clock
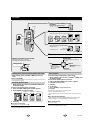
VAS detects silence and pauses recording automatically. It is especially effective
when microphone sensitivity is set to L.
1 While stopped, press and hold [
$
FOLDER/
%
MENU] until
the display changes.
Do each of the following within 10 seconds
2 Press [
$
FOLDER/
%
MENU] until “” appears.
3 Press [
9
] to select “On”.
4 Press [
1
].
“ ” and recording indicator flash while VAS is waiting for a sound to record.
∫ To turn the function off:
Select “OFF” in step 3.
RR-US350
RR-US351
Preparation: Select the folder and recording quality (Steps 1
and 2 above).
1 While stopped, press and hold [
$
FOLDER/
%
MENU] until
the display changes.
Do each of the following within 10 seconds
2 Press [
$
FOLDER/
%
MENU] until “RECF” appears.
3 Press [9] to select “On”.
4 Press [
1
].
5 Set the times.
1 Press [:,9] to change the start time.
2 Press [1].
3 Press [:,9] to change the end time.
4 Press [1].
When finished, the display changes in the following order:
ON time # OFF time # Current number of files # Clock
“RECF”flashes during recording and goes out when finished. (The setting is also
canceled.)
∫ To check the timer settings:
1 While stopped, press and hold [
$
FOLDER/
%
MENU
] until the display changes.
2 Within 10 seconds, press [
$
FOLDER/
%
MENU
] until “RECF” appears.
∫ To cancel the timer:
Select “OFF” in step 3.
You can also change the microphone sensitivity and VAS setting. (See below)
≥Start from the beginning again if the display returns to the clock partway through.
≥Press [
STOP
] or [∫] to stop partway through.
≥Start from the beginning again if the display returns to the clock partway through.
≥Press [
STOP
] or [∫] to stop partway through.
Timer recording
Preventing unnecessary recording
(VAS: Voice activated system)
Changing microphone sensitivity
Available recording time
,.
≥Use HQ or SP if the sound source is far away.
Available recording time
33 minutes
SP (Standard play)
HQ (High quality)
LP (Long play)
Recording quality
65 minutes
210 minutes