


14
RQT9201
Enjoying in various situations
Enjoying in various situations
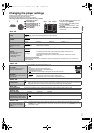
Enjoying in a car
You can enjoy video in the back seat attaching the unit to the back of the
front seat.
≥
Please insert the disc before attaching the unit to the headrest
mounting bracket.
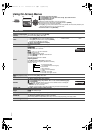
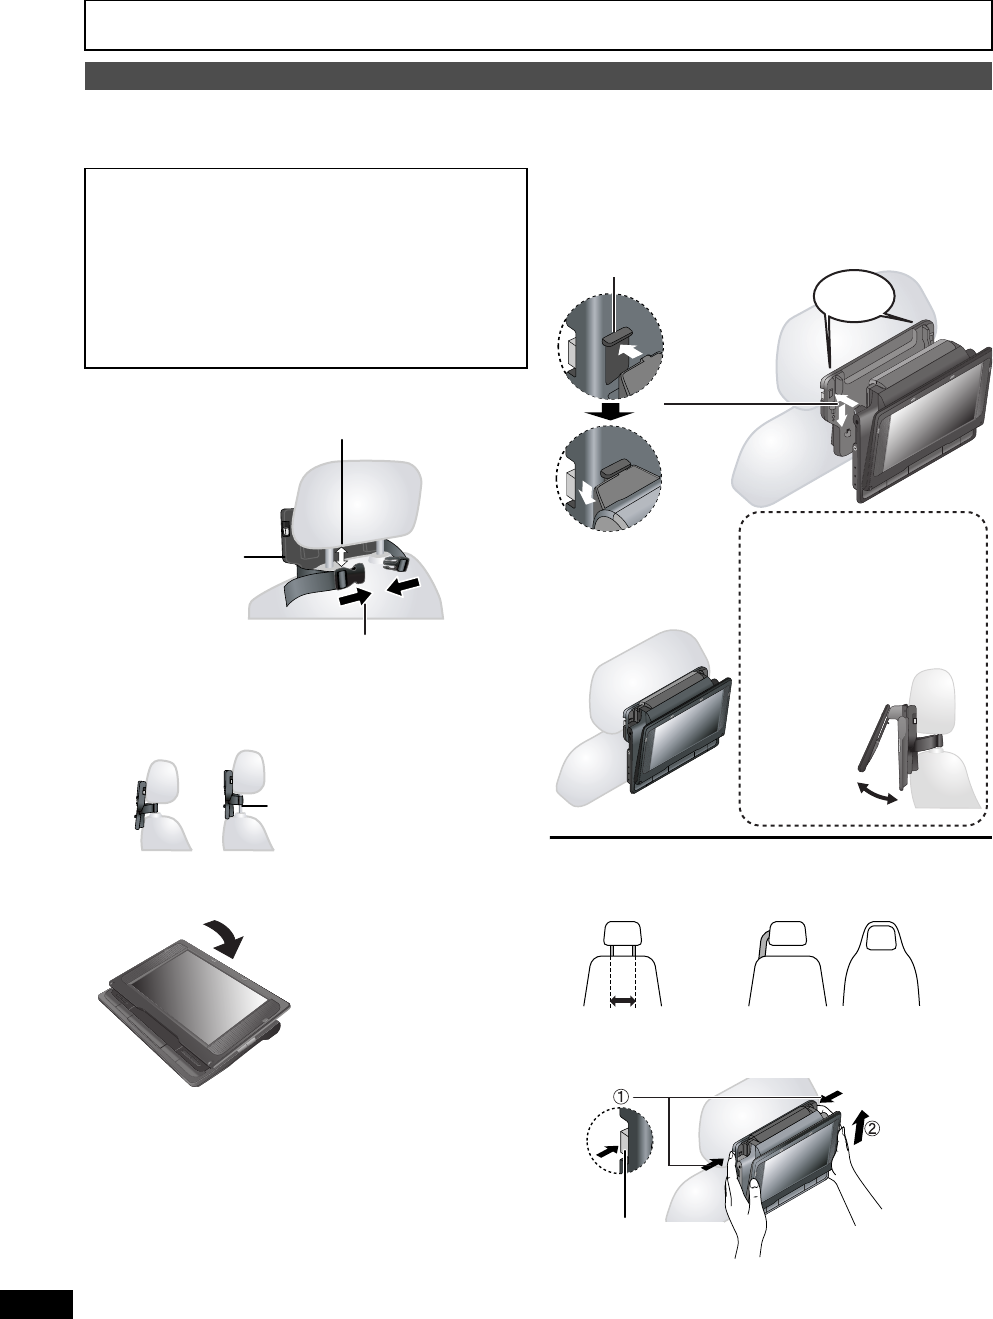
1 Attach the headrest mounting bracket to the front
seat.
2 Adjust the monitor.
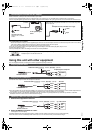
3 Attach the unit to the bracket.
While holding the unit with both hands, line up the unit just below the
protruding sections on the bracket. Press the unit down about 4 to 5 mm
so that the protrusions on the bracket fit into the holes on the bottom of
the unit.
≥
Please check the following points before use.
– The bracket is securely fastened to the unit.
– The unit is not loose and cannot be lifted upwards.
≥
Do not leave the unit on a surface that may become hot such as a dashboard. The unit is not heat-resistant so may malfunction.
≥
DRIVER MUST NOT OPERATE OR VIEW THIS UNIT WHILE OPERATING THE VEHICLE.
Doing so will distract the driver and could cause a collision resulting in serious injury or property damage.
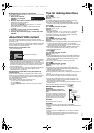
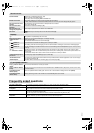
Enjoying video in the back seat with the Headrest Mounting Bracket
≥
Do not attach or detach the unit or the bracket while the car is
moving.
≥
Do not attach the unit in the following locations:
– anywhere other than the back of the front seat
– where it can be viewed or operated by the driver
– where it interferes with the driver’s operation of the vehicle
– where it interferes with the operation of an airbag
≥
Ensure that the bracket belt is securely fastened and check the
lock on the unit. Refer to installation instructions.
In the event of an accident, sudden acceleration or braking, the unit
could become loose and cause injury or property damage.
≥
Only use the Panasonic bracket supplied to attach the unit to
the car seat.
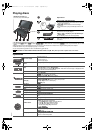
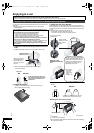
Rotate the monitor backwards so the screen is facing out.
(➜ 4, Adjusting the LCD angle)
Headrest Mounting
Bracket (included)
2 Close the buckle and adjust the belt until it fits tightly
around the headrest.
1 Adjust the headrest so there is an open space of about 3 cm.
Attach to the seat so
that the label side of
the bracket can be
seen from the rear of
the seat.
Side view
If this space is larger than 3 cm,
the unit could become loose and
cause injury in the event of an
accident etc.
DO
DO NOT
≥
Depending on the type of headrest, you may not be able to attach the
bracket.
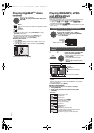
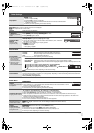
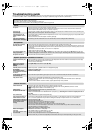
1 Press the release buttons (left and right) in towards the center of
the bracket.
2 Lift the unit up to release it.
≥
Do not press the release buttons any time other than when detaching
the unit from the bracket.
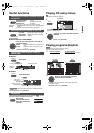
30˚
Line up the protruding
sections here.
Use the monitor in the open position
as shown in the illustration below to
prevent abnormal audio or damage
resulting from vibrations in the car.
The angle of the monitor can be
adjusted up to about 30
o
.
Diagram of the
attached bracket and
unit
≥
The angle of
the monitor
may shift
while driving
due to
vibration, etc.
When correctly
attached, you will
hear a locking
sound.
click!
23 cm or less
In the event of an accident etc., the unit
could become loose and cause injury.
DO
DO NOT
Releasing the unit from the bracket
Release button
RQT9201-P.book 14 ページ 2008年2月6日 水曜日 午後4時38分