- 13 -
Preparation
Battery
Installation
Clock Setting
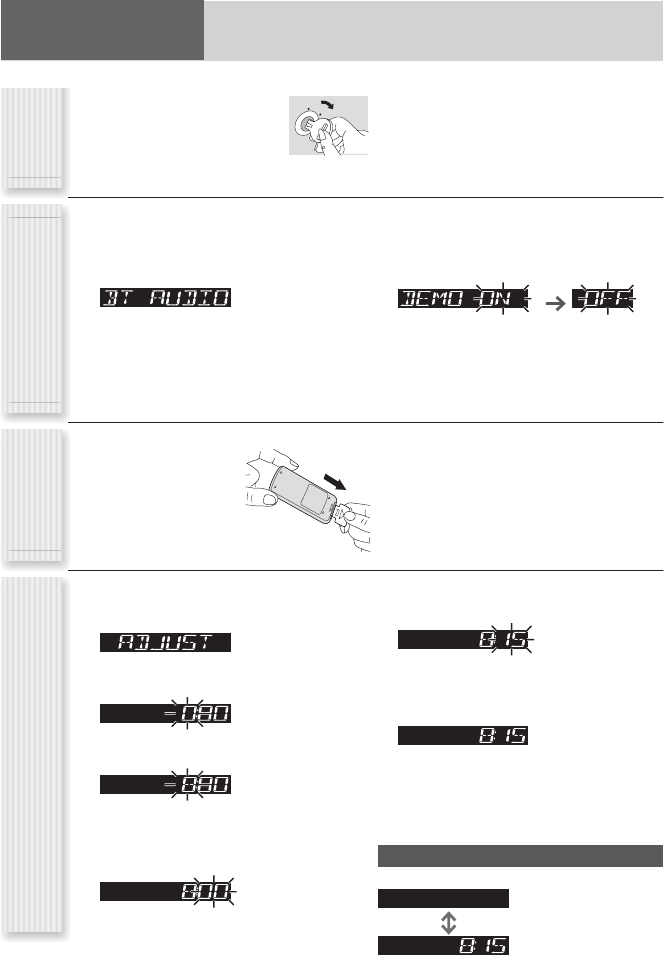
Pull the insulation fi lm out from
the backside of the remote control
gently.
1
Set your car’s ignition switch
to the ACC or ON position.
CCA
NO
The 24-hour system is used for the clock.
1
Press [DISP].
(clock display)
2
Hold down [DISP] for more than
2 seconds.
Hour blinks
3
Adjust the hour.
Hour entered
[]: sets the hour ahead.
[]: sets the hour back.
4
Press [DISP].
Minute blinks
5
Adjust the minute.
Minute entered
[]: sets the minute ahead.
[]: sets the minute back.
6
Press [DISP].
Completed
Notes:
• “ADJUST” is displayed before adjusting the clock.
• Hold down [] or [] to change numbers rapidly.
• When “NO DISC” is displayed, the clock cannot be
adjusted.
Clock Display at Power Off
Press [DISP] to change the display.
Display off
Clock display (Default)
2
Press [SRC] (PWR: Power).
Note: Battery Information:
Battery Type: Panasonic lithium battery (CR2025) (Included
in the remote control)
Battery Life: Approximately 6 months under normal use (at
room temperature)
\CQ-RX300W\ \CQ-RX105W\
First Time
Power On
\CQ-RX300W\ \CQ-RX200W\
The demonstration message appears for initial
use.
1
Set your car’s ignition switch to the ACC or
ON position.
2
Press [SRC] (PWR: Power).
3
Hold down [VOL] (PUSH SEL: Select) for
2 sec. or more to open the function menu.
4
Press [VOL] (PUSH SEL: Select) to select
DEMO.
5
Tur n [VOL] counterclockwise.
For using the remote control, press [0] ().
Notes:
• To return to the regular mode, press [DISP].
• Refer to the section on “Function Settings”.
• When “NO USB” (\CQ-RX300W\) or “NO DISC” is
displayed, the Demonstration cannot be cancelled.
Cancellation of
Demonstration


