


8
The sensor will now be in synchronisation mode for about 5 minutes, during which
one data packet will be sent every 4 seconds.
- Close the housing again by pushing it up and turning it clockwise until it engages.
- Erect the now fully assembled sensor within the possible transmission radius (up to
300 ft. in the open, but make allowances for the attenuating effects of walls etc.)
so that it stands alone in such a way that both precipitation can fall directly into
the rain sensor and that the wind measurement is not distorted by nearby build-
ings, trees etc.
A sunny spot is possible, since the temperature sensor is located in a shaded and
ventilated area of the housing.
- Push the earth spike far enough into the soil for the sensor to stand securely and
the devices to be about 6 ft. above ground level.
E 9305
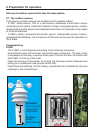
For the installation, addressing and commissioning of this sensor, please refer to
the operating instructions supplied with the unit.
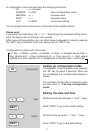
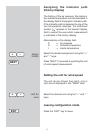
2.2. Base unit
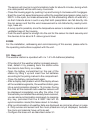
The weather station is operated with 4 x 1.5 V AA batteries (alkaline).
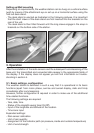
- If the stand of the weather station is already assem-
bled, detach it by pressing back the station while
the stand is held firmly on a table.
- Open the battery compartment on the rear of the
station by lifting it up and insert four AA batteries
according to the poling marked in the compartment.
- Close the battery compartment again.
- After a display test phase in which the display shows
all the available segments, the weather station goes
into a synchronisation phase for 15 minutes. During
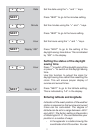
this time all the received radio weather sensors will
be displayed immediately one after the other. If all
the sensors you installed have already been received,
you can end synchronisation mode early by pressing
any key, provided that the E 9301 has left its
synchronisation mode (this takes about 5 minutes).
- After synchronisation all weather data are displayed as normal as shown in page
6. Only sunrise and sunset and the moon phase are not yet displayed, because
the clock and calendar have yet to be set.
- Configure the base unit as described under 3.1.
+
+
+
–
––
Bottom
+–