


6
Getting Started
—Continued
Depending on the Onkyo AV receiver/amp that
you’re using, choose connection method
A
or
B
.
A
: Connect the RI Dock’s AUDIO OUT L/R jacks
to an RI Dock-compatible input on your
Onkyo AV receiver/amp. (You might need to
change the input display to “HDD” or
“DOCK.”)
B
: Connect the RI Dock’s AUDIO OUT L/R jacks
to the TAPE (MD, CDR) IN jacks on your
Onkyo AV receiver/amp.
See your AV receiver/amp’s instruction manual
for details.
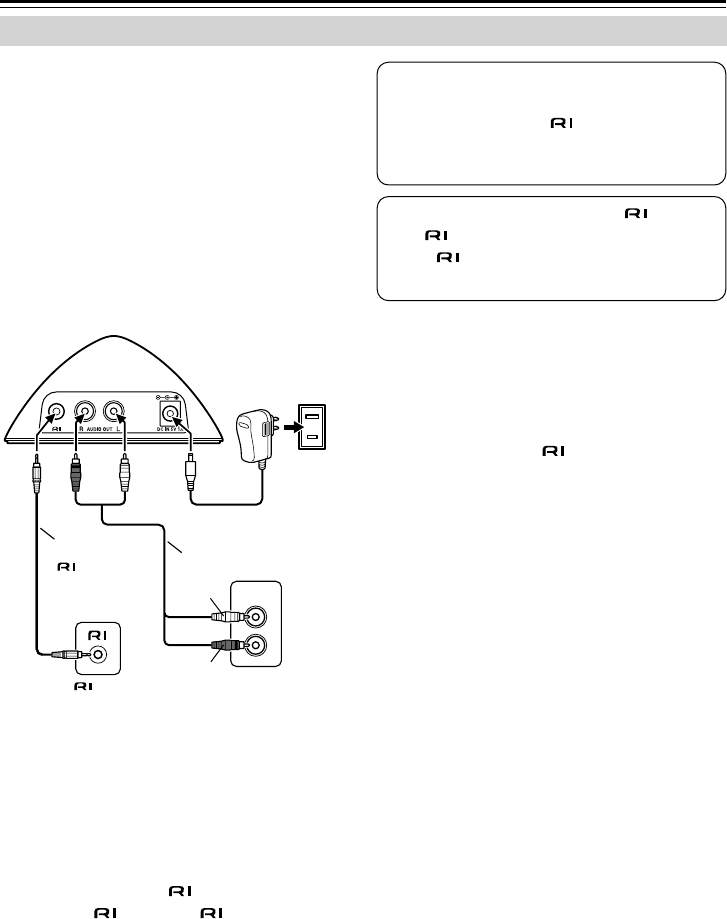
1.
Using the supplied AV cable, connect the RI
Dock’s AUDIO OUT L/R jacks to a suitable
audio input on your AV receiver/amp.
The input you use depends on the type of
Onkyo AV receiver/amp you have. See your
AV receiver/amp’s instruction manual for
details.
2.
Using the supplied cable, connect the
RI Dock’s jack to an jack on one of
the Onkyo components in your system.
3.
Connect the supplied AC adapter to the RI
Dock’s DC IN jack.
■
What to do if you already have a compo-
nent connected to your AV receiver/amp’s
TAPE input or RI Dock-compatible input
Connect the RI Dock to an unused AV input on
your AV receiver/amp. However, you will not be
able to use any of the functions.
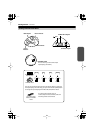
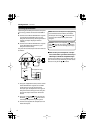
Hooking Up the RI Dock
L
R
AUDIO
INPUT
AC adapter
Wall outlet
-capable AV receiver/amp
Supplied AV cable
Supplied
cable
White
Red
White
Red
Note: When the AC adapter is unplugged or
not connected to the RI Dock, the RI Dock
will output no sound, functions will not
work, and your iPod’s battery will not be
charged.
Caution: Connect the supplied cable to
only jacks. Do not connect headphones
to the jack, as it will damage your equip-
ment.