


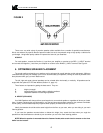


Attach the brackets to the speaker using the enclosed 3/4" wood screws. Use the pilot holes at the top center of
the back baffle of the cabinet. Either of the matching brackets can be attached to the speaker. The bracket that
attaches to the speaker must point down, and the bracket that attaches to the wall must point up. In both cases, the
face with the printing must face out.
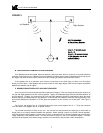
Then determine where you will locate your
speakers. See Section 5 below for guidelines on
where to locate the speakers. Then, using the
template sheet enclosed, mark holes on the wall
where the brackets will be permanently mounted.
Ideally, one set of these holes should go into a wall
stud, to give you the greatest strength.
First, locate the center of the stud. Tape the
four corners of the template sheet to the wall in the
location you have selected, using a carpenter's
l evel to make sure the line marked "LEVEL
TEMPLATE TO THIS LINE" is level. The template
sheet has locations marked for the two mounting
holes needed to attach the wall bracket to the wall.
Once you are absolutely certain that you have
the correct location, you are ready to drill the
pilot holes. Go ahead and drill right through the
paper template into the wa l l . R e - c h e ck yo u r
measurements (especially making sure the holes
will be level) at least once before drilling.
WARNING: IT IS POSSIBLE THAT
ELECTRICAL WIRING MAY BE LOCATED
BEHIND THE WALL IN THE LOCATION THAT
YOU HAVE SELECTED. BE EXTREMELY
CAREFUL ANY TIME YOU DRILL INTO A
WALL.
If you are mounting the bracket to a wall stud, drill two 3/32" holes per bracket. Remember that the wallboard
material is 1/2" or 5/8" inches thick, and you will drill through this before meeting the stud. If you are mounting the
bracket to drywall with the plastic anchors, drill two 1/4" pilot holes per bracket. Press the plastic wall anchors into the
1/4" pilot holes until they are flush with the wall. Tap them gently into place if necessary. Once all holes have been
drilled, remove the template from the wall.
Once the holes are drilled, place one bracket against the wall, making sure that the "tongue" (the portion that will
engage the bracket on the speaker cabinet) is facing away from the wall and pointing up. Using the two #6 - 1 3/4"
wood screws provided, fasten this bracket to the wall. BE VERY CAREFUL. DO NOT FORCE THE PLASTIC
ANCHORS THROUGH THE WALL OR OVERTIGHTEN THE SCREWS.
That's it! All that is left for you to do is attach the speaker wire to the input terminals (Section 4), and, from the
top, gently slide the speaker into place against the wall.
4. SPEAKER HOOK-UP
Please follow these instructions carefully, to avoid any possible damage to the speakers or your amplifier, and to
get the best possible sound.
The sound quality of your speakers can be affected by the type of speaker wire that you use to connect them.
While it is possible to use speaker wire as thin as 22 gauge to hook your speakers up, we recommend using the largest
diameter wire that you can. This means a minimum of 18 gauge wire. Over 10 feet, you should use 16 gauge, and
for more than 30 feet, we recommend using 14 gauge or heavier. The smaller the number, the thicker the wire.
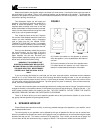
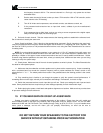
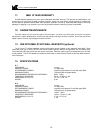
(A) Position the bracket on the speaker as pictured
when the speaker is to be located above the listeners’
ear level.
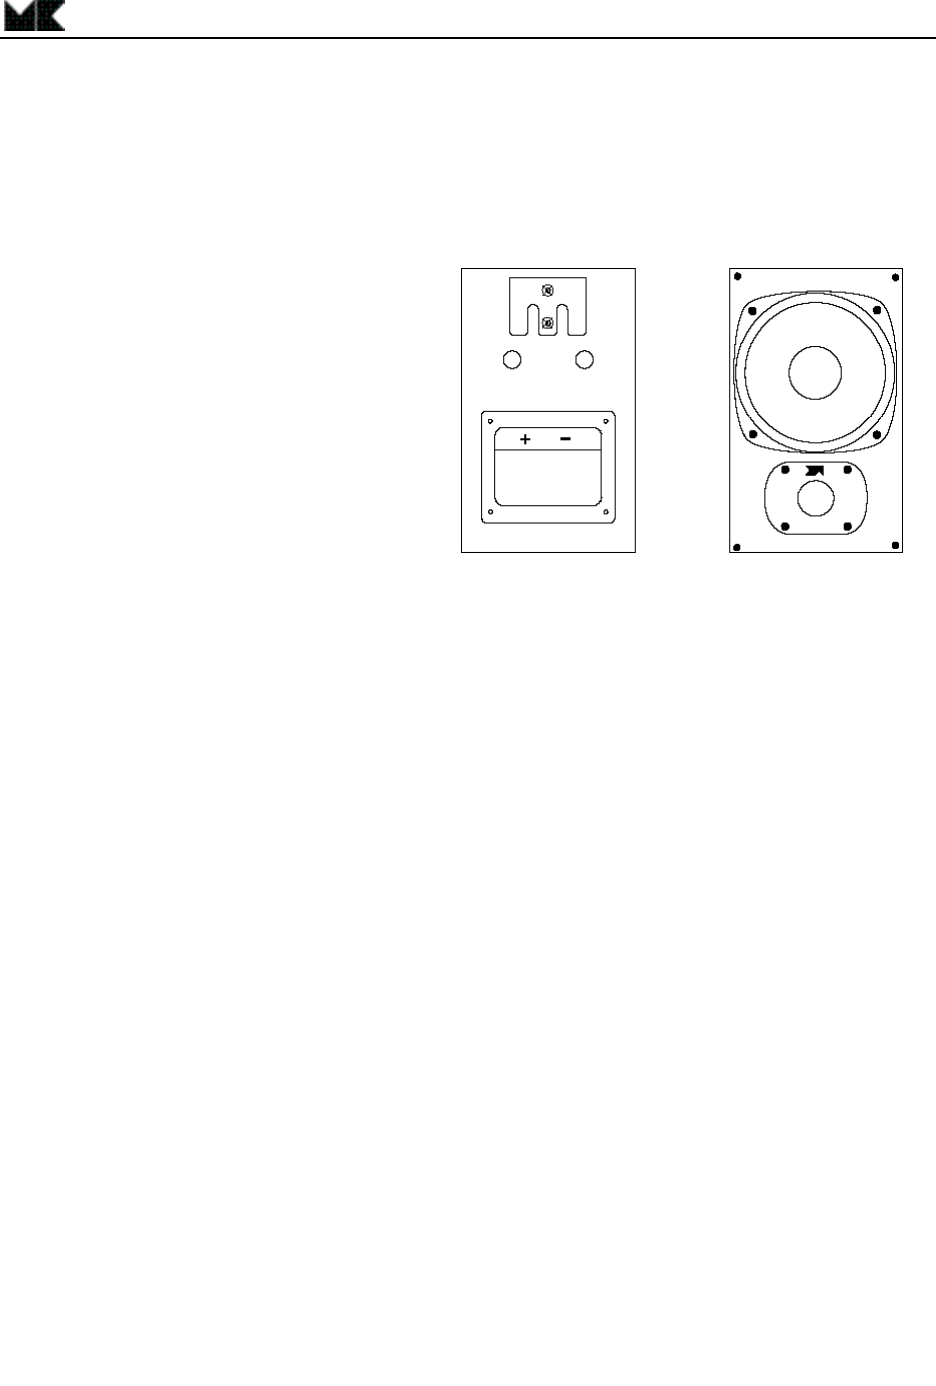
(B) Proper orientation of the front of the speaker when
it’s located above the listeners’ ear level. Notice the
tweeter is located towards the bottom of the baffle.
A
B
REAR
FRONT
FIGURE 1
5
K-5/K-7 SATELLITESPEAKER