


page 5
OPERATION
To reduce the risk of fire or electric shock, do not expose this
radio to rain or moisture.
WARNING!
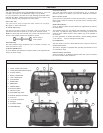
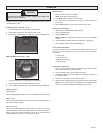
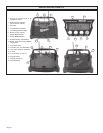
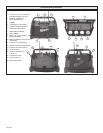
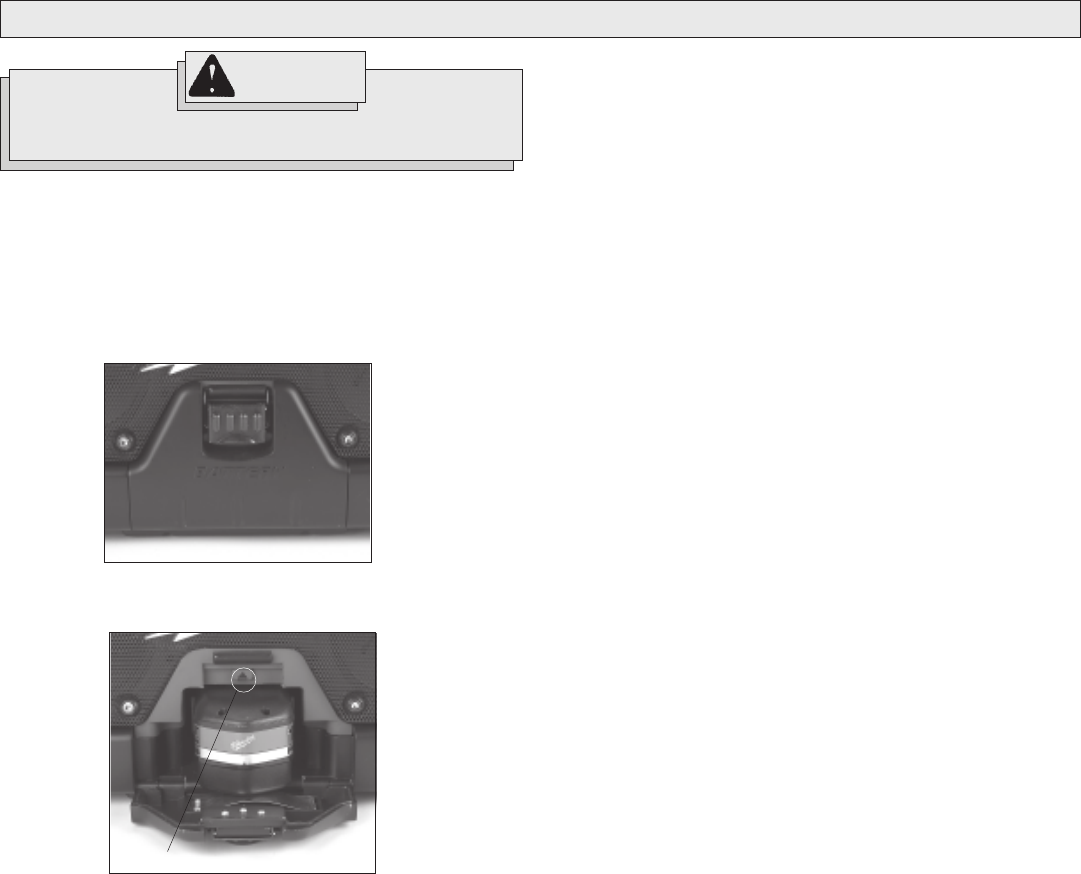
Installing Battery Pack (Fig. 1 & 2)
1. Lift lock/release latch to open battery compartment.
2. Insert battery pack all the way until you here a click.
3. Close battery compartment door and secure the lock/release latch.
Removing Battery Pack (Fig. 1 & 2)
1. Lift lock/release latch to open battery compartment
2. Push the eject button and pull the battery pack out.
3. Close battery compartment door and secure the lock/release latch.
Finding Stations
Selecting Band:
Push the MODE button to select AM, FM, or weather band before tuning.
Manual Tuning:
Turn the tuning knob right or left until it clicks to step through stations on
the current frequency band.
Auto Seek Tuning:
Turn the tuning knob slightly and hold for one (1) second or more. The
radio automatically tunes to the nearest station on the current frequency
band. Turn the tuning knob clockwise to go up on the band frequency,
counterclockwise to go down on the band frequency.
Fig. 2
Fig. 1
Eject button
To power the radio, plug the cord into an appropriate AC outlet or install
a suitable battery pack.
Setting Clock
1. Push the CLOCK button to view time.
NOTE: Radio has to be powered on.
2. Push MEM button. Display window will flash.
3. Turn the tuning knob clockwise to set hours, counterclockwise to
set minutes.
4. Push the MEM button or wait five (5) seconds to set time.
Setting Preset Stations
1. Select AM or FM band with the MODE button.
2. Tune to desired station.
3. Press the MEM button.
NOTE: "MEMORY" will appear in the top right corner of the display
window.
4. Use the PRESET button to select a number one (1) through 10.
5. Push the MEM button to store preset selection.
Using Punch EQ Feature
Push the Punch EQ button to set the desired level of bass sound. The
level of sound is indicated by the color of the Punch EQ button
as follows:
Off- No Light
Low- Green Light
Medium- Orange Light
High- Red Light
Using Stereo AUX Jack
1. Turn the volume down all the way using the on/off volume control
knob. This is to prevent speaker blowout.
2. Plug the auxiliary device into the Stereo AUX jack.
3. Press MODE button until "AUX" appears in the bottom left corner of
the display window.
4. Press the "PLAY" button on the auxiliary device.
5. Adjust volume to desired level using the on/off volume control knob.
NOTE: When in this mode the clock appears in the display window
and A.M. may also be displayed depending on time of day.