


1
2
3
4
5
6
7
8
9
0
!
@
#
$
%
^
&
Meet Magnavox at the Internet
http://www.magnavox.com
SMART. VERY SMART.
User guide
MCR220BK CD CLOCK RADIO
Read this manual first!
If you have any problems, do not attempt
to return this product to the store.
For fast help, call us first!
1-800-705-2000
S
E
E
W
H
Y
I
N
S
I
D
E
I
M
P
O
R
T
A
N
T
!
Return
your Warranty
Registration Card
within 10 days
Printed in China
W
CLASS 1
LASER PRODUCT
MCR220BK
3140 115 2903.4
SETTING TIMES CD
SETTING THE CLOCK AND ALARM TIMES
The time is displayed using the 12 hour clock (PM
indicator lights up = PM, off = AM).
1.
Press and hold down
TIME/ ALARM until the
clock or alarm time display
flashes, then release
TIME/ ALARM.
• Press TIME/ ALARM repeatedly to toggle
between the time or alarm displays
2.
Press and hold down
∞ / §
to fast adjust both
the hours and minutes settings.
3.
Release
∞ / §
when you
have reached the desired
setting.
y If you need to adjust
the time slowly, minute by minute, press and
release
∞ / §
repeatedly.
y After several seconds, the time setting is
confirmed when the display stops flashing.
4.
Repeat steps 1-3 for each of the clock or alarm
(AL1, AL2) settings.
CD PLAYBACK
1.
Insert a CD with the printed side facing up, and
close the door.
2.
Press PLAY/ PAUSE
2;
to start playback.
y Display shows:
'Cd: --' and the total
number of tracks, then
your current track
number, before
returning to clock time.
Other possible CD indications before
returning to clock time:
y door is shown if the CD door is not closed.
y noCd is shown if no CD has been inserted /
inserted incorrectly.
y nFCd is shown if the CD-R(W) is non-
finalized
y Err indicates a general error in operation of
the set.
3.
Adjust the sound with
4
or
3
.
4.
To interrupt, press
2;
y CD icon flashes.
5.
Press
2;
again to resume playback.
6.
Press ALARM RESET to stop playback.
Note: If CD playback is paused for more than 15
minutes and no controls are pressed, the set
automatically goes to standby mode.
Selecting a different track during playback
The track number appears briefly in the display when
you press
∞ or §
to skip tracks.
•
Press § once or more to skip to the next track(s).
• Press
∞
once and playback will return to the
beginning of the current track.
• Press
∞
more than once to skip to previous tracks.
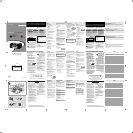
CONTROLS (see figure 1)
1 AL 1 ( ALARM/ OFF)
-
selects CD alarm;
-
to cancel or switch off CD alarm.
2 WAKE-UP TRACK
-
to program to your favorite CD track for wake-up
track alarm option.
3 SLEEP
- adjusts timer options for CD / radio;
- switch on radio for timer mode.
4 REPEAT ALARM/ BRIGHTNESS CONTROL
-changes the brightness of the display window;
-switches off the alarm for a 9 minute period;
-switches off radio / CD timer (SLEEP).
5 Power cord
-connect AC-DC adapter plug to wall outlet.
6 Coil antenna
-antenna to improve FM reception.
7 CD door
- lift here to open / close CD door
8 ALARM RESET (CD/ RADIO OFF)
- stops CD / radio playback;
- switches off radio / CD timer (SLEEP);
- stops the active buzzer, radio or CD alarms for 24
hours.
9 AL 2 ( ALARM/ OFF)
- selects radio / buzzer alarm mode;
- to cancel or switch off radio / buzzer alarm.
0 VOLUME 3 , 4
- adjusts the sound level.
! PLAY / PAUSE 2;
- starts / pauses CD playback.
@ DOWN, UP ∞ , §
- adjusts clock / alarm times
- skips CD tracks / searches for a particular passage.
# Tuning indicator
- shows the radio frequency of your selected
waveband.
$ RADIO ON (FM/ AM)
- switches on the radio;
- selects the radio waveband.
% TUNING
- tunes to a radio station.
^
TIME/ ALARM
- toggle to set the times for the clock time, or alarm 1
or 2.
& Display
- shows the clock / alarm times and status of the unit.
POWER SUPPLY
1.
Check if the power voltage, shown on the AC-DC
adapter plug, corresponds to your local power
supply. If it does not, consult your dealer or service
center.
2.
Connect the AC-DC adapter plug to the wall outlet.
3.
To disconnect the set completely from the power
supply, withdraw the AC-DC adapter plug from the
wall outlet.
The serial and production number are located on
the bottom of the set.
Standby power consumption (clock mode)..........2W
MEMORY BACKUP
The memory backup conveniently allows your clock and
alarm time settings to be stored for up to 3 minutes when
there is a power interruption e.g. AC power failure.
The complete CD clock radio and lighted display will be
switched off. As soon as the power supply returns, the
display will indicate the correct time.
•
If power supply returns after 3 minutes you will need to
re-enter the clock and alarm time settings.
BASIC FEATURES
Display brightness
1.
Toggle REPEAT ALARM/ BRIGHTNESS CONTROL.
y The brightness of the display toggles between:
low
➟
bright
➟
low
Volume
Press
4
or
3
to adjust the
volume level. The volume
level uo: is indicated as a
number from 0-32.
English
CONTROLS/ INSTALLATION
• Once your Magnavox purchase is registered,
you’re eligible to receive all the privileges
of owning a Magnavox product.
• So complete and return the Warranty
Registration Card enclosed with your
purchase at once.And take advantage of
these important benefits.
Return your Warranty Registration card today to
ensure you receive all the benefits you’re entitled to.
Warranty
Verification
Registering your product
within 10 days confirms
your right to maximum
protection under the
terms and conditions of
your Magnavox warranty.
Owner
Confirmation
Your completed Warranty
Registration Card serves
as verification of
ownership in the event of
product theft or loss.
Model
Registration
Returning your Warranty
Registration Card right
away guarantees you’ll
receive all the information
and special offers which
you qualify for as the
owner of your model.
t
This “bolt of lightning”
indicates uninsulated material
within your unit which may
cause
an electrical shock. For the safety
everyone in your household,
please
not remove product covering.
s
The “exclamation point”
calls attention to features for
which you should read the
enclosed literature closely to prevent
operating and maintenance problems.
WARNING: TO PREVENT FIRE
OR SHOCK HAZARD, DO NOT
EXPOSE THIS EQUIPMENT TO RAIN
OR MOISTURE.
CAUTION: To prevent electric
shock, match wide blade of plug to
wide slot, and fully insert.
For Customer Use
Enter below the Serial No. which is located
on the bottom of the cabinet. Retain this
information for future reference.
Model No. _________________________
Serial No. _________________________
MAC4400
Know these
safety
symbols
CAUTION
RISK OF ELECTRIC SHOCK
DO NOT OPEN
CAUTION: TO REDUCE THE RISK OF ELECTRIC SHOCK, DO NOT
REMOVE COVER (OR BACK). NO USER-SERVICEABLE PARTS
INSIDE. REFER SERVICING TO QUALIFIED SERVICE PERSONNEL.
of
do
Gentle Wake Volume
A sure way of getting up in the mornings, the gentle
wake volume for the alarm begins from a fixed gentle
volume (10) and gradually increases to a maximum
higher setting of ( 25.)
• The default low volume is Lo : 10, and the
maximum volume is HI : 25.
• During the alarm call, if you press
4
or
3
, the
volume stops increasing immediately.
• The gentle wake volume settings do not affect
normal CD and radio playback volume level, unless
you have pressed
4
or
3
during the alarm call.
SWITCHING OFF THE ALARM
There are three ways to switch off the alarm. Unless
you cancel the alarm completely, the 24 HOUR
ALARM RESET will be automatically selected after
59 minutes, from the time your alarm time first goes
off.
24 HOUR ALARM RESET
If you want the alarm mode to be stopped
immediately but also wish to retain the same alarm
setting for the following day:
• Press ALARM RESET.
y You will hear a beep tone to confirm the 24
hour alarm is reset.
REPEAT ALARM
This will repeat your alarm call at 9-minute intervals.
• During the alarm call, press REPEAT ALARM/
BRIGHTNESS CONTROL.
• Repeat if desired up to an hour.
Note:
• The selected alarm mode
,
or
indicators flashes throughout the repeat alarm
duration.
• If you are using the CD alarm mode, CD playback
resumes at the point where the repeat alarm
interrupted.
• During the CD alarm, CD playback continues for up
to an hour unless you cancel / reset the alarm.
CANCELING THE ALARM COMPLETELY
To cancel the set alarm time before it goes off, or
during the alarm call:
• Press AL1 or AL 2 once or more until the selected
alarm indicator disappears from the display.
y You will hear a beep tone to confirm the alarm
has been cancelled.
SLEEP
About Sleep
The CD clock radio has a built-in sleep timer which
enables the set to be automatically switched off
during radio or CD playback after a set period of time.
There are 3 sleep times: 60, 30 and 15 minutes.
The sleep function does not change the operation of
your alarm settings.
Setting SLEEP
1.
Press
2;
(CD) or RADIO ON (radio) to switch on
the desired mode.
• You can also press SLEEP if you want the timer in
radio mode.
2.
Select your timer option by
pressing SLEEP once or
more until the desired
option is shown.
• Display shows SL: and the timer options:
60➟ 30➟ 15 minutes ➟ 60➟ 30...
3.
To cancel the timer function you can either:
• Press ALARM RESET.
• Press REPEAT ALARM/ BRIGHTNESS CONTROL.
• Press SLEEP once or more until the sleep function
is no longer shown.
SWITCHING OFF ALARM SLEEPCD/ RADIO SETTING ALARM OPTIONS
Finding a passage within a track
1.
During playback, press and hold down
∞
or
§
y The CD is played at high speed and low
volume; the display will show 'Cd:' and your
current track number.
2.
Release
∞
or
§
when you recognize the passage
you want.
y Normal CD playback and standby clock time
resumes.
RADIO
1.
Press RADIO ON (FM/ AM) to switch on the
radio.
y Display shows 'tu' before returning to clock
time.
2.
Press RADIO ON (FM/ AM) again if you wish to
change waveband.
3.
Adjust the sound using
4
or
3
4.
Adjust the TUNING wheel to tune to a radio
station.
To improve reception:
FM: Extend coil antenna at the back of the unit fully
for optimum reception.
AM: Uses a built-in antenna. Direct the antenna by
adjusting the position of your set.
5.
Press ALARM RESET to switch off.
SETTING THE ALARM OPTIONS
GENERAL
Two different alarm times, AL 1 and AL 2 can be set
in the CD, radio or buzzer modes.
Selecting the Alarm Mode Options
When selected, the selected alarm mode is shown in
the display, and the respective AL 1 or 2 button
lights up.
1.
Select your choice of alarm mode.
Either press briefly:
• AL1 once for CD alarm
.
This enables CD
playback from the first track as your alarm call.
• AL2 once or more for
radio
/
buzzer
alarm
2.
Read the following section if you want to select
the WAKE-UP TRACK alarm option.
Selecting CD WAKE-UP Alarm Mode
You can program and select a CD track number
between 1-99, when the set is in the standby or radio
playback mode.
However, if the track number programmed does not
exist on your CD, the CD will start playback from the
first track during the alarm call.
1.
Set the alarm time for AL1.
2.
Insert a CD into the CD compartment.
3.
Press AL 1 to select CD alarm mode.
4.
Press WAKE-UP TRACK to activate favorite track
programming.
5.
Press
∞
or
§
until the desired track number is
shown.
6.
Press WAKE-UP TRACK to confirm the selected
track number.
y The display returns to standby clock time.
7.
If you want to review your programmed track
number, press WAKE-UP TRACK
Note:
• The buzzer alarm option will automatically replace
the CD alarm if you have:
–
inserted a CD incorrectly;
–
inserted a damaged CD;
–
forgotten to insert any CD;
–
not closed the CD door properly.
IMPORTANT SAFETY INSTRUCTIONS
1. Read these instructions.
2. Keep these instructions.
3. Heed all warnings.
4. Follow all instructions.
5. Do not use this apparatus near
water.
6. Clean only with a dry cloth.
7. Do not block any of the ventilation
openings. Install in accordance
with the manufacturer’s instruc-
tions.
8. Do not install near any heat
sources such as radiators, heat registers,
stoves, or other apparatus (including
amplifiers) that produce heat.
9. Do not defeat the
safety purpose of
the polarized or
grounding-type plug.A
polarized plug has two blades with one
wider than the other.A grounding type
plug has two blades and a third grounding
prong.The wide blade or the third prong
are provided for your safety. If the provid-
ed plug does not fit into your outlet, con-
sult an electrician for replacement of the
obsolete outlet.
10.
Protect the power cord from being
walked on or pinched particulary at plugs,
convenience receptacles, and the point
where they exit from the apparatus.
11.
Only use attachments/accessories
specified by the manufacturer.
12. Use only with a cart, stand,
tripod, bracket, or table speci-
fied by the manufacturer, or
sold with the apparatus.When
a cart is used, use caution when
moving the cart/apparatus
combination to avoid injury
from tip-over.
13 .
Unplug this apparatus during light-
ning storms or when unused for long
periods of time.
14 .
Refer all servicing to qualified service
personnel. Servicing is required when the
apparatus has been damaged in any way,
such as power-supply cord or plug is
damaged, liquid has been spilled or
objects have fallen into the apparatus, the
apparatus has been exposed to rain or
moisture, does not operate normally, or
has been dropped.
15.
Battery usage
CAUTION
– To
prevent battery leakage which may result in
bodily injury or damage to the unit:
●
Install all batteries correctly, + and - as
marked on the unit.
●
Do not mix batteries (old and new or
carbon and alkaline, etc.).
●
Remove batteries when the unit is not
used for a long time.
EL 6475-E003: 01/6
TROUBLESHOOTING
TROUBLESHOOTING
Continuous crackling/ hiss disturbance during
AM broadcast
–
Electrical interference from TVs, computers,
fluorescent lamps, etc.
•
Move set away from other electrical equipment
The alarm does not function
–
Alarm time not set
•
See section on SETTING THE CLOCK AND ALARM
TIMES
– Alarm mode not selected
•
See section on SETTING THE ALARM OPTIONS
MAINTENANCE TROUBLESHOOTING
MAINTENANCE (see figure 2)
General
• If you do not intend to use the CD clock radio for a
long time, withdraw the AC-DC adapter plug from
the wall outlet.
• Do not expose the set or CDs to humidity, rain,
sand or excessive heat caused by heating
equipment or direct sunlight.
• To clean the set, use a soft dry cloth. Do not use
any cleaning agents containing alcohol, ammonia,
benzene or abrasives as these may harm the
housing.
CD player and CD handling
• The lens of the CD player should never be touched!
• Sudden changes in the surrounding temperature
can cause condensation to form and the lens of
your CD player to cloud over. Playing a CD is then
not possible. Do not attempt to clean the lens but
leave the set in a warm environment until the
moisture evaporates.
• Always shut the CD door to keep the CD
compartment dust-free. To clean, dust the
compartment with a soft dry cloth.
• To clean the CD, wipe in a straight line from the
center towards the edge using a soft, lint-free
cloth. Do not use cleaning agents as they may
damage the disc.
• Never write on a CD or attach any stickers to it.
TROUBLESHOOTING
If a fault occurs, first check the points listed below
before taking the set for repair.
If you are unable to remedy a problem by following
these hints, consult your dealer or service center.
WARNING:
Do not open the set as there is a risk of electric shock.
Under no circumstances should you try to repair the
set yourself, as this will invalidate the warranty.
No sound
–
Volume not adjusted
• Adjust the VOLUME
No operation buttons function
–
Electrostatic discharge
• Disconnect the set from the power supply and
reconnect the set after 5 minutes.
CD playback does not work
–
CD badly scratched or dirty
• Replace/ clean CD
–
Laser lens steamed up
• Wait until lens has adjusted to room temperature
–
Laser lens dirty
• Clean lens by playing a CD lens cleaning disc
–
CD-R(W) is non-finalized
• Use a finalized CD-R(W)
Occasional crackling sound during FM
broadcast
–
Weak signal
• Extend coil antenna fully
AC Polarized
Plug
PORTABLE A
UDIO
One Year Free Exchange
This product must be carried in for an exchange.
LIMITED WARRANTY
WHO IS COVERED?
You must have proof of purchase to exchange the product.
A sales receipt or other document showing that you
purchased the product is considered proof of purchase.
Attach it to this owner’s manual and keep both nearby.
WHAT IS COVERED?
Warranty coverage begins the day you buy your product.
For one year thereafter, a defective or inoperative product
will be replaced with a new, renewed or comparable
product at no charge to you.A replacement product is
covered only for the original warranty period.When the
warranty on the original product expires, the warranty on
the replacement product also expires.
WHAT IS EXCLUDED?
Your warranty does not cover:
• labor charges for installation or setup of the product,
adjustment of customer controls on the product, and
installation or repair of antenna systems outside of the
product.
• product repair and/or part replacement because of
misuse, accident,unauthorized repair or other cause
not within the control of
• reception problems caused by signal conditions or
cable or antenna systems outside the unit.
• a product that requires modification or adaptation to
enable it to operate in any country other than the
country for which it was designed, manufactured,
approved and/or authorized, or repair of products
damaged by these modifications.
• incidental or consequential damages resulting from the
product.(Some states do not allow the exclusion of
incidental or consequential damages, so the above
exclusion may not apply to you.This includes, but is not
limited to,prerecorded material,whether copyrighted
or not copyrighted.)
• a product used for commercial or institutional
purposes.
WHERE IS EXCHANGE AVAILABLE?
You may exchange the product in all countries where the
product is officially distributed by
In countries where does not distribute the product,
the local Magnavox service organization will attempt to provide
areplacement product (although there may be a delay if the
appropriate product is not readily available).
BEFORE REQUESTING EXCHANGE...
Please check your owner’s manual before requesting an
exchange.Adjustments of the controls discussed there may
save you a trip.
EXCHANGING A PRODUCT IN U.S.A.,
PUERTO RICO OR U.S.VIRGIN ISLANDS...
Contact your dealer to arrange an exchange.Or, ship the
product,insured and freight prepaid,and with proof of
purchase enclosed,to the address listed below.
Small Product Service Center
Service Company
907 Snapps Ferry Road, Plant 2,Building 6
Greeneville,TN 37743
(In U.S.A.,Puerto Rico and U.S.Virgin Islands, all implied
warranties,including implied warranties of merchantability and
fitness for a particular purpose, are limited in duration to the
duration of this express warranty.But, because some states do
not allow limitations on how long an implied warranty may
last, this limitation may not apply to you.)
EXCHANGING A PRODUCT IN CANADA...
Please contact Magnavox at:
1-800-661-6162 (French Speaking)
1-800-363-7278 (English Speaking)
(In Canada, this warranty is given in lieu of all other
warranties.No other warranties are expressed or implied,
including any implied warranties of merchantability or
fitness for a particular purpose. Magnavox is not liable under
any circumstances for any direct,indirect,special, incidental
or consequential damages, howsoever incurred,even if
notified of the possibility of such damages.)
REMEMBER...
Please record the model and serial numbers found on the
product below.Also, please fill out and mail your warranty
registration card promptly. It will be easier for us to notify
you if necessary.
MODEL # __________________________________
SERIAL # __________________________________
EL6095T002 / MAC5433 / 1-97
This warranty gives you specific legal rights.You may have other rights which vary from state/province to state/province.
Service Solutions Group,P.O.Box 2976, Longview, Texas 75606, (903) 242-4800
Magnavox.
Magnavox.
Magnavox
Magnavox
Class II equipment symbol
This symbol indicates that the unit has a double
insulation system.
Alarm time display
If you have set both alarms, the standby alarm time
display will show the earlier of the two alarm times
as priority.
E.g. if AL1 = 6:00 and AL2 = 5:45, then the standby
alarm display will show the AL2 time 5:45.
Radio Alarm:
If you have selected the radio alarm, make sure
you have tuned properly to a station.
Environmental information
nnecessary packing material has been
omitted to make the packing easy to separate
into 2 categones: cardboard and paper pulp.
Your unit consists of materials which can be
recycled if disassembled by a specialized
company. Please observe local regulations on
the disposal of packing materials and old
equipment.
CAUTION
Use of controls or adjustments or performance
of procedures other than herein may result in
hazardous radiation exposure or other unsafe
operation.
• Dès que l'achat de votre appareil
est enregistré, vous avez droit
à tour les avantages dont bénéficient les
possesseurs des produits Magnavox.
• Remplissez et renvoyez votre carte
d'enregistrement de garantie jointe à
votre appareil sans tarder. Vous
bénéficierez de ces avantages importants.
Vérification
de garantie
Enregistrez votre produit
dans les 10 jours pour
confirmer votre droit à une
protection maximum selon
les termes et les conditions
de votre garantie Magnavox.
Confirmation
de possession
Votre carte
d'enregistrement de
garantie prouve que vous
possédez l'appareil en cas
de vol ou de perte du
produit.
Enregistrement
du modèle
Renvoyez votre carte
d'enregistrement de garantie
dès aujourd'hui pour vous
assurer de recevoir toutes les
informations, les offres et les
bonus auxquels vous avez
droit en tant que ossesseur
de ce modèle.
Cet «éclair à pointe de flèche»
indique qu'un matériau non
isolé, situé à l'intérieur de
l'unité, risque de provoquer un choc
électrique. Pour la sécurité de chacun,
nous vous prions de ne pas retirer le
boîtier de ce produit.
Le «point d'exclamation» attire
votre attention sur des sujets
risquant de provoquer des
problèmes de fonctionnement et
d'entretien si vous ne lisez pas les
informations s'y reportant.
DANGER: NE PAS EXPOSER
CET ÉQUIPEMENT A LA PLUIE NI A
UNE HUMIDITÉ EXCESSIVE POUR
ÉVITER LES RISQUES D'INCENDIE ET
DE CHOC ÉLECTRIQUE.
ATTENTION: Pour éviter les
chocs électriques, introduire la lame la
plus large de la fiche dans la borne
correspondante de la prise et pousser
jusqu'au fond.
Cet espace vous est réservé
Inscrivez ci-dessous le numéro de série situé à la
basse du bloc. Conservez cette information pour
vous y reporter à l'avenir.
N° de modèle __________________________
N° de série ____________________________
MAC4400
Connaissez ces
symboles de
sécurite
RISQUE DE CHOC ELECTRIQUE
NE PAS OUVRIR
ATTENTION: POUR REDUIRE LE RESQUE DE CHOC ELECTRIQUE,
NE PAS ENLEVER LE COUVERCLE (NI LE PANNEAU ARRIERE). CET APPAREIL
NE COMPORTE AUCUNE PIECE POUVANT REPAREE PAR L’UTILISATEUR.
CONFIER SON ENTRETIEN A UN TECHNICIEN QUALIFIE.
ATTENTION
Renvoyez votre carte d'enregistrement de garantie pour vous
assurer de recevoir tous les avantages auxquels vous avez droit.
Magnavox
t
s
CONSIGNES DE SÉCURITÉ IMPORTANTES
1. Lisez ces instructions.
2. Conservez ces instructions.
3. Respectez les avertissements.
4. Suivez toutes les instructions.
5. N’utilisez pas cet appareil à
proximité d’une source d’eau.
6. Nettoyez l’appareil uniquement
avec un chiffon sec.
7. N’obstruez aucun orifice de
ventilation. Installez l’appareil
selon les instructions du fabricant.
8. N’installez pas l’appareil près
d’une source de chaleur comme par
exemple des radiateurs, bouches de
chaleur, cuisinières, ou autres appareils
(même des amplificateurs) dégageant de
la chaleur
9. Ne détruisez pas
la incorporée dans
la prise de terre ou
prise polarisée
fournie. Une prise polar-
isée est dotée de deux lames dont une
plus large que l’autre. Une prise de terre
est dotée de deux fiches semblables et
d’une troisième, plus large, qui assure la
mise à la terre pour votre sécurité. Si la
prise fournie ne convient pas à la prise
murale dont vous disposez, consultez un
électricien pour remplacer et adapter
votre prise murale.
10.
Protégez le cordon d’alimentation
pour éviter de marcher dessus ou de le
pincer particulièrement aux endroits des
prises, mâles et femelles, et au point de
raccordement sur l’appareil lui-même.
11.
Utilisez uniquement des
accessoires ou options
recommandés par le fabricant.
12.
Utilisez uniquement un
meuble sur roulettes,un
support, un pied, une étagère
ou une table de type recom-
mandé par le fabricant. Si vous
utilisez un meuble sur
roulettes, veillez à le déplacer
avec précaution afin d’éviter
tout accident corporel si
l’équipement se renversait.
13 .
Débranchez l’appareil pendant les
orages ou s’il doit rester inutilisé pendant
une période de temps prolongée.
14 .
Pour toute réparation, faites appel à
un personnel qualifié. Une réparation
sera nécessaire si l’appareil a subi des
dommages tels que détérioration du
cordon d’alimentation ou de la prise, liq-
uide renversé sur l’appareil, ou encore si
un objet est tombé dessus, si l’appareil a
été exposé à la pluie ou à l’humidité, s’il
ne fonctionne pas correctement ou s’il a
fait une chute.
15.
PRÉCAUTION d’emploi des
piles – Afin d’éviter toute fuite des piles
qui risquerait de causer des blessures
corporelles ou d’endommager l’appareil :
● Installez toutes les piles correctement,
+ et - tels qu’indiqués sur l’appareil.
● Ne mélangez pas les piles (pas de piles
neuves avec des usagées ou de piles
au carbone avec des alcalines, etc.).
● Enlevez les piles lorsque l’appareil reste
inutilisé pendant une longue période.
EL 6475-F003: 01/6
Prise
polarisée C.A.
Symbole d’ un appareil de classe II
Ce symbole indique que l’appareil est équipé
d’un système à double isolation.
SYSTÈME SONORE PORTABLE
Échange gratuite pendant un an
Il faut porter ce produit à un centre de service pour l’échanger.
GARANTIE LIMITÉE
QUI EST COUVERT ?
Il faudra présenter une preuve d’achat pour pouvoir bénéficier des
services de la garantie. Le reçu,la facture ou un autre document
portant la date d’achat qui prouve que vous avez bien acheté le
produit est considéré comme preuve d’achat. L’attacher à ce manuel
d’emploi et les garder tous les deux à portée de main.
QU’EST-CE QUI EST COUVERT ?
La couverture de la garantie entre en vigueur le jour où vous
achetez le produit.Pendant un an à compter de cette date,tout
produit défectueux ou qui ne fonctionne pas sera remplacé par
un produit neuf,renouvelé ou un produit comparable sans frais
aucun au consommateur.Un produit de remplacement n’est
couvert que pendant la période non-écoulée de garantie
d’origine. Lorsque la garantie du produit d’origine vient à terme,
la garantie du produit de remplacement est terminée aussi.
QU’EST-CE QUI EST EXCLU DE LA GARANTIE ?
La garantie ne couvre pas:
• les frais de main d’œuvre pour installer ou préparer,pour
régler les commandes et pour installer ou réparer les systèmes
d’antenne à l’extérieur du produit.
• la réparation du produit et/ou d’une pièce pour cause du
mauvais emploi,d’accident, de réparations non-agréées ou
d’une autre raison qui ne peut pas être contrôlée par
Magnavox.
• des problèmes de réception dûs à des conditions de signal,au
câble ou aux systèmes d’antenne à l’extérieur de l’unité.
• un produit qui nécessite des modifications ou adaptations pour
lui permettre de fonctionner dans un pays autre que le pays
pour lequel il a été conçu,fabriqué, agréé et/ou autorisé,ou la
réparation des produits endommagés par de telles
modifications.
• des dommages indirects ou conséquents qui résultent du
produit.(Certains états ou provinces ne permettent pas
l’exclusion de dommages indirects ou conséquents.Il est donc
possible que l’exclusion ci-dessus ne s’applique pas au cas
présent.Cela comprend,mais de façon non-limitative,des
enregistrements,qu’ils soient protégés ou non par les lois sur
les droits d’auteur).
• un appareil acheté,utilisé ou réparé en dehors des États-Unis,
de Porto Rico,des Îles Vierges ou du Canada ou utilisé à des
fins commerciales ou institutionnelles (y compris mais non
limités aux appareils utilisés pour la location).
OÙ L’ÉCHANGE EST-ELLE PROPOSÉE ?
Le produit pourra s’échanger dans tous les pays où le produit est
distribué officiellement par
Dans des pays où Magnavox ne
distribue pas le produit,l’organisme
local de service Magnavox tentera
de fournir un produit de
remplacement (mais il pourra y avoir des
retards si le bon
produit n’est pas facilement disponible).
AVANT DE DEMANDER UNE ÉCHANGE…
Veuillez consulter le manuel d’instructions avant de demander un
produit d’échange.Un petit réglage d’une des commandes
expliqué dans le manuel d’instructions pourrait éviter de faire un
trajet.
POUR BÉNÉFICIER DE L’ÉCHANGE GARANTIE AUX
É.-U.,AU PUERTO RICO OU DANS LES ÎLES VIERGES
AMÉRICAINES…
Contacter votre vendeur pour arranger l’échange.Ou bien,
renvoyer le produit, frêt et assurances payés,avec preuve d’achat
incluse,à l’adresse ci-dessous :
Small Product Service Center
MagnavoxService Company
907 Snapps Ferry Road,Plant 2,Building 6
Greeneville,TN 37743 É.-U.
(Aux É.-U.,au Puerto Rico et aux Îles Vierges,toute garantie
implicite, y compris des garanties de vendabilité et d’aptitude à un
but spécifique, est limitée à la durée de cette garantie explicite.
Mais,étant donné que certains états et provinces ne permettent
pas de limité la durée d’une garantie implicite,cette limitation
pourrait ne pas s’appliquer au cas présent.)
POUR BÉNÉFICIER D’UNE ÉCHANGE GARANTIE
AU CANADA…
Veuillez contacter Magnavox
á :
1-800-661-6162 (Francophone)
1-800-363-7278 (Anglophone)
(Au Canada,cette garantie est consentie à la place de toute autre
garantie.Aucune autre garantie n’est donnée, qu’elle soit explicite ou
implicite, y compris une garantie implicite de vendabilité ou d’aptitude
à un but spécifique. Magnavox
n’est pas,en aucun cas, responsable des
dommages,qu’ils soit directs ou indirects,spéciaux, secondaires ou
conséquents,quels que soient leurs origines, même en présence
d’une notification de la possibilité de tels dommages.)
RAPPEL IMPORTANT...
Veuillez inscrire ci-dessous les numéros de modèle et de série qui
se trouvent sur le produit même.De plus, veuillez remplir et
renvoyer sans délai la carte d’enregistrement de garantie.Il nous
sera ainsi plus facile de vous contacter en cas de besoin.
Nº DE MODÈLE _______________________________
Nº DE SÉRIE _______________________________
EL6095T002 / MAC5433 / 1-99
Cette garantie vous donne des droits légaux spécifiques et vous pourriez avoir d’autres droits qui varient d’état en état et de province en province.
Service Solutions Group,P.O.Box 2976, Longview, Texas 75606, É.U., (903) 242-4800
Magnavox.
X
2
1
AL TIME 2
NOTES
NOTES
Canada
English:
This digital apparatus does not exceed the Class B limits for radio noise emissions from digital apparatus as
set out in the Radio Interference Regulations of the Canadian Department of Communications.
Français :
Cet appareil numérique n'émet pas de bruits radioélectriques dépassant les limites applicables aux appareils
numériques de Classe B prescrites dans le Règlement sur le Brouillage Radioélectrique édicté par le Ministère
des Communications du Canada.
This product complies with the FCC-Rules, Part 15 and with 21 CFR 1040.10. Operation is subject
to the following two conditions:
1. This device may not cause harmful interference, and
2. this device must accept any interference received, including interference that may cause
undesired operation.
L'appareil répond aux normes FCC, Part 15 et 21 CFR 1040.10. Fonctionnement soumis aux deux
conditions suivantes:
1. Cet appareil ne doit pas provoquer d'interférences nuisibles, et
2. Cet appareil doit accepter toute interférence reçue, y compris les interférences susceptibles de
provoquer un fonctionement peu satisfaisant.
El aparato cumple las normas FCC, Parte 15 y 21 CFR 1040.10. Funcionamiento dependiente de dos
condiciones siguientes:
1. Este aparato no puede provocar interferencia dañina, y
2. Este aparato debe aceptar cualquier interferenciarecibida, incluyendo las interferencias que
puedenprovocar un funcionamiento insuficiente.
aj3970/17 8/23/02 11:55 AM Page 1 (1,1)