


18
Note:
For accurate barometric pressure trends, the Weather Station should operate at
the same altitude for example, it should not be moved from the ground to the
second floor of the house. Should the unit be moved to a new location, discard
readings for the next 48-60 hours.
This feature cannot be turned off.
VII. MOUNTING
Note:
Before permanently mounting, ensure that the Wireless Weather Station
is able to receive signals from the sensors and WWVB signal at the desired
location. To achieve a true temperature reading, avoid mounting the remote
temperature sensor (or any sensor) where direct sunlight can reach the remote
sensor. We recommend that you mount the remote sensor on a North-facing
wall or under an eve. The sending range of the remote temperature sensor is
330-ft (100m) however obstacles such as walls, concrete, and large metal
objects can reduce the range. Place all units in their desired location, and wait
approximately 15 minutes before permanently mounting to ensure that there is
proper reception. If the Wireless Weather Station loses the signal from the
remote sensor, it will display the last temperature reading for 15 minutes. After
15 minutes of not receiving any signals, the remote temperature will display “- -
.-”.
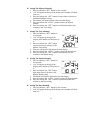
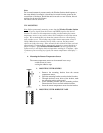
A. Mounting the Remote Temperature Sensor
The remote temperature sensor can be mounted in two ways:
• with the use of screws
• using the adhesive tape
1. MOUNTING WITH SCREWS
a. Remove the mounting bracket from the remote
temperature sensor.
b. Place the mounting bracket over the desired location.
c. Through the three screw holes of the bracket, mark
the mounting surface with a pencil.
d. Screw mounting bracket onto the mounting surface.
Ensure that the screws are flush with the bracket.
e. Insert the remote temperature sensor into the bracket.
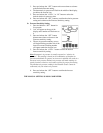
2. MOUNTING WITH ADHESIVE TAPE