


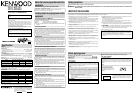

Part names
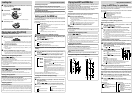
Player Liquid crystal display
O
P
E
N
_
+
DC IN
PHO
NE
S/LIN
E
O
UT
REM
O
TE
VOLUME
HOLD
1
4
3
2
5
7
6
8
9
0
-
_
+
DC IN
1432
5
6
8
7
1 D.A.S.C. display
Illuminated when the sound skip guard function is on.
2 B.BOOST display
Illuminated when the bass tones have been boosted.
3 RANDOM display
Illuminated when random playback has been selected.
4 Repeat display
Illuminated when repeat playback has been selected.
5 Battery display
Illuminated when the batteries are being recharged.
6 Information display area
Displays track numbers, amount of time elapsed, titles and other disc information,
and the status of the equipment.
7 mark
Illuminated if files that can be played back are contained within the selected folder
when media on which MP3 and WMA files are stored has been inserted into the
player (blinks during folder selection).
8 mark
Illuminated if other folders are contained within the selected folder when media on
which MP3 and WMA files are stored has been inserted into the player (blinks during
folder selection).
1 MODE key
Used to switch between the playback mode, the display mode and other modes.
2
11
11
1,
¡¡
¡¡
¡ keys
Used for fast forward and fast reverse, and to select folders.
3
44
44
4,
¢¢
¢¢
¢ keys
Used to search the beginning of tracks, to set up the various modes, and to select
folders.
4 STOP/OFF key
Used to stop, to switch off the power supply, and to recharge the batteries.
5 PLAY/PAUSE key
Used for playback, pausing, and to switch on the power supply.
6 D.A.S.C. (Digital Anti-Shock Circuit) key
Used to switch across to the sound skip guard function.
7 Liquid crystal display
8 DC IN (external power supply terminal)
Used for connecting the AC adapter supplied.
Used for connecting the car battery adapter when using a car battery for playback
purposes.
9 REMOTE PHONES/LINE OUT terminals
Used for connecting the remote controller or headphones supplied.
Used for connecting an amplifier or speakers built into amplifiers when used as a
LINE OUT terminal.
Used for connecting the car cassette adapter when using for playing back car audio
units.
0 VOLUME knob
Used to adjust the volume.
- OPEN/HOLD switch
Used when the top cover is to be opened and when switching the hold function be-
tween on and off.
2
1
3
4
5
6
1 PHONES terminal
Used to connect the headphones.
2 VOLUME knob
Used to adjust the volume.
3 HOLD switch
Used to switch the hold function be-
tween on and off.
4
44
44
4 key (SKIP DOWN)
Used for searching for the beginning of
tracks, etc.
5 STOP
77
77
7 key
Used to stop the player and switch off
the power.
6
33
33
3/
¢¢
¢¢
¢ key (PLAY/SKIP UP)
Used for playing and searching for the
beginning of tracks, etc.
Remote controller (DPC-MP727)
(Except for U.S.A., Canada and Australia)
Remote controller and headphone
connections
¶ The headphones are connected to the PHONES
terminal on the remote controller. The headphones
can also be connected directly to the player when
the remote controller is disconnected.
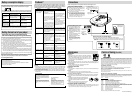
Inserting and recharging the batteries
Inserting the batteries in the player
1
Open the cover.
O
P
E
N
2
Taking care over the positive (+) and negative (-) poles, in-
sert the batteries.
When running the player on normal dry-cell batteries, use size AA alkaline
batteries (LR6) available on the open market.
As playback time will be greatly reduced when manganese batteries are used,
ensure that size AA alkaline batteries are used.
Make sure that both batteries are replaced when changing batteries.
Do not use rechargeable batteries and size AA alkaline batteries together.
3
Close the cover.
Using the external battery case
Using the battery case together with the rechargeable batteries or size AA alkaline bat-
teries set in the player will provide extended periods of continual play.
1
Remove the cover on the battery case.
2
Taking care over the positive (+) and negative (-) poles, in-
sert the size AA alkaline batteries.
_
+
_
+
It is not possible to recharge the batteries with the external battery case.
As playback time will be greatly reduced when manganese batteries are used,
ensure that size AA alkaline batteries are used.
Make sure that both batteries are replaced when changing batteries.
3
Close the cover.
4
Attach the case to the player.
Caution:
Remove the battery case from the player when it is not to be used for long periods of
time. As the dry-cell batteries will recharge the rechargeable batteries, the dry-cell bat-
teries will run out quickly. Also, ensure that the batteries are removed from the case.
Recharging the batteries
Refer to the “Accessories” table.
Ensure that only the rechargeable batteries supplied with the player (NB-150) or
sold separately (NB-130) are used. Batteries other than special Kenwood batteries
must not be used under any circumstances.
Remove the external battery case.
1
Insert the rechargeable batteries in the player, and then
connect the AC adapter.
2
Switch the power off.
3
Wait for five seconds, press the STOP key twice in succes-
sion, and then confirm that the symbol is illuminated.
The recharge timer will be switched off after approximately six hours. The power
will be switched off once recharging is complete.
4
Disconnect the AC adapter from the player once recharg-
ing is complete.
Electrode
Guide pin
Align the guide pin and electrode
with the holes on the player and
press the battery case into position,
and then turn the screw in the di-
rection of the arrow to fix it in place.
Insert from the positive (+) side.
Recharging
Illuminated
Recharging complete
Extinguished
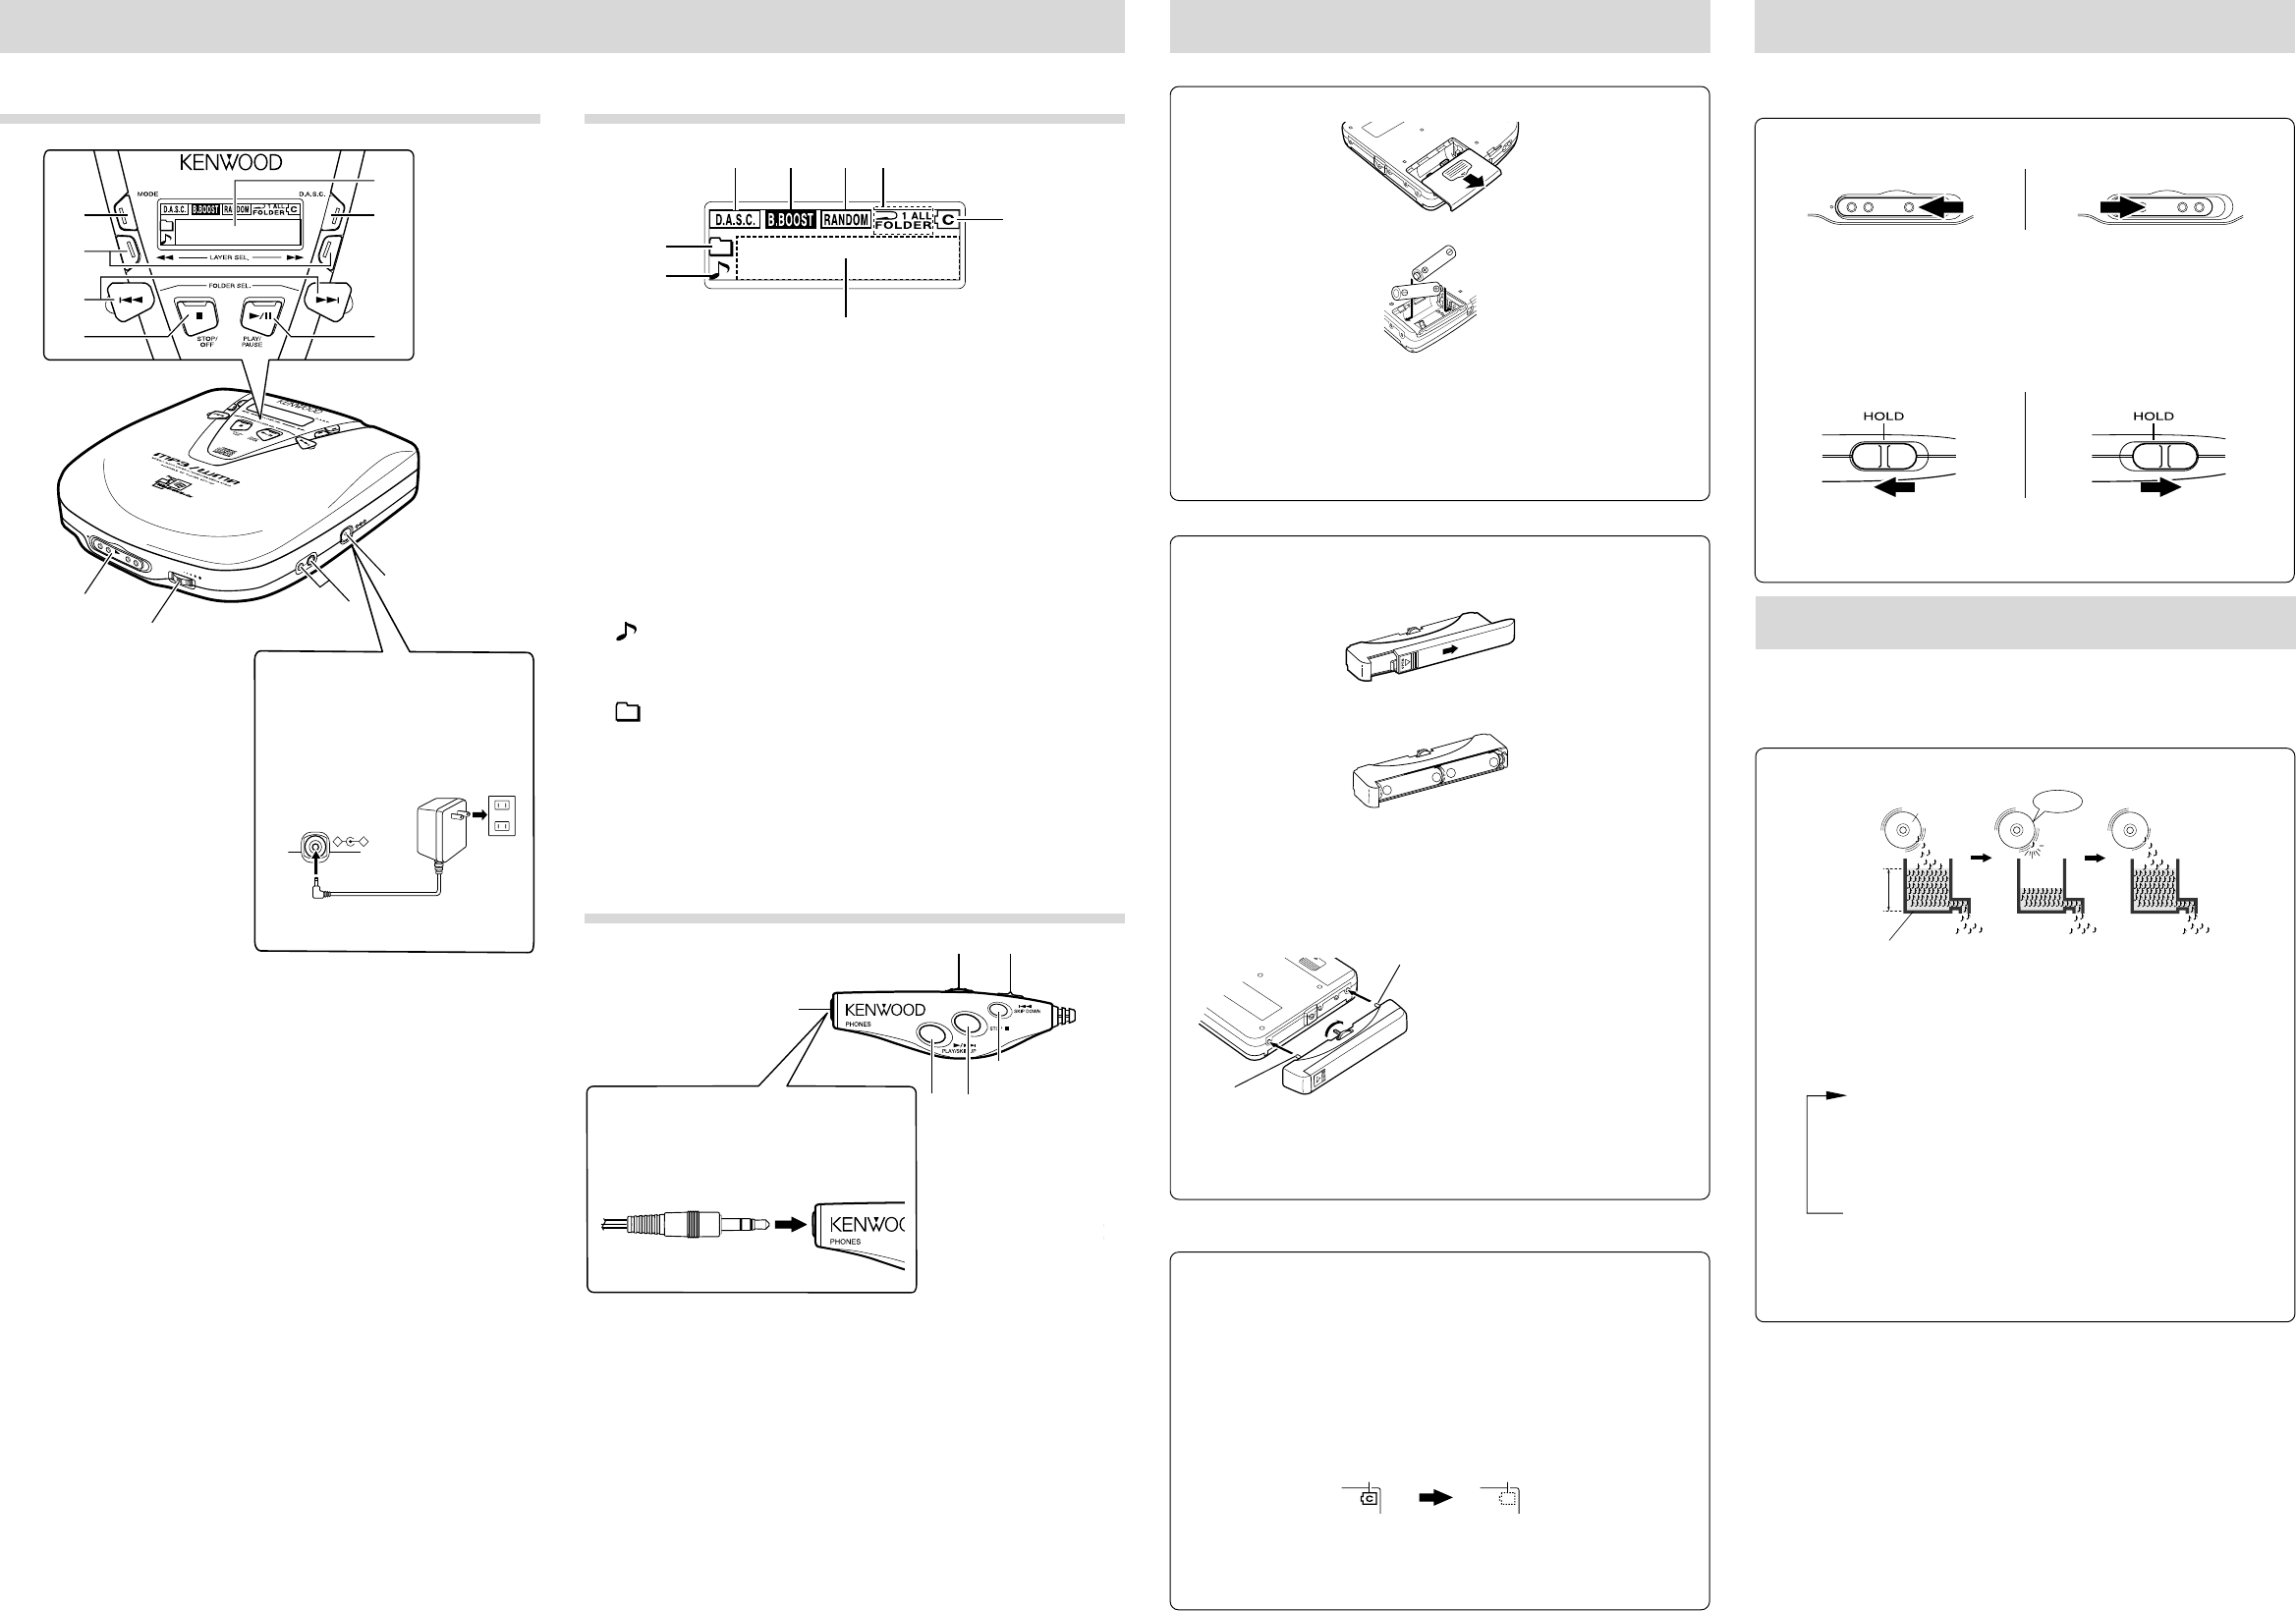
Avoiding miss-operations
It is possible to avoid miss-operations when the player is placed in a bag with the use
of the hold function that prevents all keys, with the exception of special keys, from
being operated.
Player:
Slide the OPEN/HOLD key to the HOLD position.
When on hold: When the hold is cancelled:
OPEN
3
HOLD
OPEN
3
HOLD
All keys on the player, with the exception of the OPEN/HOLD switch and the volume
knob, will stop operating.
Slide the OPEN/HOLD switch to the central position to cancel the hold function and
resume operations.
The operation keys on the remote control will not be set in the hold mode when the
OPEN/HOLD switch on the player is set in the HOLD position.
Remote controller (DPC-MP727):
Slide the HOLD switch to the HOLD position.
When on hold: When the hold is cancelled:
All keys on the remote controller, with the exception of the volume knob, will stop
operating.
Slide the HOLD key to the off position to cancel the hold function and resume opera-
tions.
Sound skip guard function (D.A.S.C.)
Sound skipping caused by vibrations, etc., is prevented by recording the sound
data into the memory and then playing it back from the memory.
The D.A.S.C. function will always be activated with MP3 and WMA files (approxi-
mately 110 seconds when saved with a transmission bit rate of 128kbps and a sam-
pling frequency of 44.1kHz).
Sound skip guard function mechanism
CD
Digital data
recorded
Digital memory
Vibrations
Playback sound
There are cases where, depending on the degree of the vibrations, the memory data
will be used up and the sound skip guard function will be temporarily disabled.
D.A.S.C. setup (Audio CDs (CD-DA) only)
Press the D.A.S.C. key.
The display will alternate between the following whenever the key is pressed.
“40-SEC”: Records approximately 40 seconds of sound data.
This is the highest sound skip guard mode level.
“10-SEC”: Records approximately 10 seconds of sound data.
This mode provides lower sound skip guard mode
levels in comparison with the 40-SEC mode, but the
quality of the sound is better.
D.A.S.C.function
is released : Cancels the sound skip guard function.
(
D.A.S.C. disappears
)
Sound being played back will be cut off when switching between modes.
The D.A.S.C. setting will become 40-SEC when the top cover is opened.
DPC-MP727/MP922(EN)1
Using the AC adapter*
Do not use anything other than the AC
adapter supplied.
¶Note that the power will be switched off
when the cable is plugged in or unplugged
from the player’s DC IN terminal.
*Shape of AC adapter may differ de-
pending on the sales area.