


3
Fix the leg to the stand with three of the supplied
screws —long: M4 x 25 mm (M4 x 1 in.).
• Do not tighten each screw completely one by one.
First put all screws in, then tighten them evenly and firmly.
It is recommended to place a cushion under the leg.
• You can tighten the screws easily by placing the leg horizontally.
4
Connect the speaker cord to the speaker
terminal of the leg.
• Use the 6-meter (19.7 ft) speaker cords for front speakers and
15-meter (49.2 ft) speaker cord for rear speakers.
• Each speaker cord has its name tag attached to one end.
Attach the end
without the name tag to the speaker terminal.
• Twist and remove the insulation at the end of each speaker
cord before connecting.
1)
Insert the speaker cord inside the stand as illustrated.
• Pull the speaker cord out of the center of the stand by
about 50 cm (20 in.).
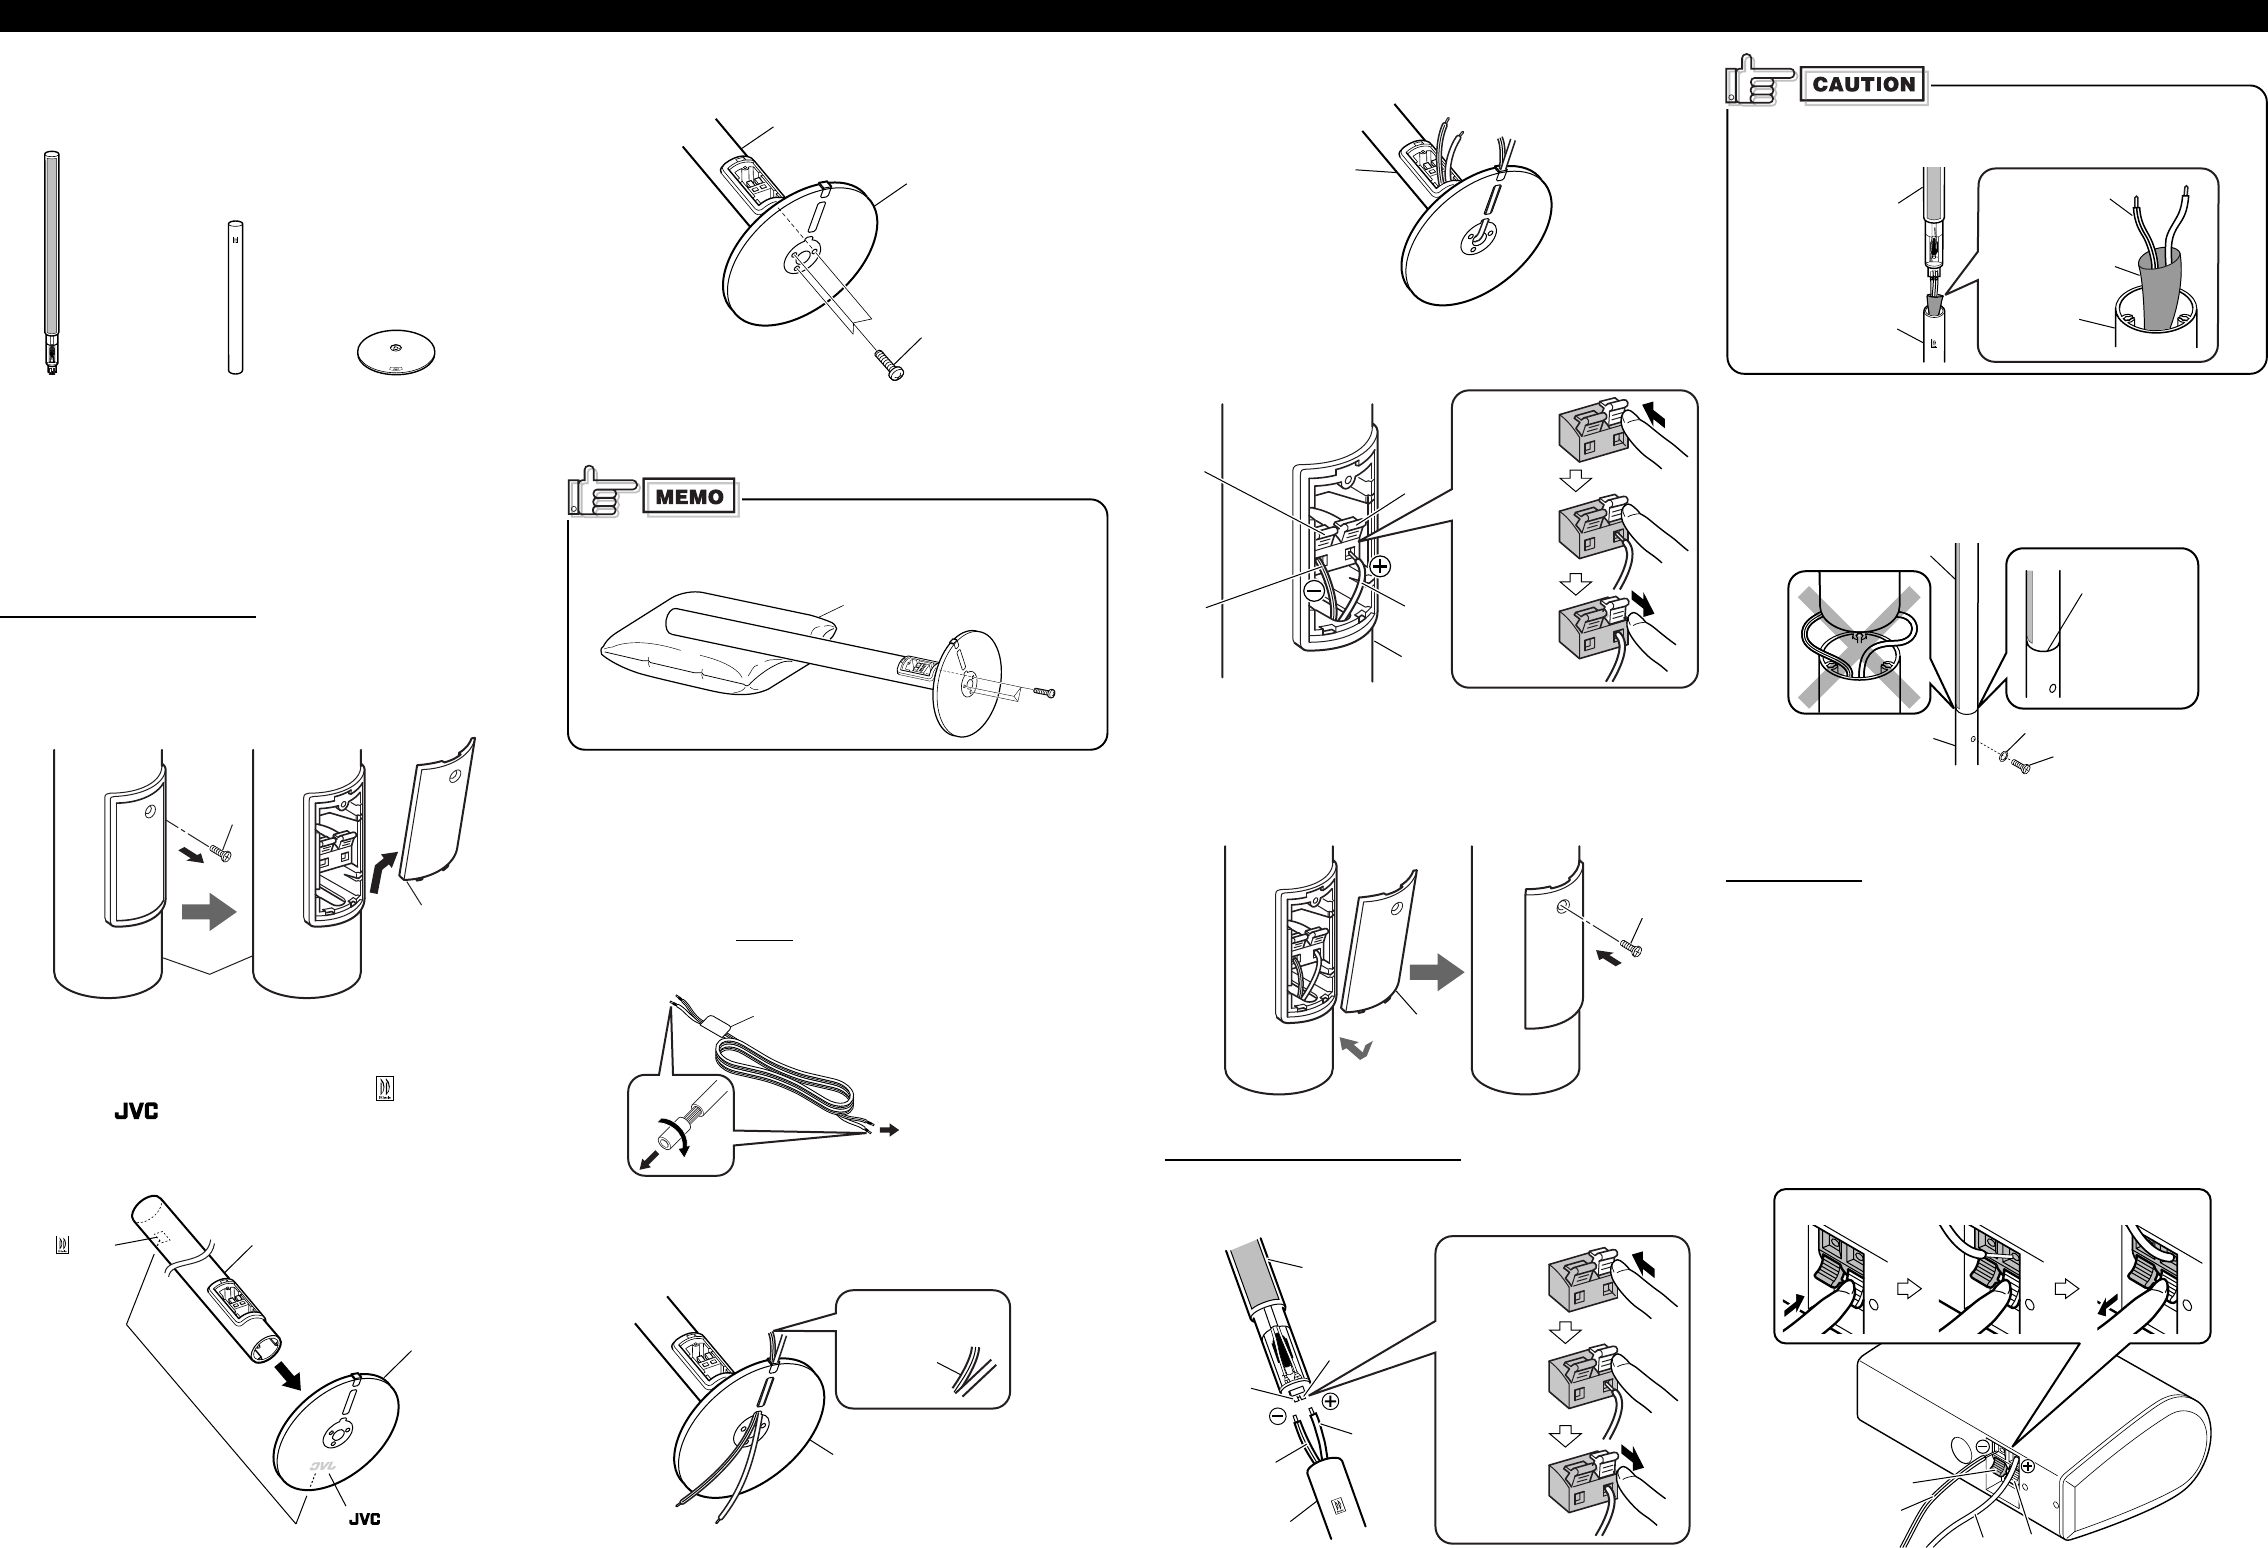
7 Assembling the satellite speakers
Each speaker (except the center speaker) has been divided into
three parts for shipment. Before using this speaker system,
assemble it first by following the procedure below.
• Prepare a Phillips screw driver.
Before assembling—
• Take care not to drop the stand while assembling; otherwise, it
may cause damage to the floor or injury.
• Ensure enough space for assembly and installation.
• Place a large, thick cloth on the floor where you assemble the
speaker, so you can protect the floor and the speaker itself.
• Use the speaker only after assembly is fully and correctly done.
Attaching the leg and the stand
1
Remove the terminal cover from the leg.
First remove the screw on the terminal cover, then detach the
cover by pulling it upward.
• You will need to use the removed screw in step
5
.
2
Join the leg to the stand.
• Rotate either the leg or stand so that the mark on the leg
and the
mark on the stand are facing the same
direction.
• Make sure to match the screw holes on the leg with those on
the stand so that they are aligned correctly.
Leg Stand
Speaker
section
Screw
Leg
Terminal
cover
Stand
mark
mark
Leg
Cushion
Screw
Stand
Leg
The cord with the
black stripe is on
this side as
illustrated.
Stand
Tag
To the speaker
terminal of the leg
Leg
5
Attach the terminal cover to the leg.
Push cords fully inside the leg. Then fix the terminal cover using
the screw removed in step
1
.
Joining the leg and the speaker unit
6
Insert the speaker cord into the speaker terminal
inside the leg.
Terminal
cover
Screw
Speaker
section
Leg
Leg
Speaker cord
Cord protector
Leg
Speaker section
Black
Red
Copper
Black striped
Joint here
without gap.
Leg
Speaker section
Washer
Screw
1 Press
2 Insert
3 Release
Black
Red
Copper
Black
striped
Leg
1 Press
2 Insert
3 Release
1 Press 3 Release2 Insert
2)
Insert the tips of the speaker cord into the leg and pull
them out as illustrated.
3)
Insert the speaker cord into the speaker terminal inside
the leg.
Do not pull or remove the cord protector, otherwise the speaker cord
may come off from terminal on the leg or the speaker may be damaged.
7
Join the speaker section and the leg.
Insert the speaker section to the leg, then fix the speaker
section and the leg with one of the washers and one of the
supplied screws—short: M5 x 12 mm (M5 x
1
/2 in.).
•
Push cords fully inside the leg before attaching the speaker section.
8
Repeat the procedure from step
1
to assemble the other satellite
speakers.
For disassembly
Reverse Assembly procedure:
1) Remove the speaker section from the leg.
2) Remove the leg from the stand.
7 Connecting the center speaker
• To connect the center speaker, use the same type of speaker
cord (6 m (19.7 ft); tagged with “CENTER”) as used for
connecting the front speakers.
• Twist and remove the insulation at the end of each speaker cord
before connecting.
Insert the speaker cord into the speaker terminal.
Black
Red
Copper
Black striped
Assembly
SX-XD55[J]ff.p65 04.3.4, 5:35 PM2