Setting the alarm (ALARM-BUZZER)
1 PresstheSETbuttontoselect“ALARM1”or“ALARM2”.→Theselectediconstartslighting.
2 PressandholdtheSETbutton.→“ON”or“OFF”and
startsashing.
3 UsetheDOWN/UPbuttontoselect“ON”andpresstheSETbutton.→ starts lighting and the time
displaystartsashing.
• When “OFF” is selected, goes off and the alarm setting is disabled. The display returns to the current
time.
• To separate “ALARM 1” and “ALARM 2”, set to on/off for each.
4 Whileashing,seteachitemwiththeDOWN/UPbutton.
•WhentheSETbuttonispressed,theashingitemswillchangeinthefollowingorder.
• It is not necessary to set the “TIMER PLAY” time at this point.
5 Switch the ALARM switch to “BUZZER”.
•
of the set alarm starts lighting on the display.
•
To check the set time, switch the display to alarm time (ALARM 1/ALARM 2) by pressing the SET button.
• The buzzer sounds for three minutes.
• If the set time of “ALARM1” laps over that of ”ALARM2”, the buzzer of the earlier set alarm stops when
the latter one starts sounding.
Selecting iPod or FM radio for the alarm sound (ALARM-TIMER PLAY)
1 Set the alarm time.
(See steps 1 to 4 of “To set the alarm (ALARM-BUZZER)”)
• You can set the duration of time between timer-on and timer-off from 10 minutes to 30 minutes in TIMER
PLAY time.
2 If the power is off, turn the unit power on.
3 ConrmthatyoucanheartheiPodorFMradio.
• Set to an appropriate volume.
4 Switch the ALARM switch to “TIMER PLAY”.
of the set alarm starts lighting and the selected source
is blinking on the display.
Stopping alarm sound
uTo pause the alarm (snooze)
Press the SNOOZE/LIGHT button while the alarm in sounding, when the alarm is set with either
“ALARM-BUZZER” or “ALARM-TIMER PLAY”.
The alarm sound is temporarily stopped, and started again 5 minutes later. You can repeat this up to 10
times.
uTo stop the alarm (BUZZER/ TIMER PLAY)
• Switch the ALARM switch to “OFF”.
Deleting the alarm settings
1 Press the SET button to select the ALARM you want to delete.
2 PressandholdtheSETbutton.→“ON”or“OFF”and
startsashing.
3 Use the DOWN/UP button to select “OFF” and press the SET button.
• The alarm setting is deleted.
To turn off the System after a certain period of time (Sleep Timer)
1 Press the SLEEP button repeatedly to specify the time (in minutes) as follows:
2 Wait until the set time goes off.
• To check the time remaining before the shut-off time, press SLEEP button once.
If you press the button repeatedly, you can change the shut-off time.
• After the system is turned off with the Sleep Timer, you cannot operate any button other than the
SNOOZE/LIGHT button. To operate the system as usual, press to turn off the power and then turn
on the power again.
NOTES
• Sleep Timer and “ALARM-TIMER PLAY” cannot be selected at the same time. If “TIMER PLAY” is
selected, Sleep Timer will be cancelled.
• Sleep Timer and “ALARM-BUZZER” can be selected at the same time.
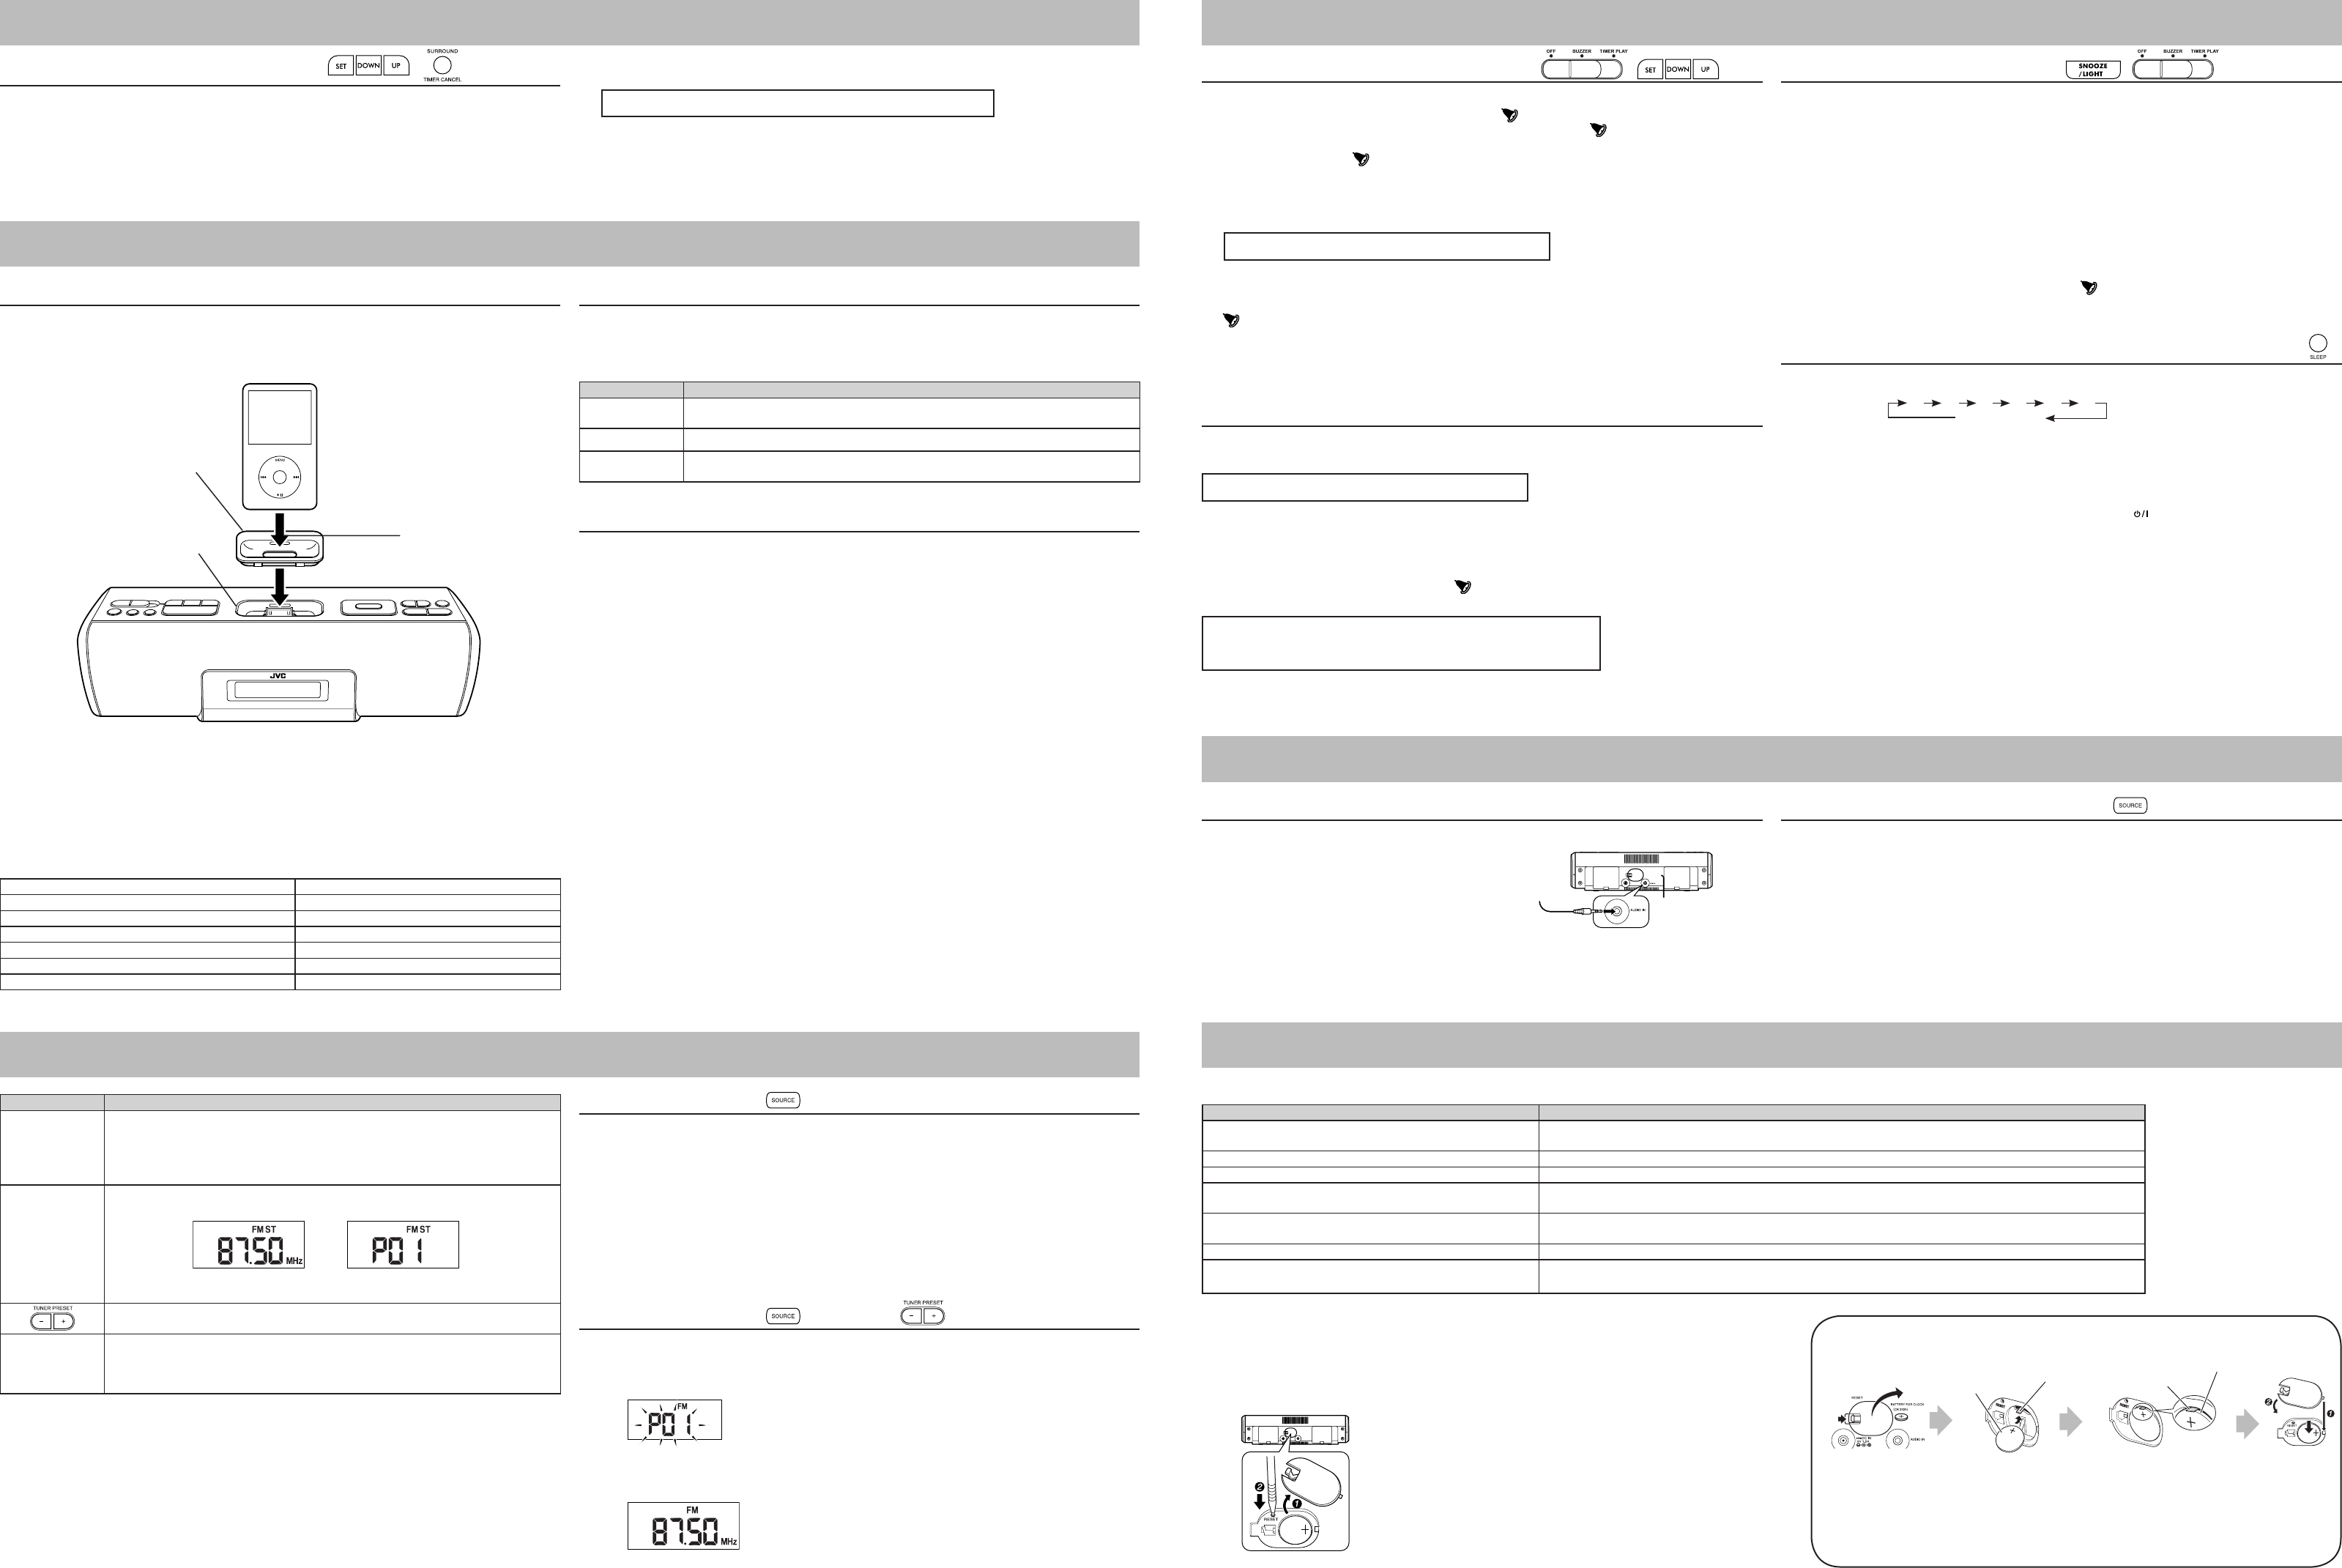
Setting the iPod on the unit
1 Insert the Dock adapter supplied with the iPod to the unit.
If the Dock adapter was not supplied with your iPod, purchase the Dock adapter from Apple Inc.
For details, visit the Apple’s website.
<http://www.apple.com>
2 Connect the iPod to the connector plug of the unit.
•Theconnectorplugisprotectedwithacoverwhenitisrstpurchased.Pleaseremovethecoverbefore
operating the unit.
• When the iPod is not connected, insert the terminal cover. This prevents dust from entering and possibly
damaging the unit.
• Always set volume to the minimum level when connecting or disconnecting iPod.
• When you connect your iPod to the unit, make sure you insert it all the way.
• When disconnecting the iPod, make sure that the System is turned off.
Listening to the iPod
1 Connect the iPod to the unit.
2 Turn the unit power on.
3 Select “iPod” with the SOURCE button.
When iPod is selected as sound source, it automatically starts playback.
Press Functions
38
Playback/Pause
Press and hold this button to switch the iPod to sleep mode.
¢
Next song / fast forward (press and hold)
4
Previous song (Press this button during playback to jump back to the beginning of the
track.) / fast rewind (press and hold)
Charging the iPod
The iPod is charged while it is set on the unit when the Unit power is on.
• Connect the AC adapter to the Unit. The iPod battery is not charged while
the Unit is operated on the battery power supply.
• The iPod is charged regardless of the sound source selected on the Unit.
• See the iPod instruction manual about charging times.
NOTES
• This unit can only play the iPod audio.
You can use the iPod video function and hear the audio but cannot play the video.
• Do not carry the System with iPod connected. You might drop it down or it might cause damages to the
connector part.
• Do not touch or hit the iPod terminal pins or the connector pins directly. It might cause damages to the
connector part.
• If the iPod does not play correctly, please update your iPod software to the latest version. - For details
about updating your iPod, check on the Apple web site <http://www.apple.com>.
• iPod is a trademark of Apple Inc., registered in the U.S. and other countries.
• iPhone is a trademark of Apple Inc.
• JVC is not responsible for any loss of or damage to iPod that might result from the use of this product.
• Sound distortion may occur when playing back audio sources with high recording levels. When distortion
occurs, it is recommended to turn off the equalizer of the iPod. For information on operating the iPod, see
the iPod instruction manual.
• If you do not turn on the power of this unit and only connect the iPod to this unit, power may be supplied to
the iPod.
• “MadeforiPod”meansthatanelectronicaccessoryhasbeendesignedtoconnectspecicallytoiPodand
hasbeencertiedbythedevelopertomeetAppleperformancestandards.
• “WorkswithiPhone”meansthatanelectronicaccessoryhasbeendesignedtoconnectspecicallyto
iPhoneandhasbeencertiedbythedevelopertomeetAppleperformancestandards.
•
Apple is not responsible for the operation of this device or its compliance with safety and regulatory
standards.
n iPod Compatibility Chart
iPod touch 8GB/16GB/32GB iPod nano (3rd Generation) 4GB/8GB
iPod touch (2nd Generation) 8GB/16GB/32GB iPod nano (4th Generation) 8GB/16GB
iPhone 3G 4GB/8GB/16GB iPod nano (2nd Generation) 2GB/4GB/8GB
iPhone 4GB/8GB/16GB iPod nano 1GB/2GB/4GB
iPod classic 80GB/120GB/160GB iPod (4th Generation) 20GB/40GB
iPod video (5th Generation) 30GB/60GB/80GB iPod mini (2nd Generation) 4GB/6GB
iPod photo (4th Generation) 20GB/30GB/40GB/60GB iPod mini 4GB/6GB
Press Functions
FM MODE
Switch FM stereo/monaural.
When there is too noisy in an FM stereo broadcast, you can reduce the static by
switching to monaural reception. Press again to switch back to stereo reception.
If the broadcast is not FM stereo, the sound becomes monaural, even if FM stereo is
selected.
3/8
•
Switch channel display / frequency display. Channel display is automatically switched to
frequency display after approx. 10 seconds and will return to time display.
Select a channel from P01 to P20.
(The unit button can be used when channel display is selected.)
¢
4
Change frequencies to tune in to FM radio station. (The unit button can be used when
frequency display is selected.)
•Pressandholdtosearchbroadcaststationsautomatically.Thesearchisnished
when the signal is received. Press again while searching to quit search.
Listening to FM radio
Stretch out the wire antenna located on the rear of the unit before using.
1 Turn the Unit power on.
2 Select “FM” with the SOURCE button.
3 Select a frequency with the 4 / ¢ button.
NOTES
• Press and hold 4 / ¢ buttontosearchbroadcaststationsautomatically.Thesearchisnishedwhen
the signal is received. Press again while searching to quit search.
• When there is too noisy in an FM stereo broadcast, you can reduce the noise by switching to monaural
reception. Press again to switch back to stereo reception.
Presetting Stations
1 Select “FM” with the SOURCE button.
2
Push the TUNER PRESET - + button to select the desired channel number (P01 to P20) to be registered.
3 While the desired channel number is displayed, press and hold the 3/8 button. → The channel number
startsashing.
4 Whilethechannelnumberisashing,usethe4 / ¢ button to select the frequency (87.50 MHz to
108.00 MHz) of the station that you wish to register.
5 Press the 3/8 button → The selected frequency will be registered.
•Toconrmregistration,pushtheTUNERPRESET-+toselecttheregisteredchannelnumber(P01to
P20), and press 3/8 button to display frequency.
6 Afterpresettingthestation,youcaneasilyselectthechannelwithTUNERPRESET−+.
Channel displayFrequency display
Hour → Min. → TIMER PLAY time (10 to 30) → time display
Hour → Min. → TIMER PLAY time (10 to 30) → time display
CAUTION:
• “AUDIO IN” cannot be selected as a source. Select another source.
• The “TIMER PLAY” does not work when the Unit power is turned off.
If you are having a problem with your System, check this list for a possible solution before calling for service.
In These Cases Check the following points
Power does not come on. • AC adapter is not inserted securely. Plug in securely.
• The batteries are exhausted.
No longer works. Press the RESET button (see “Resetting the unit” below).
Cannot set the iPod. • Is the Dock adapter properly mounted on the unit? Make sure to mount the Dock adapter properly.
Cannot operate iPod. •IstheiPodrmlyconnectedtotheconnectorplugoftheunit?
• Is the iPod properly functioning? Test the iPod functions in stand alone condition.
iPod cannot be charged. •IstheiPodrmlyconnectedtotheconnectorplugoftheunit?
• Is the AC adapter connected? The iPod cannot be charged while the Unit is operated on batteries.
Hard to listen to broadcasts because of noise. The FM antenna is not properly extended and positioned.
When the volume level is manually set higher than “8”, the unit
automatically lowers the level to “8”.
The unit’s battery runs low (The “---” (Low battery) appears on the display). Replace the batteries with new ones.
n Resetting the unit
If “Troubleshooting” does not eliminate malfunctioning (failure to operate or display properly, etc.),
press the RESET button on the rear of the unit with something having a sharp point, while the unit is turned on.
After pressing RESET button, unplug the AC adapter and wait a while before plugging it again.
• When using RESET button, make sure the lithium coin battery is loaded.
• While resetting the unit, the clock is also reset. Adjust the clock after resetting the unit.
Connecting other equipment
Connect an external device to the AUDIO IN jack on the rear of the unit using a stereo mini plug cord (not
supplied) .
NOTE
• Always turn the power OFF when connecting or disconnecting other equipment.
Listening to external devices
1 Turn the unit power on.
2 Select “AUDIO IN” with the SOURCE button.
3 Start playback on the external device.
4 Adjust the volume.
To audio output such as CD/
MD/digital audio player, etc.
10 20 30 40 50 60
OFF (Canceled)
5. Listening to FM Broadcasts
4. Playing back from iPod
7. Playing back from other equipment
8. Troubleshooting
Dock adapter
(Supplied with your iPod or
to be purchased)
Connector well
You can remove the dock
adapterwithyourngernail
by using this slot.
6. How to set the TIMER
3 4
uChanging batterie s for the Clock
Be sure to match the poles (+/-) correctly.
Lithium coin battery
(CR2025) (not supplied)
Plus terminal
Plus terminal
Side of the battery
Press the tab to open
the cover.
Close the cover in the
order shown by the
numbers.
Time to change the battery
As the battery is running out, the display indication dims or the alarm may beep at the time the
alarm is not set at. Replace the battery in such cases.
Insert the battery with pushing the plus
terminal up to be sure the terminal
contacts the side of the battery.
4 / ¢
4 / ¢ 3/8
Setting the Clock
• The time can be set both when the power is on and off.
1 Press and hold the SET button. →Theyeardisplaystartsashing.
2 Whileashing,seteachitemwiththeDOWN/UPbuttons.
3 Press the SET button.
•WhentheSETbuttonispressed,theashingitemswillchangeinthefollowingorder.
• The time is set when switching to time display from Minutes.
NOTES
• To modify the setting, start again from step 1.
• To return to the previous item, press the TIMER CANCEL button.
Year → Month → Day → 12/24-hour time → Hour → Min. → time display
3. How to set the time
* The displays may vary by region.


