


432
XL-PM400S / LVT1179-014A / US XL-PM400S / LVT1179-014A / US XL-PM400S / LVT1179-014A / US
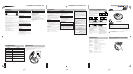
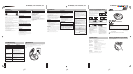
p3 p4p2
Display/reference
Button
Audio CD MP3
4
VOLUME
6
VOLUME
1
5
3
RL
OFF
ON
HOLD
2
01
02
0
53
01
02
010
53
MP3
Operation
To pause
To stop
To turn off the
unit
Fast forward/
reverse
Group skip
(MP3 only)
07
00 18
4
00
0
07
01
10
44 48
35
10
Skip function
During play,
Search function
Keep depressed during play.
•Play stops automatically when
all the tracks have been played.
For your reference:
“dISC”
This indication appears if 3/8 is pressed when no disc is loaded
or if the disc is not properly seated.
“– –”
Preparation period before playing the track
Flashes for several seconds after pressing 3/8 to play.
“OPEn”
This indication appears when the lid is open.
Removing discs
Turn off the unit and, after the disc has stopped rotating, remove
the disc as shown below:
Auto power off
If the unit is left in stop mode for 30 seconds, the unit turns
itself off automatically to prevent the batteries from running
down.
Disc rotation noise
The portable CD player uses a power-saving operation method
so that disc rotation noise will intermittently be emitted. But, it
is not a failure.
• To skip back to the previous track, quickly press 4
twice.
• During Program play, the button is used to fast for-
ward or back through the programmed sequence of
tracks.
• During Random play, the skip button cannot be used
to skip back to tracks that were played previously in
the random sequence.
During play,
During play,
Reverse
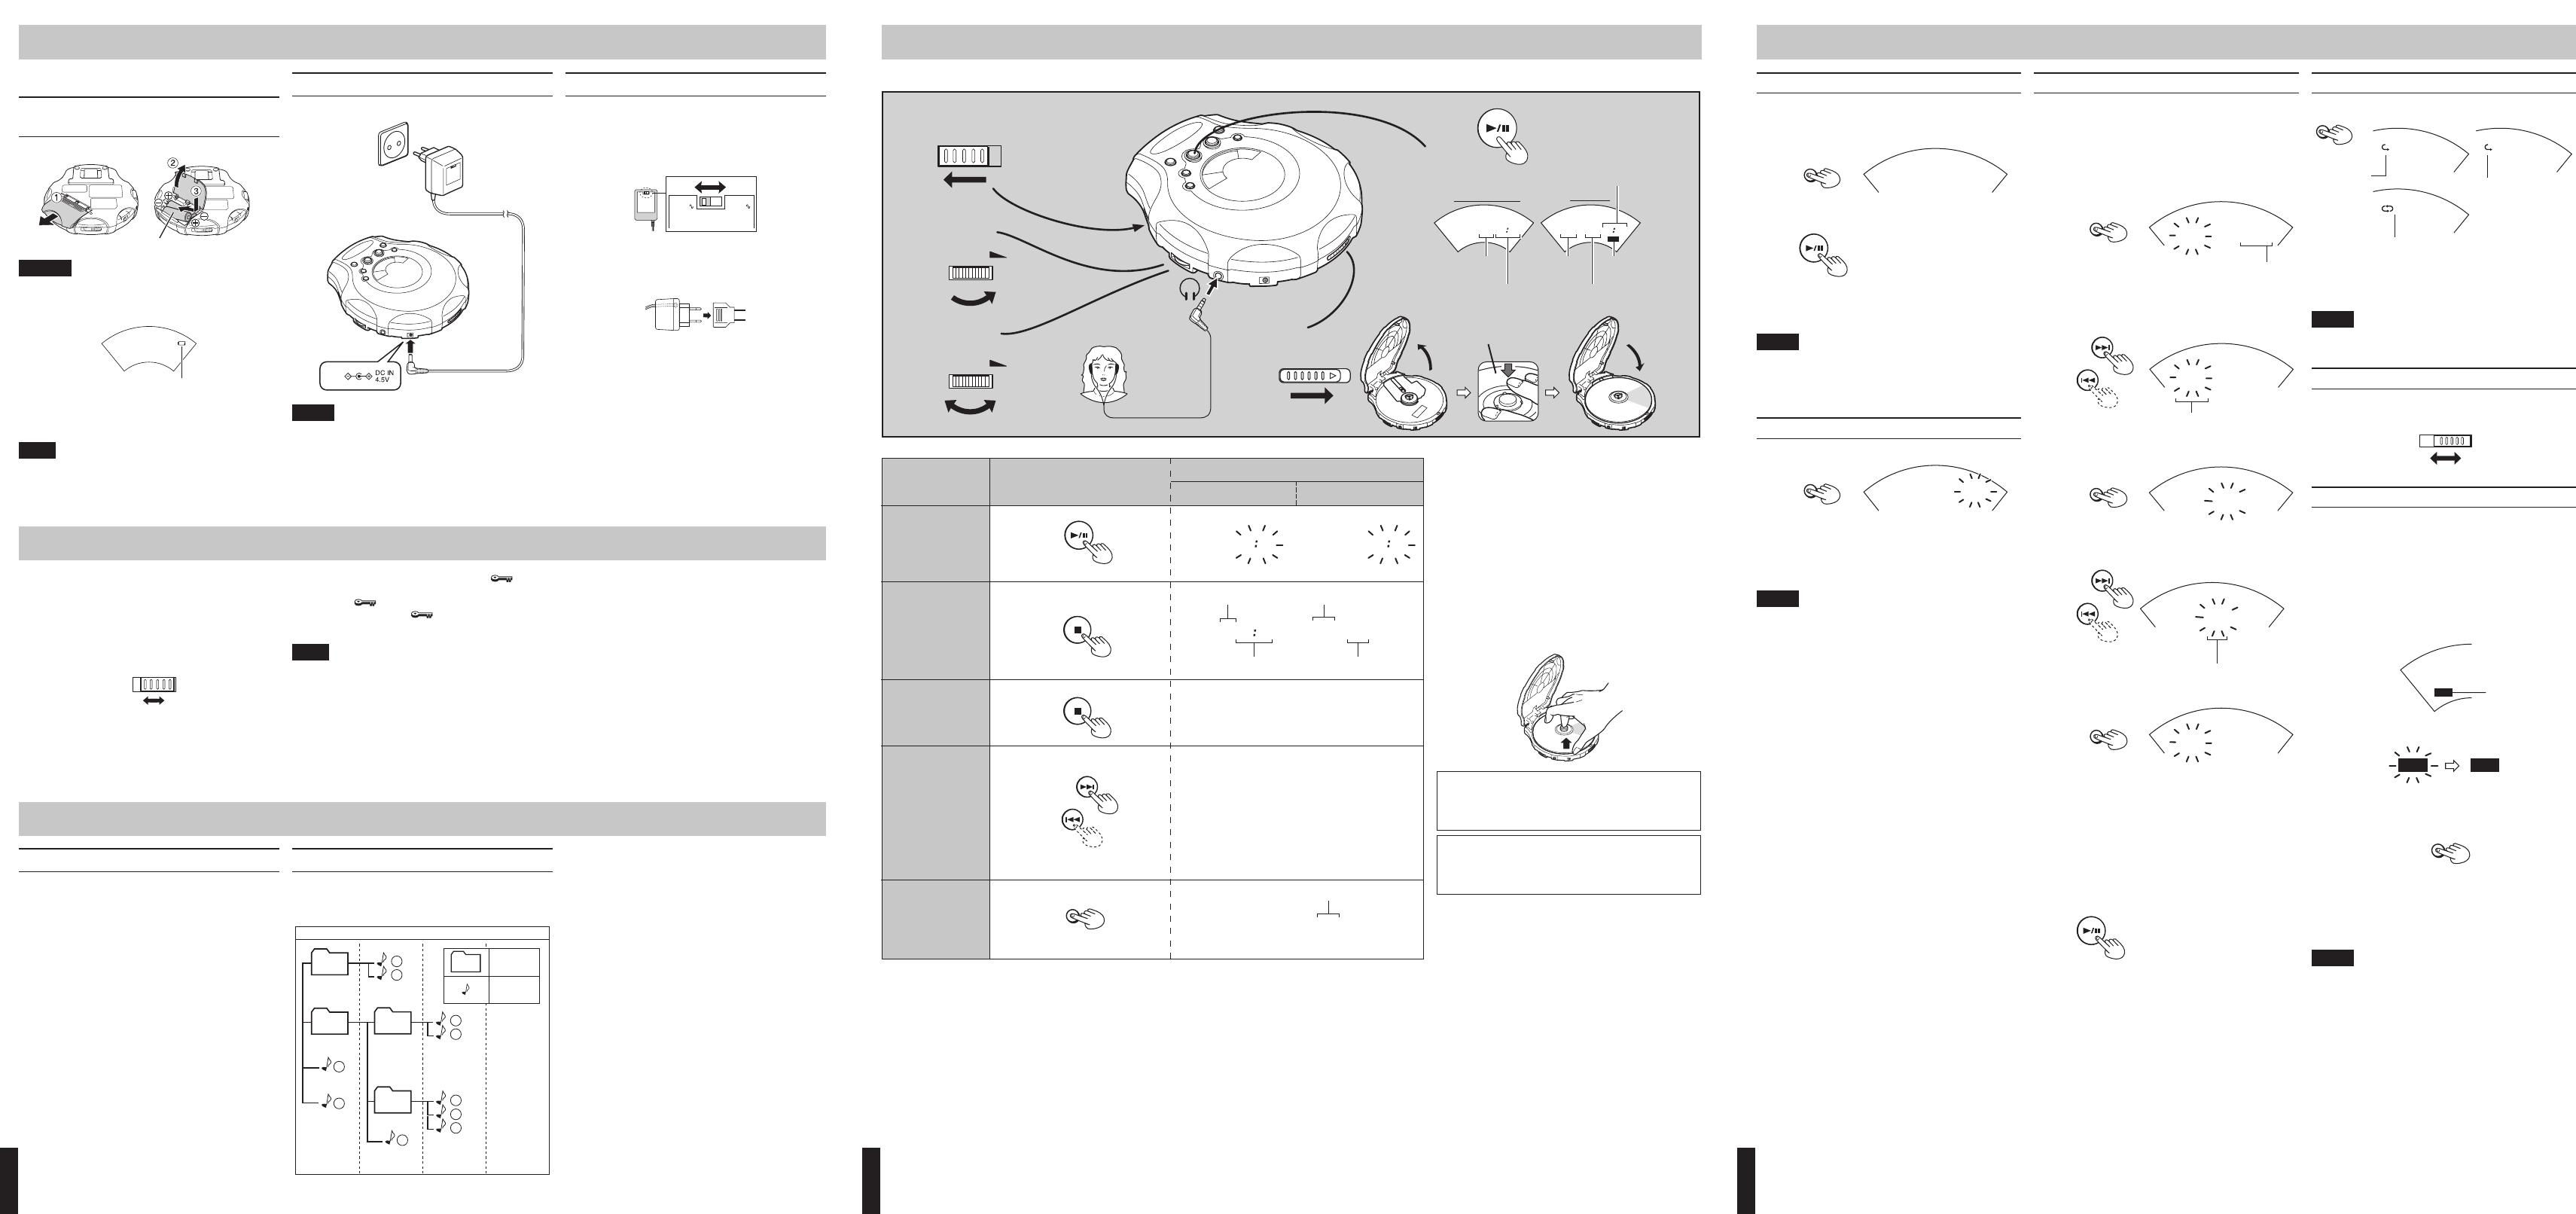
Basic Play
Total number of tracks
Total playing time
Label side
Elapsed playing time
of each track
No indication.
Intro play
You can successively play the first 10 seconds of every track.
1 While stopped,
INTRO
MODE
2
To cancel
Press MODE repeatedly until “INTRO” goes out.
Notes:
• You can also select Intro play during playback.
In this case, Intro play will start from the next track after the
current track has finished.
• You can also select Intro play during Program play mode.
Random play
During playback,
MODE
RND
After playing all tracks, the unit stops.
To cancel
Press MODE until “RND” goes out, or press 7 to stop the disc.
Notes:
• You can also select Random play in stop mode.
• During Program play, you can not select Random play.
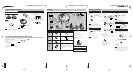
Program play
You can program up to 64 tracks in any desired order including
the same tracks.
For Audio CD, go to step 3.
Though the display differs a little, operation is the same.
1 While stopped,
(MP3 only)
PROGRAM
00
00
P
0
0- 1
2 (MP3 only) Select the desired group number.
(e.g.02)
-
01
02
P
0
01
3
PROGRAM
01
02
P
0
01
-
4 Select the desired track.
03
02
P
0
0- 1
5
PROGRAM
PROG
00
00
P
0
0- 2
The track is registered.
6
For MP3, repeat steps 2-5 to select other tracks.
For Audio CD, repeat steps 4 and 5.
When you program exceeding 64 tracks, the program se-
quence number returns to “01” and will overwrite the previ-
ous setting.
7
• To confirm the program
While stopped, press PROGRAM repeatedly. At this time, you
can add and change the program, if required.
• To delete the entire program
While stopped, press STOP. Or turn off the unit.
Program sequence number
Track number
Repeat play
During playback,
MODE
GROUP
ALL
To cancel
Press MODE repeatedly until the repeat indicator goes out.
Notes:
• You can also select Repeat play during Program play.
• You can also select Repeat play while stopped.
Hyper-Bass Sound effect
You can enjoy powerful bass sound.
OFF 21
HBS
Anti-Shock Protection EX
This function achieves excellent performance against sound inter-
ruption caused by vibrations. You will be able to enjoy listening
to music during (not vigorous) jogging.
By utilizing the high-performance servo circuit, audio data will be
stored in the memory ahead of time.
For Audio CD: Up to 175 seconds worth (Anti-Shock Protection
on/off selectable)
For MP3: Up to 426 seconds worth at 128 kbps (Anti-Shock
Protection is fixed to on.)
Normally, this function is in effect.
ASP
As the audio data is gradually stored, the indicator changes as follows:
ASP ASP
To cancel
(Audio CD only)
A.S.P./
GROUP UP
The “ANTI SHOCK” indicator goes out.
To activate again (Audio CD only)
Press A.S.P./GROUP UP.
Notes:
• During this operation, the disc rotates at a higher rate than usual
in order to collect extra audio data. This may cause the batteries
to run out faster and could result in a slight increase in disc rota-
tion noise.
• This function can be switched ON and OFF during playback.
However, this may cause a slight interruption in the sound be-
cause the disc’s rotational speed changes.
ANTI SHOCK
indicator
(Repeatedly)
1 track repeat
Other Play Methods
(Repeatedly)
Power Supply Preparations
The illustration of the grip band is omitted.
Using dry-cell batteries
(not supplied)
Caution:
Do not forcibly open the battery lid too wide.
Battery indicator
This indicator appears when the batteries are almost out of power.
Power will be cut off a short while later.
Note:
Turning off the Anti-Shock Protection EX will save the battery power
more or less. For details, see “Anti-shock Protection EX” on page 4.
(Available for an Audio CD only)
Battery indicator
AC adaptor
Using the AC adaptor (supplied)
Notes:
• Even if the unit is turned off, small power is consumed as long
as the AC adaptor is connected to the AC power outlet.
AC power outlet
• When the unit is in Hold mode, “HOLd” and “ ” lights as
follows.
Power on : “ ” stays lit.
Power off : “HOLd” and “ ” lights up for a few seconds
when 6 is pressed.
Note:
If the HOLD switch is set to the ON position, you cannot turn on
the unit.
This function causes the unit to ignore, accidental button presses.
Hold mode prevents the following:
• Powering on the unit accidentally (which can cause the batter-
ies to go dead).
• Play being cut off unexpectedly.
To use the Hold mode
OFF
ON
HOLD
• To prevent the unit from powering on accidentally, set the
HOLD switch to the ON position while the unit is turned off.
• To prevent the unit from unexpected operation during play,
set the HOLD switch to the ON position after you starts play-
ing the disc.
Preventing Accidental Operation (Hold mode)
The illustration of the grip band is omitted.
Follow the steps in the numerical order.
Two “AA” (LR6) alkaline batteries.
AC adaptor
Before use
Make sure the present voltage of your AC adaptor fits to your lo-
cal voltage before plugging it into the AC power outlet. If it
doesn’t, shift the AC line-voltage selector with a screwdriver so
that it corresponds to your local voltage.
VOLTAGE
ADJUSTOR
AC 110V
~127V
AC 220V
~240V
If the power plug will not fit your socket, use the AC plug adaptor.
How to use the AC plug adaptor (sup-
plied)
Track number in play
Firmly connect
Forward
While stopped,
Press again to restart play.
MP3 File Compatibility
• This player can read MP3 files that are recorded in the format
that is compliant with ISO 9660.
• The player can read or play an MP3 file with the extension code
—“.mp3”.
About MP3 files
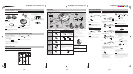
Playing order of MP3 files
The illustration below shows the normal playing order of the MP3
files. You will see that the MP3 files are played back in the order
from the higher hierarchy to the lower one.
3
4
9
8
10
6
7
1
2
5
Hierarchy
Group
MP3 file
During play or while stopped,
Group number
Lights when a MP3
disc is used
Group number
Track number
(in the group) in play
Elapsed playing time
of each track
For MP3
For Audio CD
Total number of groups
Total number of tracks
01
02
0
A.S.P./
GROUP UP
Group number
1 group repeat
(MP3 only)
All track repeat
(Repeatedly)
[Fully stored]