


3
WALL-MOUNTING
NOTE: The customer is responsible for proper selection and use of mounting
hardware (available through hardware stores), to properly and safely wall-mount
the module.
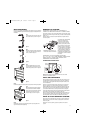
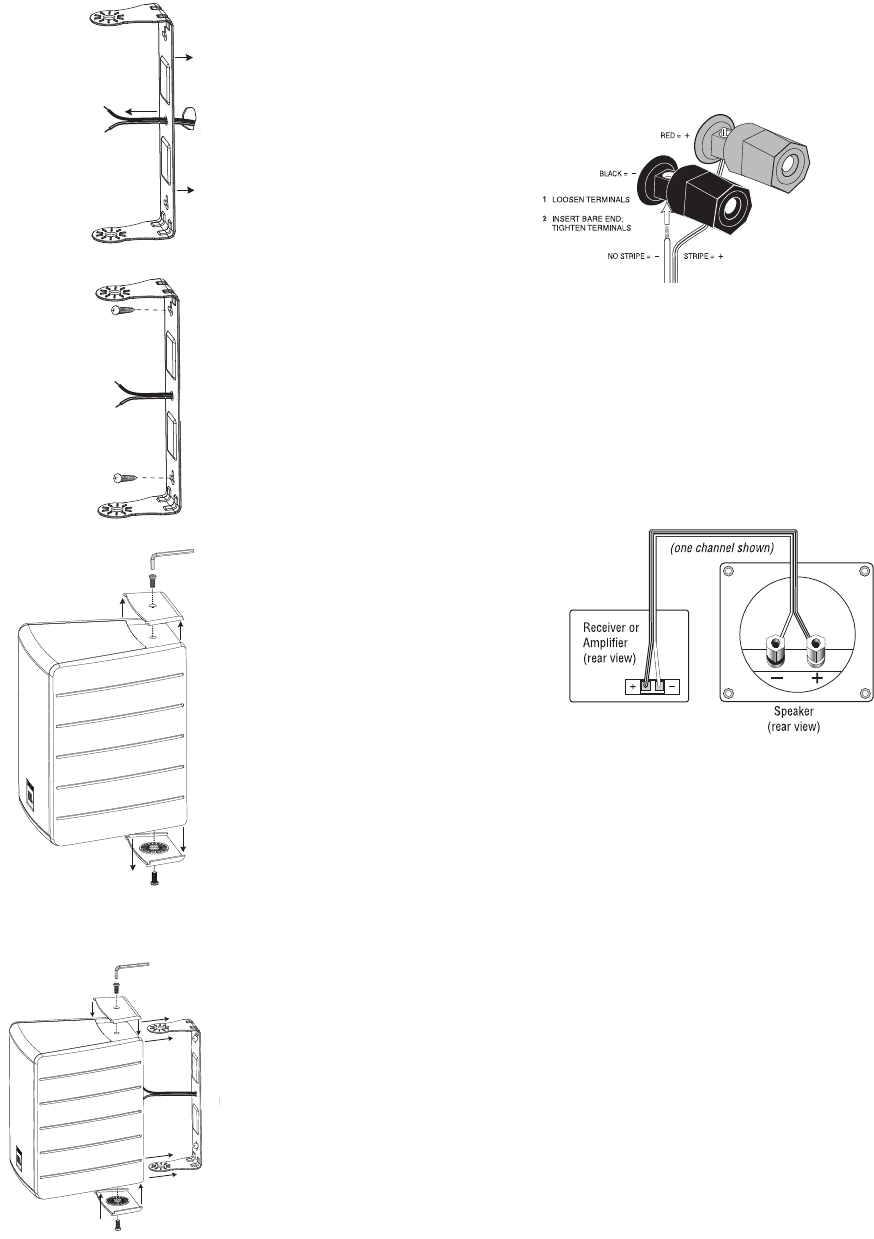
Step 1.
Run the speaker wire through the hole in the
center of the bracket, as shown in Figure 4.
Figure 4.
Step 2.
Attach the bracket to the wall in the desired
location, using the appropriate screws and
anchors, as shown in Figure 5.
Figure 5.
Step 3.
Using the supplied Allen wrench, remove
the screws and end caps from the top and
bottom of the speaker, as shown in Figure 6.
Figure 6.
Step 4.
Connect the speaker wire to the speaker, as described in “Wiring the System.”
Step 5.
Slide the speaker into the bracket, aligning
the holes in the bracket with the threaded
inserts in the top and bottom of the speaker,
and reattach the screws and end caps
removed in Step 3, as shown in Figure 7.
Figure 7.
Step 6.
Hand-tighten securely. You may angle the speaker up to 15 degrees to the
right or the left before final tightening.
WIRING THE SYSTEM
IMPORTANT: MAKE SURE ALL EQUIPMENT IS
TURNED OFF BEFORE MAKING ANY CONNECTIONS.
For speaker connections, use a high-quality speaker wire with polarity coding.
The side of the wire with a ridge or other coding is usually considered positive
polarity (i.e., +).
NOTE: If desired, consult your local JBL dealer about speaker wire and
connection options.
The speakers have coded terminals
that accept a variety of wire
connectors. The most common
connection is shown in Figure 8.
To ensure proper polarity, connect
each + terminal on the back of the
amplifier or receiver to the respec-
tive + (red) terminal on each speaker,
as shown in Figure 9. Connect the
–
(black) terminals in a similar way.
See the owner’s guides that were
included with your amplifier, receiver
and television to confirm connection
procedures.
IMPORTANT: DO NOT REVERSE POLARITIES
(I.E., + TO
–
OR
–
TO +) WHEN MAKING CONNECTIONS.
DOING SO WILL CAUSE POOR IMAGING AND
DIMINISHED BASS RESPONSE.
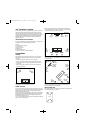
STANDARD CONNECTION
Figure 9. Wiring diagram shows polarity connections for one channel
of a stereo or home theater system.
FINAL ADJUSTMENTS
Check the speakers for playback, first by setting the system volume control
to a minimum level, and then by applying power to your audio system. Play
a favorite music or video segment and increase the system volume control
to a comfortable level.
NOTE: You should hear balanced audio reproduction across the entire
frequency spectrum. If not, check all wiring connections or consult the
authorized JBL dealer from whom you purchased the system for more help.
The amount of bass you hear and the stereo-image quality will be affected
by a number of different factors, including the room’s size and shape, the
construction materials used to build the room, the listener’s position relative
to the speakers, and the position of the speakers in the room.
Listen to a variety of music selections and note the bass level. If there is too
much bass, move the speakers away from nearby walls. Conversely, if you
place the speakers closer to the walls, there will be more bass output.
CARE OF YOUR SPEAKER SYSTEM
Each enclosure has a finish that does not require any routine maintenance.
When needed, use a soft cloth to remove any fingerprints or dust from the
enclosure or grille.
NOTE: Do not use any cleaning products or polishes on the cabinet
or grille.
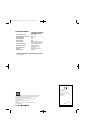
Standard
Connection
Speaker Wire
Figure 8. This figure shows how to
connect bare wires to the terminals.
JBLP2748ControrlMntr_OM 7/10/08 4:10 PM Page 3