


5
SAT-1100
S
PEAKER
C
ONNECTIONS
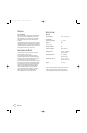
Turn Off All Power
First, turn off all audio-system power. Use high-quality speaker
wire to make your connections. #18-Gauge speaker wire with
polarity coding is recommended. For longer distances,#16-gauge
or heavier wire is recommended.The side of the wire with a ridge
or other coding is usually considered positive polarity (i.e., +).
Also, consult the owner’s manuals that were included with your
amplifier or receiver to confirm connection procedures.
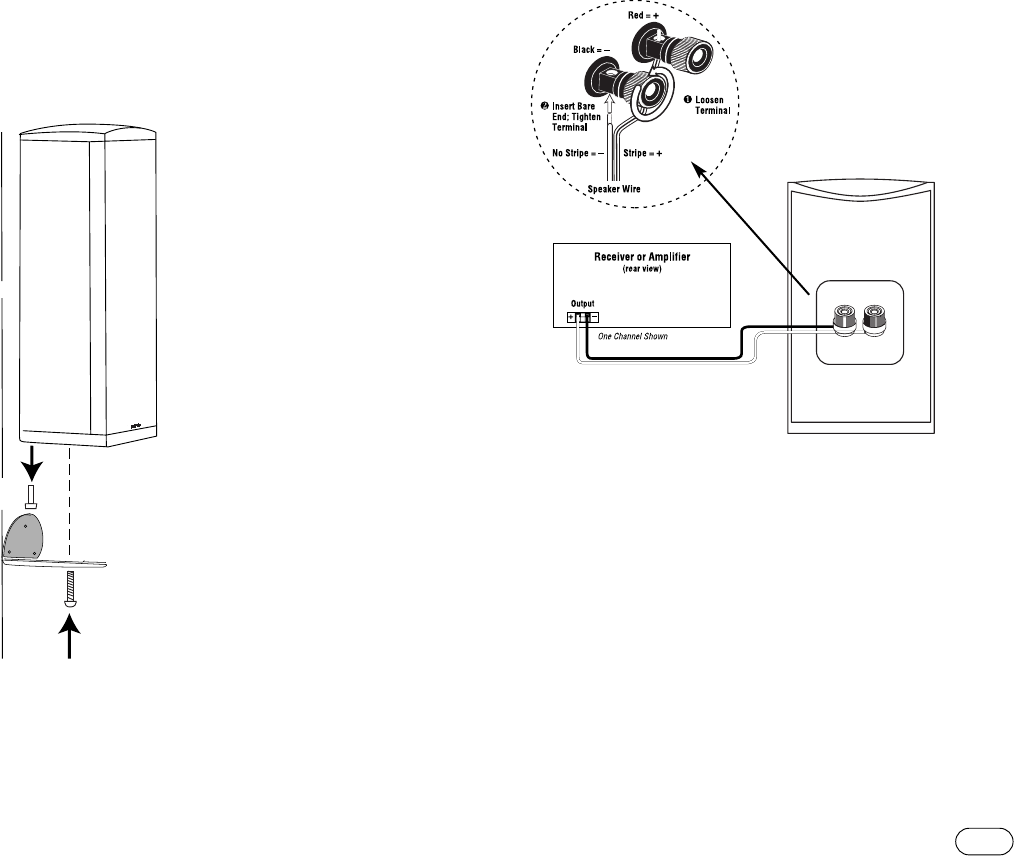
Observe polarities when making speaker connections, as shown
in Figure 5. Connect each + terminal on the back of the
amplifier or receiver to the respective + (red) terminal on each
speaker. Connect the – (black) terminals in the same way.
Important!
Do not reverse polarities (i.e., + to – or – to +) when making
connections. Doing so will cause poor imaging and diminished
bass response. Be certain that positive and negative wire strands
are completely isolated to avoid short circuits that may damage
your equipment.
– +
Figure 5.Wiring diagram shows polarity connections
for one channel of a home theater system.
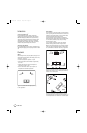
The SAT-1100 satellites are designed to be mounted on the wall
if desired.There is a wall bracket included for each satellite
speaker. Each speaker bracket will require (3) 1-1/2,"#10 wood
screws; each screw should be fastened to a wall stud. If a wall
stud is unavailable, install an anchor appropriate for a 1-1/2,"
#10 screw.
NOTE:The customer is responsible for the correct selection
and use of mounting hardware (available through hardware
stores) that will ensure the proper and safe wall-mounting of
the speakers.
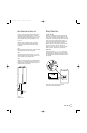
Step 1.
Place bracket against the wall and mark the positions on the wall
where you would like to place the mounting screws.
Step 2.
Place bracket against wall and fasten three 1-1/2,"#10 wood
screws through the bracket’s screw holes into the wall. If a wall
stud is not available, use an appropriate anchor.
Step 3.
Remove rear foot, place the speaker on the bracket and insert the
provided 1/4"-20 screw through the bottom of the bracket into
the threaded insert on the bottom of the satellite (Figure 3).Turn
satellite to desired angle and tighten.
keyhole on the back of the speaker to the screwhead on the wall.
Once positioned properly, the speaker should slide down slightly
and become secure.
WALL
-MOUNTING THE S
ATELLITES
®
(wall)
(Remove
foot)
(Insert screw
through bracket
into speaker)
Figure 4.
Bracket on wall.
SAT-1100 OM 1/16/04 12:34 PM Page 5