


iH56 IB_4 inserts_0220_b.fh10 7/15/08 10:53 AM Page 7
4
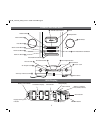
Using the iH56
Radio
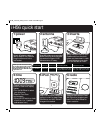
Setting up Antennas
a) Snap AM loop antenna into provided stand, then plug antenna cable into
Ƹ AM Loop Antenna socket on back of unit.
Move antenna 12” away from unit for best reception.
b) Extend ƿ FM Antenna (on back of unit) fully for best reception. Do not strip, alter or attach to other antennas.
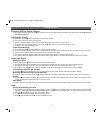
Tuning and Playing the Radio
a) Press the
ᕧ Radio Button to select radio play mode.
b) Press the
ᕨ AM/FM Select Button to select AM or FM radio band.
c) Turn the Set Wheel to tune radio to desired station.
d) Turn the ᕦ Volume Wheel to adjust iH56 volume up or down.
e) Press
¹ Alarm Reset/Power Off Button to turn iH56 and iPod off.
Using the Line-in and Line-out Jacks
a) Use an audio patch cord (available at www.ihomeaudio.com) to play nondocking iPods or other audio devices through the
iH56
ƾ Line-in Jack (one end in the device’s line out or headphones jack, the other in the iH56 line in jack). Make sure there
is no iPod docked in the iH56 when using the line-in jack. Press the iPod Button until AUX appears on the display.
b) Use the
ƺ Line Out Jack to connect the iH56 to the line-in jack of other audio devices such as a tape recorder or amplifier.
The Volume Wheel of the iH56 does not control line-out volume (adjust on attached device instead).
Using Sleep Mode
Sleep mode lets you sleep to your iPod or the radio, gradually lowering the volume until the unit shuts off at the selected time.
a) Press the
µ Sleep Button to select an amount of time before the iH56 will turn off: 120, 90, 60, 30 or 15 minutes.
b) Turn the Volume Wheel to set the sleep volume (this volume setting is separate from your standard volume setting).
Using Dimmer
a) Press the ³ Snooze/Dimmer Button during normal operation to adjust brightness of LCD display.
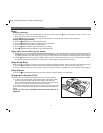
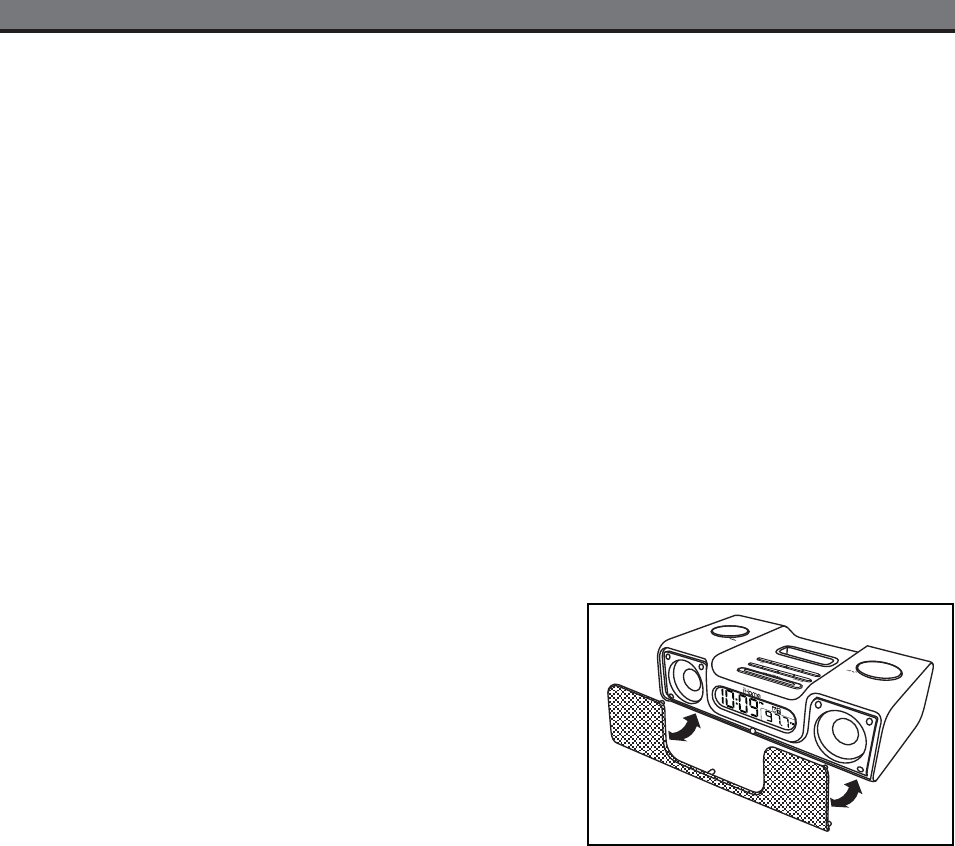
Changing the Speaker Grille
The iH56 comes with 3 detachable speaker grilles (one is already installed).
a) To remove the speaker grille, grip the bottom edge of the grille on either
side and gently pull forward until the bottom edge is free of the unit.
Grip the the left edge of the grille and gently pull out the grille from the left
of the unit. Do the same on the right and release the grille.
b) To replace the speaker grille into the unit, simply line up the grille and
press firmly into place. Make sure the grille is placed properly so it does not
vibrate.
NOTE: DO NOT TOUCH EXPOSED SPEAKERS WHEN GRILLE IS
REMOVED