


Using The Optional Remote Control Unit
Install/Replace the Remote Control Battery (for models with remote control)
To order a remote control, visit www.ihomeaudio.com
The remote control battery is already installed at the factory. When the remote control
stops operating or its range seems reduced, replace the battery with a new one.
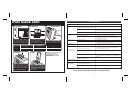
1.
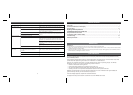
The battery door is located on the back end of the unit.
2.
Slide the battery door to release the battery door latch and remove the battery door.
3.
Insert a “CR2032” 3-volt lithium battery. Make sure the polarity (the + and – side of
the battery) is correct.
4.
Replace the battery compartment door back in the remote control.
NOTE: PLEASE DISCARD BATTERIES PROPERLY
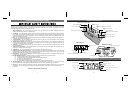
Operating the remote control
The Remote Control controls basic functions on the iH24 and certain iPod
®
functions when the iPod
®
is docked in the iH24.
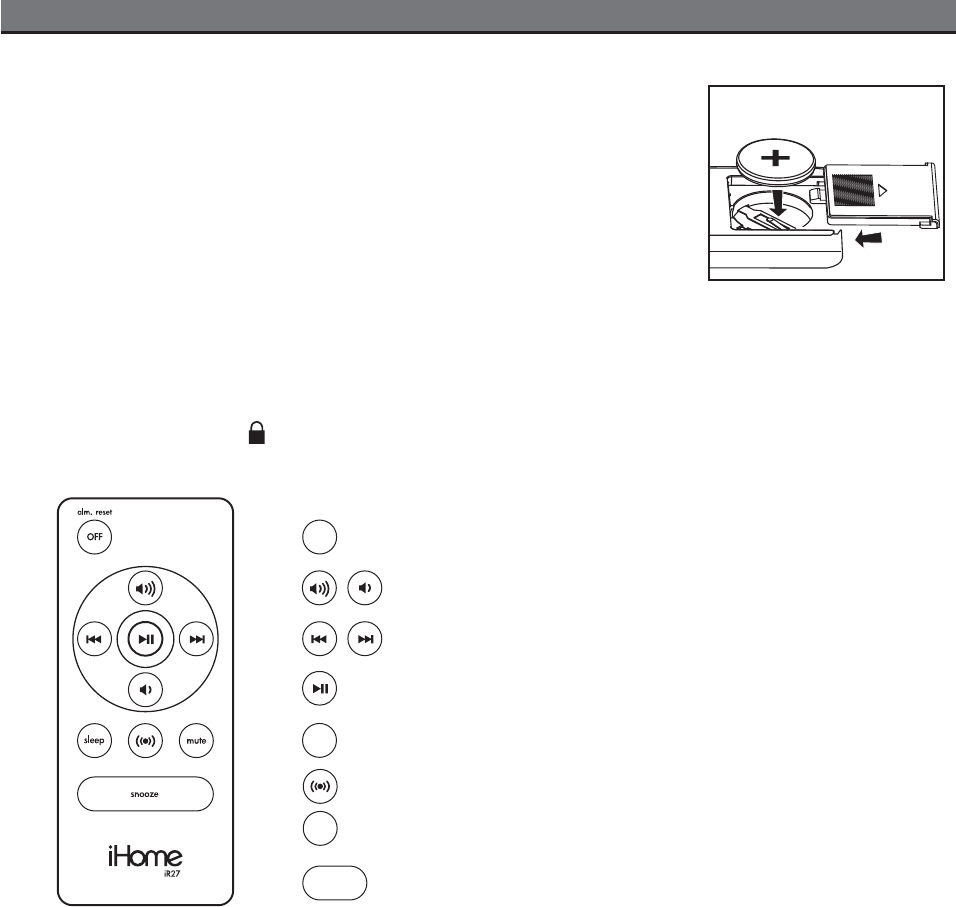
For best results, aim remote control towards the remote sensor by the lower right corner of the display.
Move the Travel Lock Switch to Remote position to enable the remote control.
6
Turns iH24 OFF or resets alarm when alarm is sounding
Toggles sound ON or OFF
Turn EXB sound enhancement ON or OFF
Selects Sleep Time function
Snooze mode when alarm sounds, otherwise dims display
Skip to previous or next track when iPod is playing, or
hold to scan current playing track.
Volume Buttons raise and lower volume on the unit.
Selects iPhone/iPod and plays track. In play mode,
press to pause
3
Using the iH24
Connect iH24 to Power Source
a)
Plug the AC adaptor cable into the AC Adaptor Jack and the other end into a standard 120v wall socket. Adaptor must be plugged
in to charge iPod.
b) For portable operation, install 4 “AA” (LR) batteries in battery compartment on the bottom of of the unit. Make sure polarity
matches diagram in compartments. Note: Unit will not charge iPod while operating on batteries.
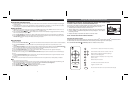
Setting the Clock
a) Depending on your location and the time of year, move the DST (Daylight Saving Time) switch on the back of the unit to +1 to
add one hour (a DST icon will appear on the display) or to -1 to subtract 1 hour.
b)
Press and hold the Time Set Button until the display flashes. Press the Alarm Set Button to toggle between 24 hour (military)
and 12 hour (standard) time display modes.
c)
Press the Hour Set Button to adjust the hour display (a PM indicator appears when time is set to PM; there is no AM indicator)
d)
Press the Minute Set Button to adjust the minute display. Hold to advance rapidly. When the correct time is displayed, press the
Time Set button again. Two beeps will indicate clock setting is complete.
Using the Alarm
Setting the Alarm
a)
Press and hold the Alarm Set Button until the alarm time flashes to wake to iPod (buzzer alarm sounds if no iPod is detected).
b)
Press the Hour Set Button to set the desired alarm hour (a PM indicator appears when time is set to PM; there is no AM
indicator)
c)
Press the Minute Set Button to set the alarm minute time. When the desired alarm time is displayed, press the Alarm Set Button
again. Two beeps will indicate alarm setting is complete.
Alarm is now armed, indicated by the alarm clock icon.
Arming and Disarming Alarm (Turn Alarm Function ON and OFF)
a)
Press the Alarm On/Off Button to arm or disarm alarm functions. When armed, the alarm icon appears in the display.
Resetting the Alarm to Come on the Next Day
a)
When the alarm is sounding, press the Alarm Reset/Power Off Button to stop the alarm and reset it to come on the following day.
Snooze
a)
Press the Snooze/Dimmer Button after the alarm sounds. The alarm will be silenced and come on again 9 minutes later. Snooze
can be pressed several times during the 1 hour alarm cycle.
Sure Alarm
The iH24 has a sure alarm feature so the buzzer alarm will still sound in the event of power failure, if backup battery is installed.
iPod
Playing and charging your iPod
a)
After selecting and placing the proper insert for your iPod model, gently dock iPod in Dock. When docked, iPod will charge until
fully charged when the iH24 is connected to an outlet with AC adaptor. Unit will not overcharge iPod.
b)
Press the iPod Play Button to play iPod, and again to pause.
c)
Press Volume UP or DOWN buttons to adjust iH24 volume up or down.
e)
Press
Alarm Reset/Power Off Button to turn iH24 and iPod off.