


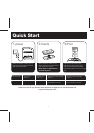
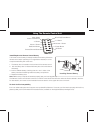

This unit is a PRESET Clock/Radio: the clock is preset for the correct Eastern Standard Time at the factory. Please follow the
steps below to match settings to your location.
1. Depending on your location and whether or not Daylight Saving Time (DST) is in effect, set the DST Switch located on
the back of the unit to +1 to add 1 hour or to -1 to subtract 1 hour. When set to +1 a DST icon will appear on the display,
indicating DST mode.
2. Press and hold the Time Zone Button located on the back of the unit until the current time zone at the lower part of the
display blinks. If needed, press the << or >> Button to select your time zone.
3. Press Time Zone Button again (or if no button is pressed within 10 seconds) to exit the setting mode.
4. If the time showing is not correct, please see Setting Time and Calendar to set the clock.
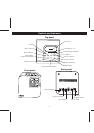
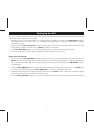
Setting Time and Calendar
1. Press and hold the Clock Adj Button located on the back of the unit until the time display blinks. Press the << or >>
Button until the current time is displayed. Holding the button for a few seconds will advance or reverse rapidly. Remem-
ber to set the correct AM or PM. An icon in the upper right hand corner of the time digits is the PM Indicator; there is
no AM indicator.
2. Press the Clock Adj Button again to accept the current setting and set current year. Press the << or >> Button until
the current year is displayed. Press the Clock Adj Button to confirm year setting after adjustment.
3. The display will change to show the date blinking. Press the << or >> Button until the current date is displayed. Holding
the button for a few seconds will advance or reverse rapidly.
4. Press the Clock Adj Button again (or if no button is pressed within 10 seconds) to exit the time and date setting mode.
5
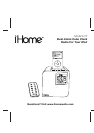
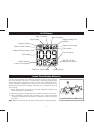
Setting Up the iH12