


9
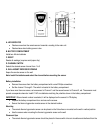
Secures battery compartment on the anemometer base
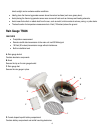
Assembly
• Slide the wind cups on to the anemometer rotating shaft. Do not use force.
• Insert the longer arm of the Allen Wrench (provided) into the wind cup set screw opening. Feel the head of the set
screw inside the wind cups and tighten carefully the set screw securing the wind cups to the rotating shaft.
• Test to ensure cups are securely fastened to the shaft and cannot be removed
Battery installation
• Remove four (4) screws from the battery compartment with a small Phillips screwdriver.
• Open the battery compartment and install 2 “AA” size alkaline batteries (not included) matching the polarities shown.
• Replace the battery compartment door and secure the screws.
Aligning
• Manually point the wind direction vane to the north (use a compass or map if necessary).
• Press the “SET” button located inside battery compartment (on the shorter side) with a paper clip. “SET” button selects
a new direction for NORTH and, when pressed repeatedly, alternates between the factory default NORTH and user
selected NORTH.
Note: Repeat this procedure every time after changing the batteries.
Mounting
Mount the anemometer onto a vertical surface, using the fittings provided.
Placement tips:
• The anemometer should be mounted in an open area with a free air flow; away from the nearby trees, buildings or
other structures.
• For optimal performance, mount the anemometer at 33 feet (10meters) above the ground in unobstructed area.
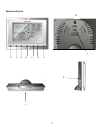
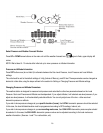
Main Unit
The main unit measures pressure, indoor temperature, humidity, and receives atomic time data from the US Atomic Clock and
outdoor measurements from remote sensors. It should be placed indoors.
FEATURES
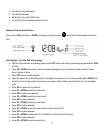
Time
• Precise time and date set via RF signals from US Atomic clock
• 12 or 24 hour time format
• Manual adjustment of time and date
• Calendar displaying date with month and day in 6 languages English, German, French, Italian, Spanish and Dutch
• Time Zones for over 100 pre-programmed world cities