


B
B
a
a
t
t
t
t
e
e
r
r
y
y
P
P
r
r
e
e
c
c
a
a
u
u
t
t
i
i
o
o
n
n
s
s
1. Use only the size and type of batteries specified.
2. When installing batteries, observe proper +/ – polarities. Incorrect
installation of battery may cause damage to unit.
3. Do not mix different types of batteries together (e.g. alkaline with
carbon-zinc or old batteries with new ones).
4. If the unit is not going to be used for a long period of time, remove
batteries to prevent damage due to possible battery leakage.
5. Do not dispose of batteries in fire. Batteries may explode or leak.
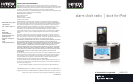
Charging your iPod
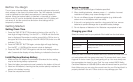
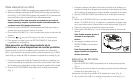
Select the correct insert for your particular iPod model from the chart below:
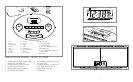
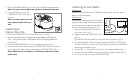
When you want to connect a different size iPod, remove the insert from the
unit and replace with the correct size insert. To remove dock insert, place
fingernail in slot on insert (Fig 3) and gently pull up. You must always use
the appropriate size insert for your iPod. You may contact HMDX Audio
Consumer Relations at 1-800-466-3342 to order the correct insert for your iPod.
Note: Make sure you are using the correct insert for your iPod and that it is
properly docked in the unit. Failure to do so may damage your iPod.
6 7
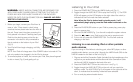
Before You Begin
The unit uses a backup battery system to provide continuous alarm and
clock settings in the event of a power failure. Two “AA” batteries (included)
must be inserted into the battery compartment if memory backup is
desired. When the backup battery is installed, in the event of a power
failure or the DC cord is accidentally disconnected, the LCD display will
not remain lit, but the current time and alarm time settings will be
temporarily maintained.
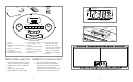
Getting Started
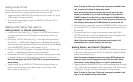
Setting Clock Time
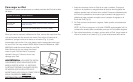
1. Press the TIME SET BUTTON located on the top of the unit (Fig. 1);
hour digit will begin flashing. Turn the SET +/- KNOB until the current
hour is displayed. Remember to set the correct AM or PM (an icon in
the upper left of the time display is the PM INDICATOR; there is no AM
indicator) (Fig. 2).
2. Press the TIME SET BUTTON again; minute digits will begin flashing.
Turn the SET +/- KNOB until the current minute is displayed.
3. Press the TIME SET BUTTON again to exit the clock setting mode or
after 5 seconds the display will stop flashing to indicate the time is set.
Install/Replace Backup Battery
1. Make sure the DC adaptor is connected. Otherwise the time setting
may be lost during battery replacement.
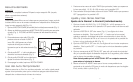
2. Open the battery compartment cover located on the bottom of the unit.
3. Insert two AA batteries, checking that the positive polarity matches the
picture in the battery housing.
4. Close the compartment cover.
Insert Label iPod Model
2G nano iPod nano 2nd Generation
nano-3G iPod nano 3rd Generation
video 30G, 80G
classic/touch
5G iPod with Video (30GB), U2 iPod with Video, iPod classic
(80GB), iPod touch
video 60G, 160G
classic
5G iPod with Video (60GB, 80GB), iPod classic (160GB)