


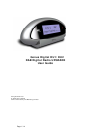
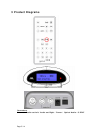

Page 6/14
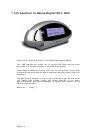
4 Getting Started
4.1 Switching On for the First Time
• Connect the internal antenna (supplied) and then position the antenna above
the DAB Upgrade. Alternatively an external antenna can be connected
(external DAB Band III antenna not supplied)
• Connect your DAB Upgrade, using the audio cable supplied, to the available
input connector on your audio system. Alternatively you can connect via the
optical output/input (SP/DIF) if your audio system is compatible (cable not
supplied)
• Connect the power adapter provided to the DAB Upgrade. Now plug into the
mains socket and switch mains on.
• Turn the DAB Upgrade on using the on/off button on the top of the unit – the
display will now say ‘clock not set’
• Press the on/off button on the remote control. The ‘clock not set’ message will
disappear and The DAB Upgrade will now perform a fast auto scan and tune
into the first available station.
• If required, reposition the antenna in order to achieve the best reception. The
optimum reception on any DAB product is normally achieved if the product is
positioned close to a window.
NB It is advisable to perform a ‘full scan’ to benefit from all the DAB channels
available in your area (see Full Scan below)
4.2 Auto Scan / Full Scan
Your DAB Upgrade will perform an auto scan the first time you switch it on as
detailed above. To ensure that you are receiving all of the channels available
to you it is advised that you perform a Full Scan.
• To perform a Full Scan hold down the Scan button for three seconds. The
DAB Upgrade will perform a full scan and return to the first available
station
4.3 No Stations Available
• If no stations are found your DAB Upgrade will provide you with menu
options to repeat the scanning process or to allow you to tune manually
• If you still fail to find stations please check that you have DAB coverage in
your area