


17. 16.
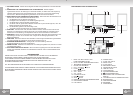
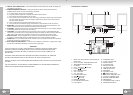
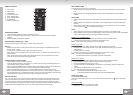
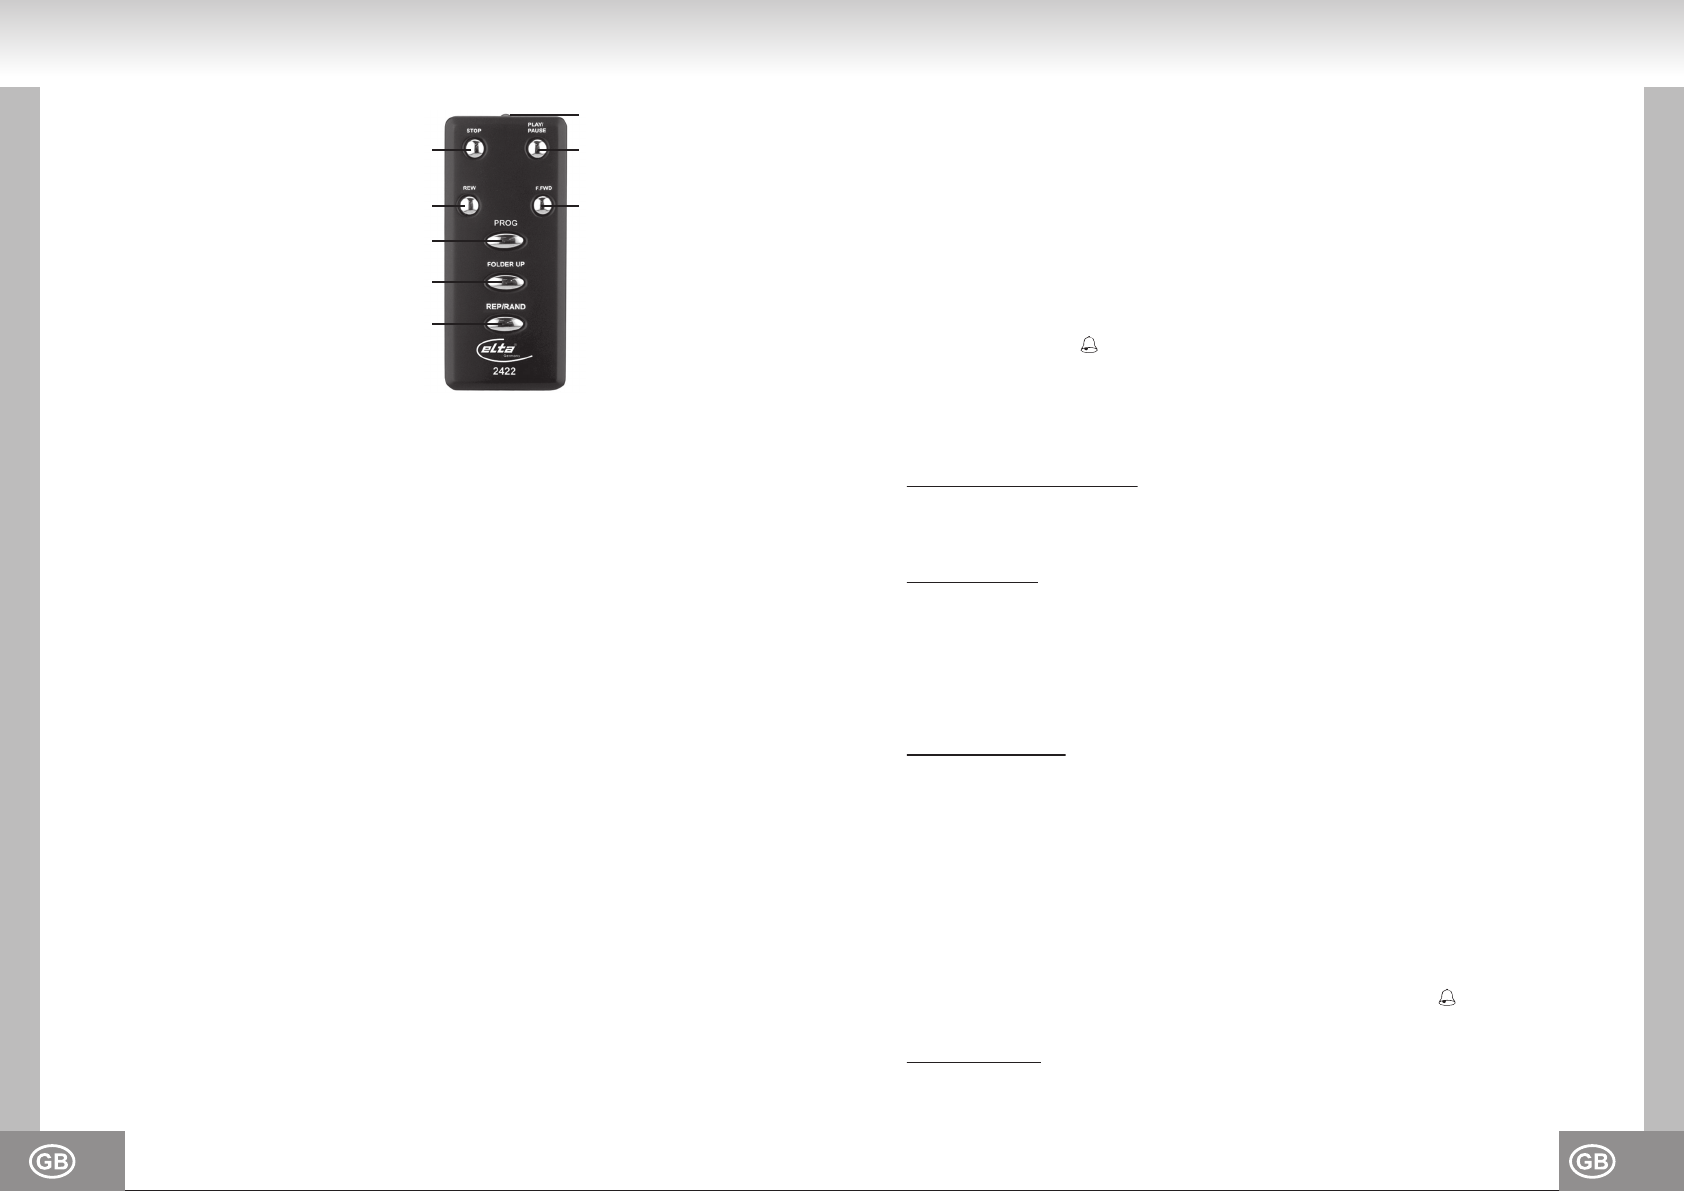
REMOTE CONTROL
1. STOP button
2. REW button
3. PROG button
4. FOLDER UP button
5. REP / RAND button
6. PLAY / PAUSE button
7. F.FWD button
8. Battery compartment
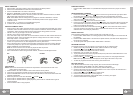
CHANGE BATTERIES
1. Open the battery cover at the rear of the remote control.
2. Insert 2 x AAA batteries while observing the polarity. We recommend the use of alkaline
batteries.
3. Close the battery compartment properly.
POWER SUPPLY (MAINS 230V ~ 50HZ)
Connect the power supply cable plug to a (230V ~ 50Hy) wall outlet.
Warning:
• Before using the device, check that the local mains power supply is compatible with the HI-FI
System (230V ~ 50Hz).
• Do not plug or unplug the power supply cable with wet hands.
• When planning not to use this unit for long periods of time (i.e. vacation, etc.) disconnect from
the wall outlet.
• When disconnecting from the wall outlet, please pull the plug; do not pull the cord in order to
avoid electric shock caused by the damaged cable.
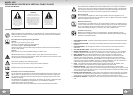
BATTERY SAFETY PRECAUTIONS:
• Keep batteries away from children and pets.
• Insert the batteries observing the polarity (+/-). Failure to properly align the battery polarity can
cause damage and/or property damage.
• Remove exhausted batteries from the device. Remove the batteries when the device will not be
used for extended periods of time to prevent damage due to battery leakage.
• Never throw batteries into the fire. Do not expose batteries to fire or other heat sources.
• Battery disposal: exhausted batteries must be properly disposed of and recycled in compliance
with all applicable laws. For detailed information contact your local municipality’s waste authority.
• Follow the battery manufacturer’s safety, usage and disposal instructions.
BACKUP BATTERY
Two 1.5V “AA” batteries (not included) may be installed as a backup option to maintain the time in
case of power failure. In the event of a power outage, the time will not be displayed; however, the
clock will continue to operate and the actual time will be maintained. The LCD display and other
functions will resume once electrical power is restored. The backup batteries should be replaced as
needed; remove the batteries if the clock is not used or stored for long periods of time.
1
2
3
4
5
6
8
7
SET CURRENT TIME
Connect the AC power cord to a wall outlet.
1. While pressing and holding the TIME SET button, press the HOUR button to set the desired
hour.
2. While pressing and holding the TIME SET button, press the MIN button to set the desired
minutes.
SET ALARM
1. While pressing and holding the AL.SET button, press the HOUR button to set the desired alarm
hour.
2. While pressing and holding the AL.SET button, press the MIN button to set the desired alarm
minutes.
3. After setting the alarm time, remember to press the AL.ON / OFF button to turn on the alarm
function (alarm icon will be displayed in the LCD).
NOTE:
1. When sliding the function switch to BUZZ position the unit will turn to standby mode.
2. When sliding the function switch to BUZZ position, the unit cannot be turned on with the POWER
button until sliding the switch to CD / MP3 / RADIO / AUX mode.
WAKE UP TO ALARM BUZZER:
a. Slide the BUZZ / CD / MP3 / RADIO / AUX function selector to BUZZ position.
b. The alarm buzzer will sound for 3 minutes at the set alarm time.
Note: Press the AL.ON / OFF button to turn off the alarm.
WAKE UP TO CD:
a. Slide the BUZZ / CD / MP3 / RADIO / AUX function selector to CD position.
b. Open the CD door manually and insert a CD (with the label side facing up) into the CD
compartment.
c. Close the CD Door manually.
d. The CD will sound at the set alarm time playing the first track on the CD.
Note: The unit will automatically be turned off after 1 hour.
To deactivate the alarm (CD) manually, press the STOP Button.
WAKE UP TO RADIO:
a. Slide the BUZZ / CD / MP3 / RADIO / AUX function selector to RADIO position.
b. Slide the FM ST. / FM MO / AM band selector to AM or FM position.
c. Press the POWER button to turn the unit on.
d. Tune the radio with the ◄TUNING► control knob to a broadcasting station and adjust the
volume.
e. Then press the POWER button to turn off the unit.
f. The radio will sound at the set alarm time.
Note: The unit will automatically be turned off after 1 hour.
To deactivate the alarm (Radio) manually, press the POWER button.
TURN OFF ALARM
To cancel the alarm mode:
Press the AL.ON / OFF button to turn off the alarm function (the alarm icon in the LCD display
turns off).
ADJUST VOLUME
• Press VOL + button to increase the volume.
• Press VOL - button to decrease the volume.