


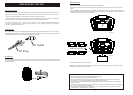

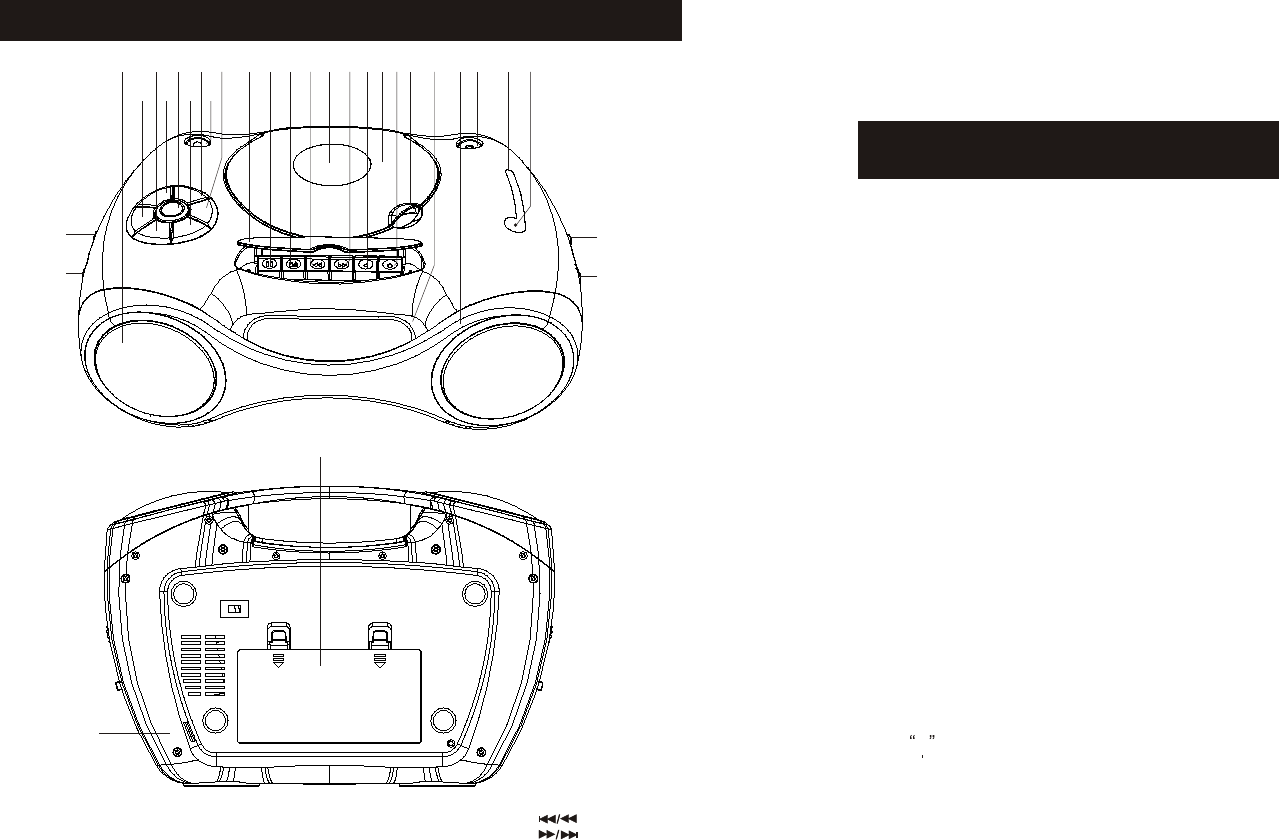
LOCATION OF CONTROLS AND INDICATORS
1. FUNCTION SWITCH
2. FM ANTENNA
3. HANDLE
4. CD DOOR
5. CD DOOR OPEN
6. BAND SWITCH
7. TUNING KNOB
8. CASSETTE RECORD BUTTON
9. CASSETTE PLAY BUTTON
10. CASSETTE REWIND BUTTON
11. CASSETTE F.FWD BUTTON
12. CASSETTE STOP/EJECT BUTTON
13. CASSETTE PAUSE BUTTON
14. VOLUME KNOB
15. SPEAKERS
16. CD SKIP/SEARCH ( ) BUTTON
17. CD SKIP/SEARCH ( ) BUTTON
18. CD REPEAT ONE/ALL BUTTON
19. RADIO DIAL WINDOW
20. CD TRACK(S) INDICATOR
21. CD STOP BUTTON
22. CD PLAY/PAUSE BUTTON
23. CASSETTE DOOR
24. CASSETTE KNOB COVER
25. DBBS BUTTON
26. PHONES SOCKET
27. AC INPUT SOCKET
28. BATTERY COMPARTMENT
29. PROGRAM BUTTON
30. FM STEREO INDICATOR
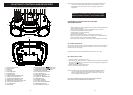
1
14
6
7
16
21
25
18 22
29
26
17
20
4 5 2 19 30
24
23 3
15
13
12
11
109
8
28
WARNING : TO PREVENT FIRE OR SHOCK HAZARD.
DO NOT EXPOSE THIS UNIT TO RAIN OR MOISTURE.
AVOID INSTALLING THE UNIT IN LOCATIONS
DESCRIBED BELOW:
* Areas exposed to direct sunlight or close to heat radiating appliances
such as electric heaters.
- On top of other stereo equipment that radiates too much heat.
- Places lacking ventilation or dusty place.
- Areas subject to constant vibration.
- Humid or moist locations
- Operate controls and switches as described in the manual.
- Before tuning the power switch on for the first time, make certain the
batteries and power cords are properly installed.
* Store your tapes and CDs in cool area to avoid damage from the heat.
NOTE: The manufacturer is not responsible for any RADIO interference
cause by unauthorized modifications to this equipment. Such
modifications could void the user’s authority to operate the
equipment.
AC POWER CONNECTION
Connect one end of the AC cord to the AC INPUT socket (27) on the back of
the unit, then connect other end to the wall outlet. The unit is now ready to
operate by AC power supply.
Disconnect AC cord from wall outlet when the unit is not in use.
BATTERY INSTALLATION
1. Open the battery compartment cover.
2. Insert 8 pcs. D R20 UM-1x8 or type batteries into battery compartment.
Be sure to insert battery s polarity as shown in the diagram engraved on
the battery compartment.
3. Place the battery compartment cover.
4. The unit is now ready for operation.
NOTE: The battery circuits is disconnected automatically when the AC
cord is inserted to the AC INPUT socket when operate by AC.
Remove all the batteries from battery compartment, when the
unit is longer operate by battery.
DO NOT EXPOSE THE RADIO TO DRIPPING OR SPLASHING!
BATTERIES MUST BE DISPOSED OF PROPERLY
-5--4-
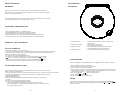
27
,