


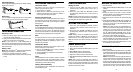
INSTALLATION
Connecting the Phone
To connect the phone
1. Connect the coiled
cord to the jack in the
handset and the
bottom of the base.
2. Connect the
telephone line cord
into the wall outlet.
With a four prong
style jack, simply use a plug in modular adaptor.
Connecting the Telephone Clock Radio
Simply plug in the AC power cord.
For Your Safety
The AC power plug is polarized (one blade is wider
than the other) and only fits into AC power outlets one
way. If the plug won’t go into the outlet completely, turn
the plug over and try to insert it the other way. If it still
won’t fit, contact a qualified electrician to change the
outlet, or use a different one. Do not attempt to
bypass this safety feature.
NOTE : When the unit is connected to an AC outlet for
the first time after it has been disconnected, one of the
following conditions may occur.
A. Display blinks.
B. Display is incomplete.
C. Alarm or radio will sound even though ON/OFF/
MUSIC/ALARM switch is in OFF position.
Conditions “A” and “B” may be corrected simply by
setting the correct time, condition “C” may be
corrected by pressing the SNOOZE switch.
CONGRATULATIONS!
You have purchased a TCR500, a Telephone Clock
Radio manufactured to the highest standards of
Conairphone
TM
. Before installing and operating, be
sure to read this manual.
Your Conairphone
TM
is FCC approved for connection
to your telephone line.
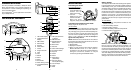
LOCATION OF CONTROLS
Battery Backup
Your telephone clock radio has a backup power system
to guard against an AC power failure. While operating
under battery power, your unit will maintain the time
and alarm settings. However, the display will shut down
to conserve battery power. Normal operation will
resume after AC power is restored so you will not have
to reset time or alarm. A standard 9 volt battery (not
included ) can be used. It is recommended that an
alkaline 9 volt battery be used to ensure continuous
operation of the clock for up to eight hours during AC
power failure.
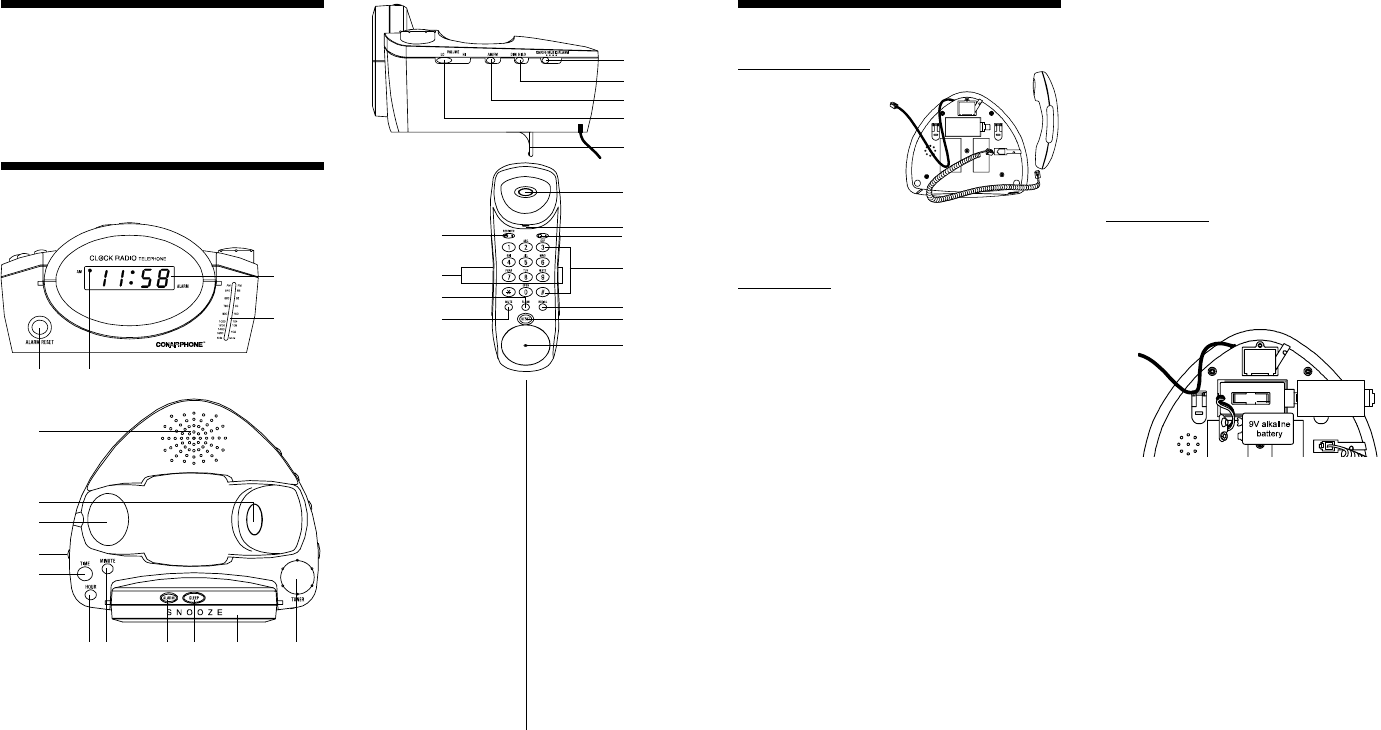
To Install Battery
1. Open the battery compartment located on the
bottom of the unit.
2. Lift out the battery contacts.
3. Snap the battery contacts.
4. Position the battery inside the compartment.
5. Close the battery compartment.
NOTE: If power cord becomes disconnected for more
than 10 hours, the battery should be replaced. It is
recommended that the battery be changed every six
months to ensure full battery back up. If unit will not be
used over an extended period of time, remove battery
to prevent any possible leakage of battery chemicals.
Your clock display will function without battery backup.
However, in the event of a power failure, time and alarm
settings must be reset and no alarm will sound.
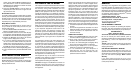
1. LED Clock Display
2. Lighted Radio Dial
Display
3. AM Indicator
4. Alarm Reset
5. Speaker
6. Hook Switch
7. Cradle
8. Ringer Off/Lo/Hi
9. Time
10. Hour
11. Minute
12. Alarm
13. Sleep
14. Snooze Bar
15. Radio Tuning Control
16. On/Off/Music/Alarm
Switch
17. LED (Clock) Dim Hi/
Lo Switch
18. AM/FM Switch
19. Speaker Volume
Slide Control
20. Base stand
21. Receiver
22. Green LED backlight
23. Tone/Pulse Switch
24. Key Pad
25. Redial
26. Reset
27. Mouth Piece
(Transmitter)
28. Receiver Volume
Control (Norm/High)
29. Comfort Grips
30. Flash
31. Mute
5678
5
6
7
8
9
10 11 12 13 14 15
1
2
34
16
17
18
19
21
23
24
25
26
27
28
29
22
30
20
31