41
Nothing comes close to a Cobra
®
Advanced Operation
40
English
Advanced Operation
Memory Locations
Your radio has ten (10) Memory Locations for storing your most frequently used
channels. These Memory Locations can be selected individually or can be scanned.
(See page 42 under memory location scan.)
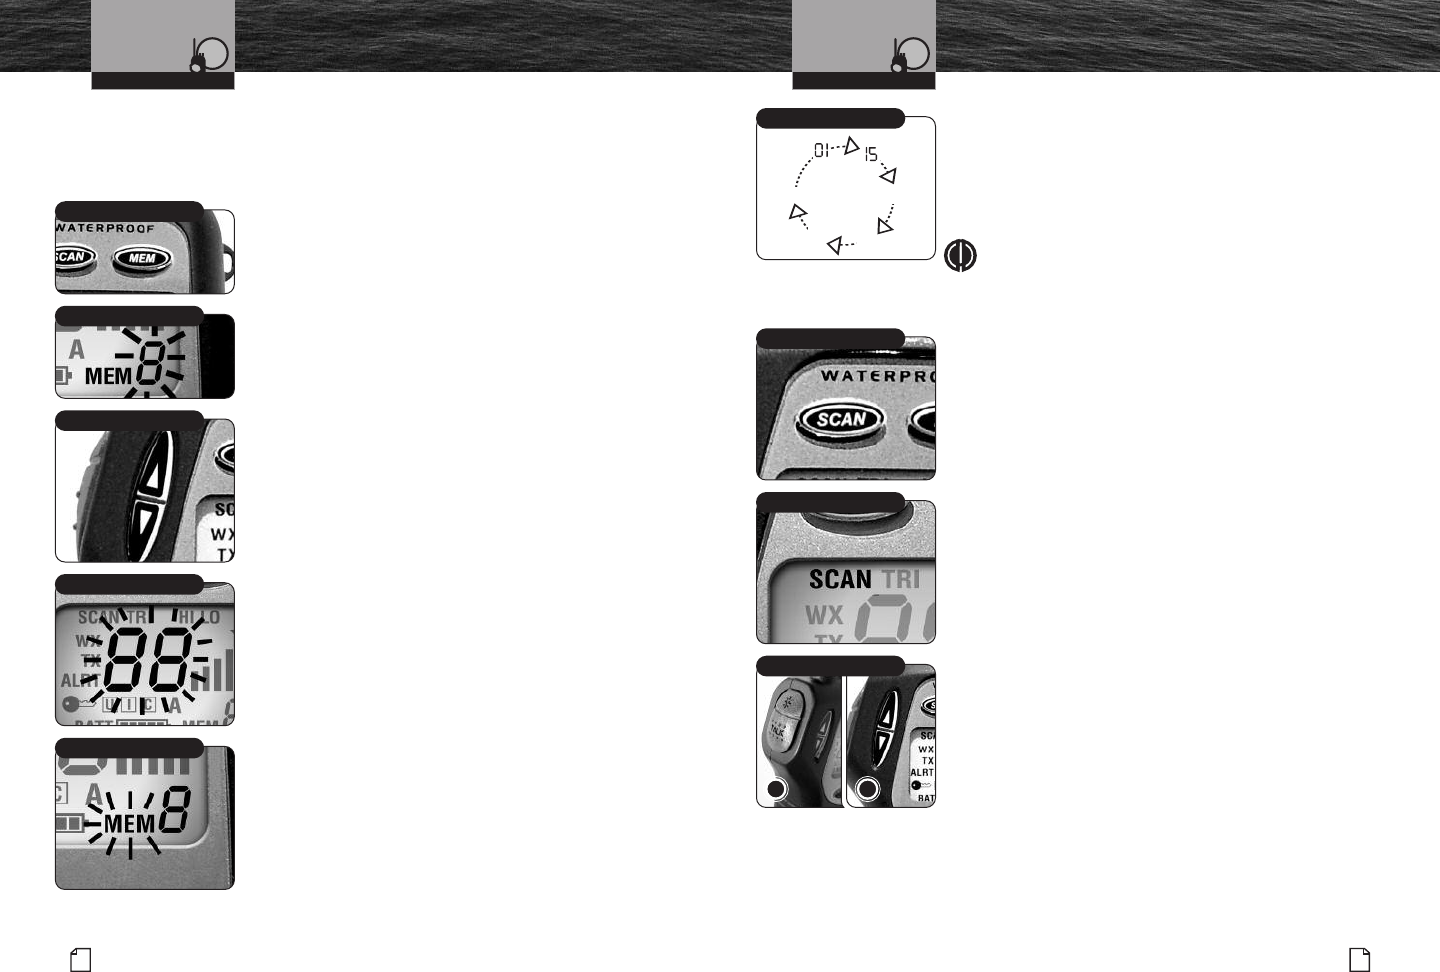
To Program Memory Locations:
1.
Press and hold the Memory button for three (3) seconds.
The memory location number will start flashing and
Memory icon will be turned On.
2. Use the Channel Up or Channel Down button to change
to the memory location (0 to 9) you want to program.
3. Press the Memory button to select the memory location.
The memory channel number will stop flashing and the
channel number will start flashing.
4. Use the Channel Up or Channel Down buttons to
change to the channel you want to store in the selected
memory location.
5. Press the Memory button to program that channel.
The memory location number will flash again.
Repeat steps 2 to 5 to program as many additional
memories as you want, up to a total of ten (10).
6. Press and hold the Memory button for three (3)
seconds. This will return the radio to Memory mode.
7. Press and release the Memory button again to
return to Standby mode.
To Recall A Stored Memory Location:
1.
Press the Memory button. The Memory icon
will be turned On.
2. Press the Channel Up or Channel Down button to
select the memory location (0 to 9). If a memory
location has been programmed, its associated channel
will be shown on the LCD.
Your radio is now in Standby mode on the selected
memory location.
To Exit Memory Location Mode:
1.
Press the Memory button to return the radio to
Standby mode on the last channel shown on the
LCD before entering Memory Location mode.
Channel Scan
During Channel Scan, the radio will rapidly switch from
channel to channel through all the channels. Whenever any
activity is detected, the radio will stop the scan for ten (10)
seconds to allow you to listen briefly on that channel. It will
then continue to scan unless you switch out of the
Scan mode.
NOTE
The radio must be squelched for the channel scan
to function. See page 31 for squelch procedure.
To Enter Channel Scan:
1.
From Standby mode, press the Scan button.
The radio will immediately begin to scan the entire
channel map selected in the active channel map.
The Scan icon will show on the LCD.
To Exit Channel Scan:
1.
From Scan mode, press the Scan button.
This will return the radio to Standby mode
on the last scanned channel.
During Channel Scan (while receiving an incoming
transmission), You Can Choose From The Following:
a.
Press the Talk button to remain on that channel
and end scanning. This will return the radio to
Standby mode.
b. Press the Channel Up or Channel Down button
to resume scanning channels.
If you do not press any buttons within ten (10) seconds,
your radio will automatically resume scanning channels.
During Channel Scan (while not receiving a
transmission), You Can Choose From The Following:
a.
Press the Talk button to communicate on the last
memory location scanned and return to Standby mode.
b. Press the Channel Up or Channel Down button to change
scan direction.
Intro Operation Customer
Assistance
Warranty
Notice
Main Icons
Secondary Icons
Caution Warning
Installation
Customer
Assistance
Scan Button
88
14
88
30
60
75
79
A
68
69
71
72
78
A
88
15
30
60
75
S
canning
Memory Button
Scan Icon
Memory Location Number
Channel Number
Memory Icon
Channel Up/Down Buttons
Intro Operation Customer
Assistance
Warranty
Notice
S
econdary Icons
Caution Warning
Installation
Customer
Assistance
Operating Your Radio
Intro Operation Customer
Assistance
Warranty
Notice
S
econdary Icons
Caution Warning
Installation
Customer
Assistance
Operating Your Radio
a
Talk or Channel Up/Down
b


